
latest
habitat tv

Say goodbye to the morning scramble for keys, coats and sunglasses and hello to this… see this and more videos
blog

Re-living the 1980s through art
Clint C is an artist whose work instantly sparks recognition and joy. Based in Hamilton,… more

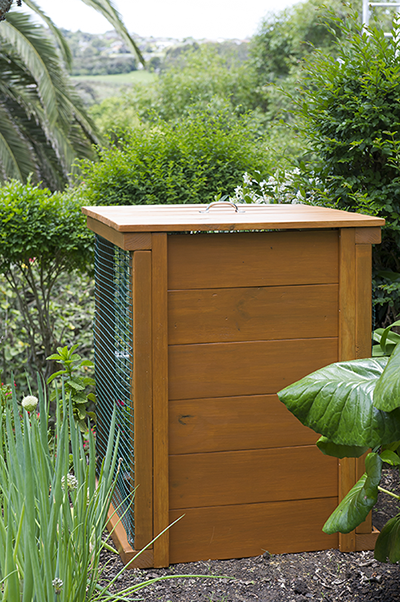
Composting is the ultimate in recycling, turning rubbish into plant food.

Make a compost bin
Turn your scraps and cuttings into plant food with this compost bin.
You will need
Tools and equipment (all available to hire from Hirepool):
· Compound mitre drop saw
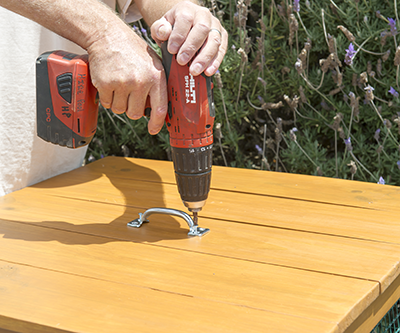
· Cordless drill and bits
· Hammer and paint brush
Materials:
· Timber (all H3.5 treated): ten lengths of 70mm x 45mm – four at 750mm long for corner posts and six at 650mm long for top and base frames; eleven 140mm x 18mm at 700mm long – five for the lid and six for the door (these will need to be trimmed to fit); four battens 40mm x 18mm at 1800mm for the bracing strips, door and lid frames, and guide rails
· Plastic mesh, three squares cut to fit
· Sandpaper
· Galvanised and stainless steel screws and staple nails
· Resene Waterborne Woodsman stain tinted to Resene Heartwood
· One exterior-use handle for the lid
Step 1
Using the drop saw, cut the framing and corner posts to the lengths noted opposite. Mitre two ends of two pieces of the 650mm, and one end of the other four. Screw them together to form the top and bottom frames.
Roughly sand the edges to get rid of splinters and rough edges. We stained the frame at this stage with Resene Waterborne Woodsman, but you can stain the pieces at any stage, as long as it’s before attaching the mesh.
Step 2
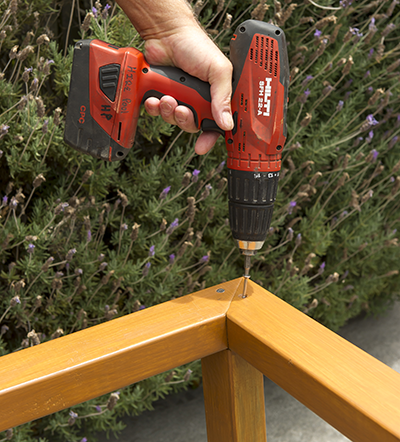
Attach the corner posts to the base frame, then attach the top frame to the posts.
Step 3
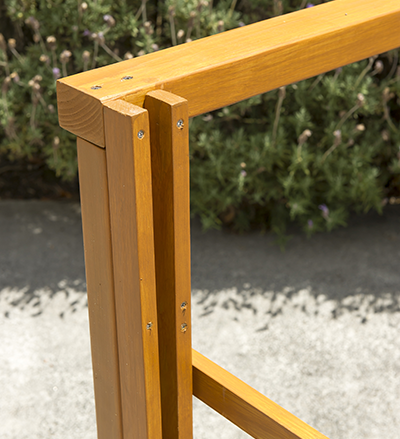
Attach a bracing strip across the front of the bin – this adds strength but also allows you to half-raise the door. Attach the guide rails to the front, leaving a 25mm gap to allow the door to run easily.
Step 4
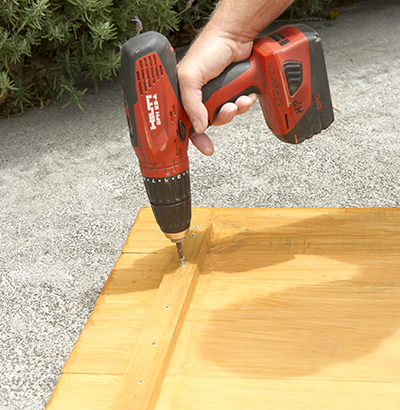
Make the lid and the door by attaching the wider planks to two battens. Use two off-cuts for a handle and chock on the inside of the door, then stain.
Step 5

Cut the mesh to fit the sides and staple nail to the frame, keeping the mesh as taut as possible.
Step 6
Apply a second coat of Resene Waterborne Woodsman stain to the entire structure. Finish by attaching the exterior-use handle to the lid.
Collect your kitchen scraps and start composting.
Composting tips
Start with a layer of coarsely chopped twiggy material on bare soil or grass. Add alternate layers of wet material (veggie scraps, manure, fresh lawn clippings, seaweed, coffee grounds) and dry material (dry grass and leaves, shredded paper or egg cartons, sawdust, twigs) preferably in layers no more than 5-10cm deep.
Don’t use invasive weeds with seeds, pet manure, meat scraps or plants you’ve treated with herbicides.
Compost needs to be the right moisture level and temperature, and needs air. Wet the compost occasionally so that it stays moist, without becoming sloppy. Turn the compost every week or so to aerate it.
Occasionally sprinkle the compost with some soil, ready-made compost, Blood & Bone or commercial compost maker.
Compost is ready when it becomes a sweet, dark, crumbly material and you cannot distinguish the original materials in it. If compost is well maintained and turned often, it can be ready in as little as 6-8 weeks.
Dig the compost into your garden or use it as a potting mix.
Published: 02 Jan 2016
Do you have a home full of wonderful Resene paint and colour? Send us some snaps by emailing [email protected].
Composting is the ultimate in recycling, turning rubbish into plant food.

the look
If you're stuck on what
colour to use or need colour
advice, try out the Resene
Ask a Colour Expert service.
the look
If you're stuck on what
colour to use or need colour
advice, try out the Resene
Ask a Colour Expert service.

