
latest
habitat tv

Say goodbye to the morning scramble for keys, coats and sunglasses and hello to this… see this and more videos
blog

Brick Bay unveils its poetic new folly for 2026
The winner of the 2026 Brick Bay Folly competition has been unveiled. Within the Wings… more
Get Growing: make a groovy veggie garden
13 Oct 2016
In small gardens, practicality and lifestyle often compete for space and sun, which means the aesthetics of elements like the vegetable garden have taken on a whole new meaning.
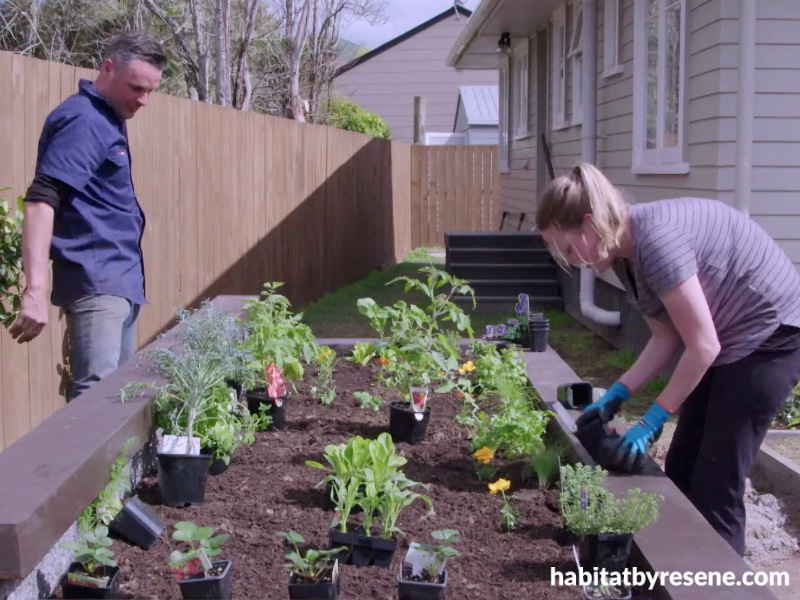
As the makeover of Natalie and Matt’s garden continued on the Get Growing Roadshow, landscape designer Justin Newcombe designed a raised vegetable garden made of exposed aggregate concrete and capped with macrocarpa sleepers painted in Resene Wood Bark. It not only looks good as you enter the property, but also provides a spot to sit.
Here’s how he did it:
1. Measure the width, length, and height of your container, allowing for the timber capping. Flatten out the area and put any soil aside, being careful to remove any grass.
2. The boxing is made up of 70mm x 50mm pine bracing and 12mm ply, using untreated timber. Cut the plywood into panels for both the inside and outside of the concrete walls.
These walls are 100mm thick so the outside panel is 200mm longer than the inside but the same height. Cut and nail two lengths of bracing top, and bottom, to each panel of plywood.
The corners need to interlock so make the bracing on the end sections 50mm shorter than the longer side panels.
3. Between the two lengths of bracing, insert a vertical baton every 400mm - make sure there are no nails protruding on the plywood side or the concrete could catch. Install the inside box first, using strops with a set of blocks fixed into a 90-degree right angle to hold the panels in position while levelling and screwing in place. Make sure you're able to unscrew and pull the panels apart once the wall is poured and set. Repeat for the outside box, then peg and brace both inside and outside.
4. Paint a printable concrete retardant onto the inside of the ply and let it dry. Cut and place steel mesh to sit between the ply boxing. Tie the corners together with wire or even string.
5. Using a concrete mixer, mix and pour the wall. The mixture used here was:
Half a shovel of sand
One and a half shovels of a part gap 7
Two shovels of decorative pebbles
One shovel of cement
Black oxide (the more you use the darker the finish)
The mix should slump easily when shovelled into the wall and not be too wet otherwise the decorative pebbles will sink to the bottom.
6. Use a stick to work any air out of the concrete, making sure the steel sits in the middle of the wall. Insert threaded rod with a nut on the end into the top of the wall and make sure this is completely vertical. The nut is inserted into the concrete and will stop the rod from being pulled out. The threaded rod is used to attach the sleepers once the concrete dries. If you're not attaching sleepers, trowel over the top and spray with retardant - then expose when you remove the boxing.
7. Remove the ply boxing. Hose and soft brush the walls to remove the retarded concrete and expose the decorative pebbles. Clean thoroughly and to improve the finished look, wash with a weak solution of spirits of salts (follow safety directions carefully).
8. Cut the sleepers to length. Place on top of the threaded rod, push the sleeper down so the rod marks the sleeper then drill a counter sunk hole wide enough for a socket, 20mm into the sleeper. Drill another hole through the middle of the first, wide enough for the threaded rod. Once this is done, place the sleeper on the wall and using a socket set, tighten a nut over the threaded rod attaching the sleeper to the wall.
9. Once all the sleepers are in place, fill in all the gaps, joints and screw holes with epoxy resin. Once this is dry, sand and shape the sleepers. Paint the epoxy resin with Resene ConcreteSeal 3 in 1 concrete primer - to seal and prime the sleepers. This will ensure the Resene Lumbersider sticks well and flows smoothly, then paint the sleepers with your choice of Resene colour. The Get Growing planter box was painted in Resene Lumbersider Low Sheen in Resene Wood Bark, a very dark velvet brown.
Did you know… that Resene ConcreteSeal 3 in 1 is a versatile fast drying primer/sealer for concrete that may also be used as a coloured dust coat for new and aged interior concrete floors?
Published: 13 Oct 2016

