
latest
habitat tv

Say goodbye to the morning scramble for keys, coats and sunglasses and hello to this… see this and more videos
blog

Brick Bay unveils its poetic new folly for 2026
The winner of the 2026 Brick Bay Folly competition has been unveiled. Within the Wings… more
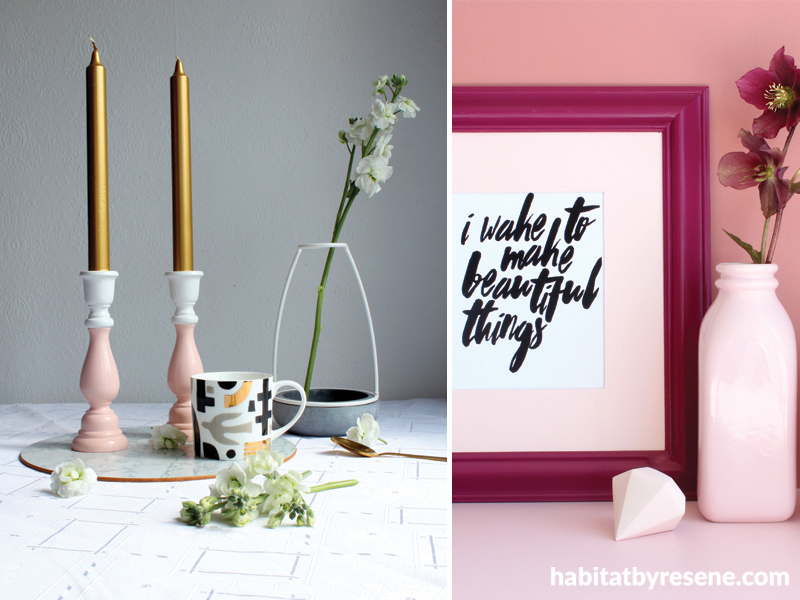
2 easy DIY projects for the weekend
28 Sep 2016
Getting crafty is a great way to unwind, get the creative juices flowing and finish with something pretty for the home. Nikki Astwood of Revised Edition whipped up these two DIY projects for our readers, which are both easy and gorgeous.
She's had a play with pink colour combos, but there are so many other shades you can have fun with – have a look at the new Resene The Range fashion fandeck 18 here for endless inspiration. And don't forget to message us or post your DIY projects using Resene paint on our Facebook page. We love hearing from you.
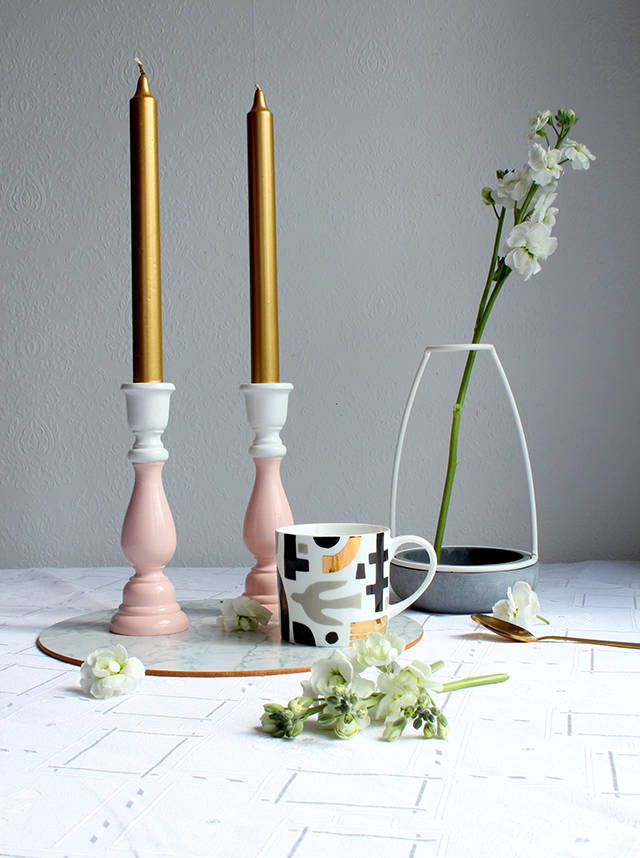
Duo-colour candlesticks
Painted in dusky pink and grey white and filled with gold candles, these candlesticks are a perfect table top addition, day or night.
You will need
Scissors, sandpaper, masking tape, two wooden candlestick holders, Resene testpots (we used Resene Sakura and Resene Black White), Resene Acrylic Undercoat, paintbrush and roller tray.

- Sand your candlesticks down, getting rid of any varnish and leaving it with a smooth finish. Wipe down with a damp cloth.
- Paint the candlesticks in one coat of Resene Black White. Leave to dry.
- Wrap the masking tape around each candlestick. Paint the top half with another coat of Resene Black White, remove the tape, and leave to dry.
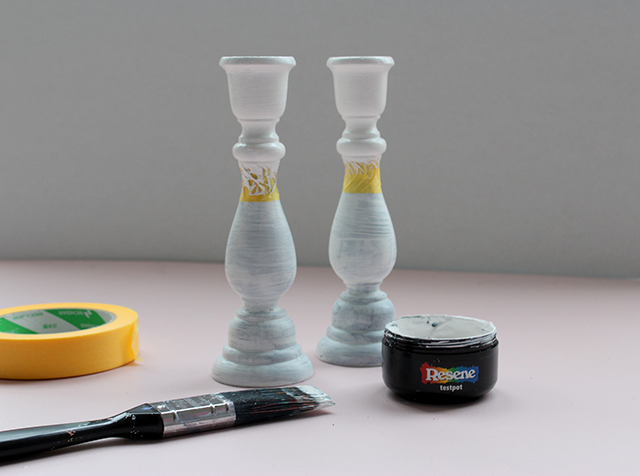
- Repeat, this time painting the bottom half with Resene Sakura.
- Leave a couple of hours to dry, and then fill with beautiful candle sticks.
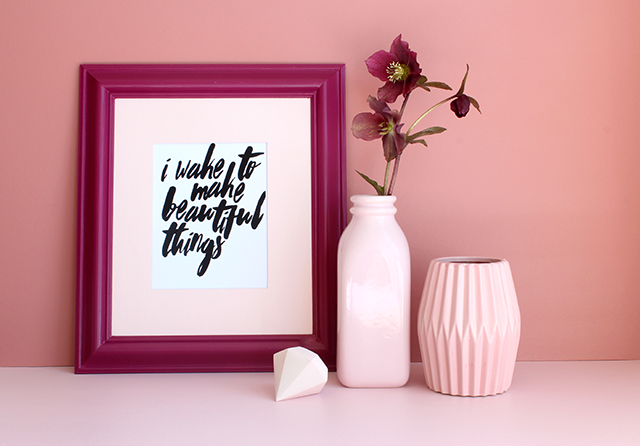
Framing inspiration
If you've been meaning to frame a beautiful print or photograph, why not do it with something that pops? This project is quick and inexpensive, and will make a striking addition to your mantelpiece.
You will need
Scissors, sandpaper, masking tape, wooden frame with frame inner (we found ours at an op shop), Resene testpots (we used Resene Pompadour and Resene Pink Terrace), ruler, paintbrush, roller tray and a print or photograph to fit.
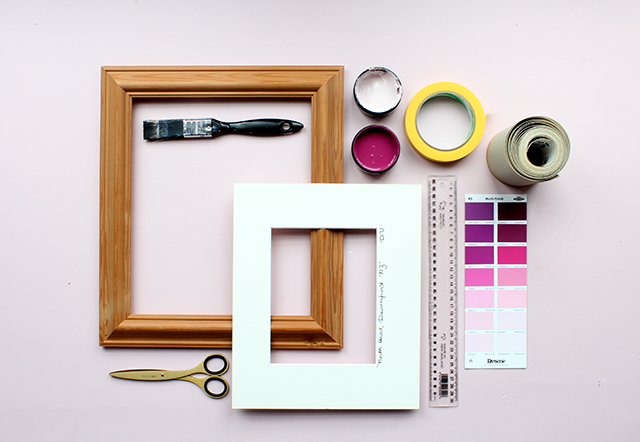
- Sand your frame down, getting rid of any varnish and leaving it with a smooth finish. Wipe down with a damp cloth.
- As a base, paint the frame in Resene Acrylic Undercoat. Leave to dry.
- Paint the frame in Resene Pompadour and the frame inner with Resene Pink Terrace. Leave to dry.
- Using the ruler, measure your print or photograph and cut to size.
- Frame up and enjoy your colourful piece of artwork!
- Nikki has also used Resene Coral Tree for the wall, Resene Paper Doll for the shelf and Resene Pink Terrace for the vases and diamond.
Top tips
- The paint in most Resene testpots is made from Resene Lumbersider, a low-sheen hard-wearing paint normally used for exteriors. This makes it tough enough for a range of craft, art and DIY projects, for indoors and outdoors.
- If you're looking for colour combo ideas, the back of Resene palette cards have colour matching suggestions. Or use Resene ColourMatch to generate colours that match a photo, fabric, or print that has caught your eye.
- When waiting for the paint to dry, wrap your paintbrush with a plastic bag. This will keep it from drying out, and will be ready for you to use for the second coat.
Published: 28 Sep 2016

