
latest
habitat tv

Say goodbye to the morning scramble for keys, coats and sunglasses and hello to this… see this and more videos
blog

Brick Bay unveils its poetic new folly for 2026
The winner of the 2026 Brick Bay Folly competition has been unveiled. Within the Wings… more
3 Ways with Pinecones
18 Jul 2019
From wreaths to stencils, the humble pinecone is such a versatile material when it comes to at-home crafting. Found in coniferous woodlands during cooler months, or available to purchase online, pinecones are often a great option for cost-free art and the perfect alternative to plastic.
Here are three innovative ways you can transform a slice of nature into colourful decorations with little more than a pinch of creativity and a few Resene testpots.
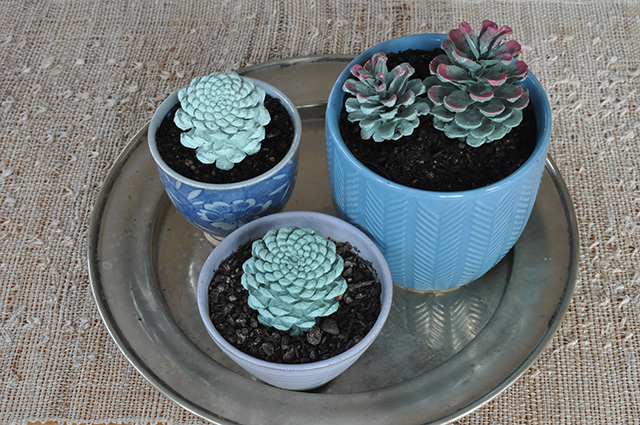
Pinecone succulents
The perfect alternative for those who struggle to keep plants alive but love the aesthetic, this project is also an ideal option for perking up a child’s bedroom.
You will need:
- Resene testpots – Fleur used Resene Laurel, Resene Spring Rain, Resene Rivergum and Resene Merlot
- 3-4 small pinecones
- Small craft brush
- 3 plant pots
- Potting mix
Step 1 Using a small craft paintbrush, paint each pinecone a different grey-green colour. Fleur used Resene Laurel, Resene Spring Rain and Resene Rivergum.

Step 2 Add Resene Merlot on the ends of some of the 'leaves' of the pinecones that have been painted Resene Rivergum. Once you have done this, allow the paint to dry.
Step 3 Fill a plant pot with potting mix and push a pinecone into each pot. The best thing? There’s no need to water!
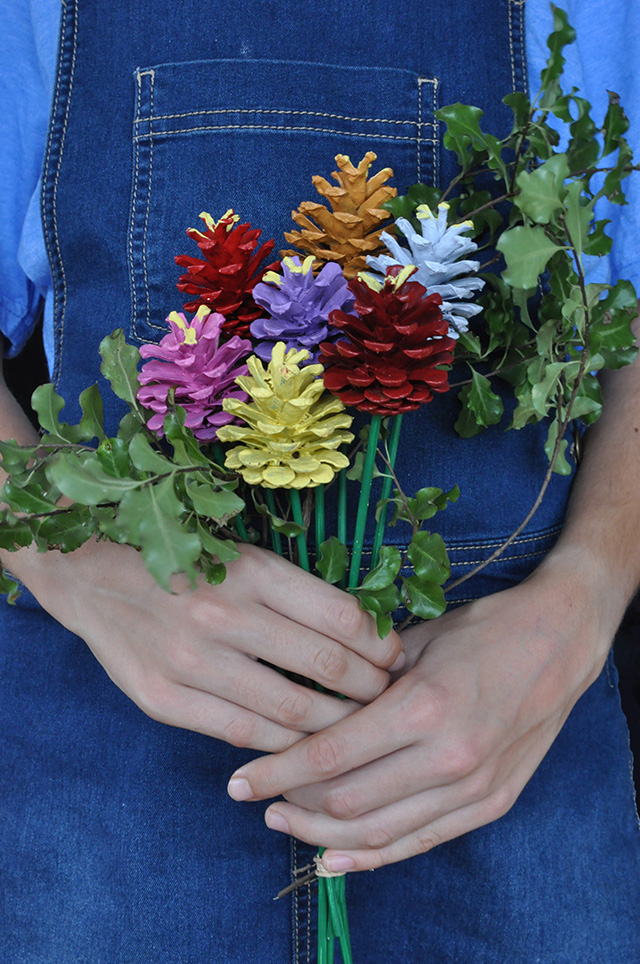
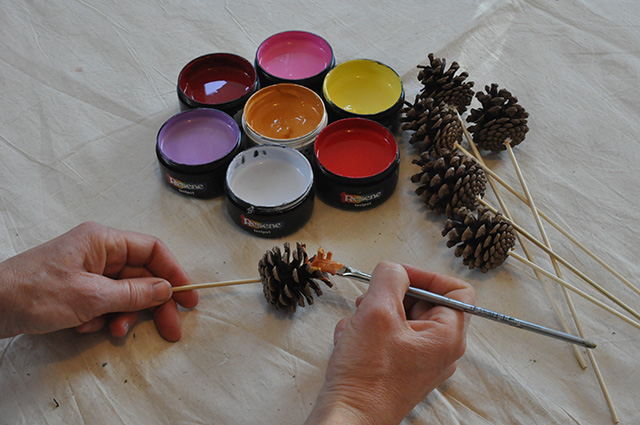
Pinecone flowers
Create a bouquet of everlasting blooms using a selection of Resene’s brightest hues.
You will need:
- Resene testpots – Fleur used Resene Jalapeno, Resene Boogie Wonderland, Resene Salsa, Resene Weathered Orange, Resene Festival, Resene Smitten, Resene Alaska and Resene Kaitoke Green
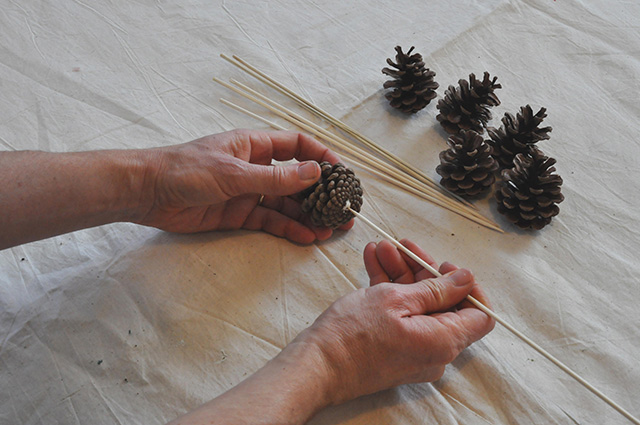
- 7 small pinecones
- 7 bamboo skewers
- Small craft paintbrush
- An electric drill
- PVA glue
Step 1 Use an electric drill and select a part that is the same diameter as the bamboo skewers. Then drill a hole approximately 1.5cm deep into the base of each of the pinecones.
Step 2 Put PVA glue into each hole and insert a skewer.
Step 3 Once the glue is dry, use a small craft paintbrush to paint each of the pinecones a different colour. Fleur used Resene Jalapeno, Resene Boogie Wonderland, Resene Salsa, Resene Weathered Orange, Resene Festival, Resene Smitten and Resene Alaska.
Step 4 After the paint has dried, paint the entire skewer with Resene Kaitoke Green.
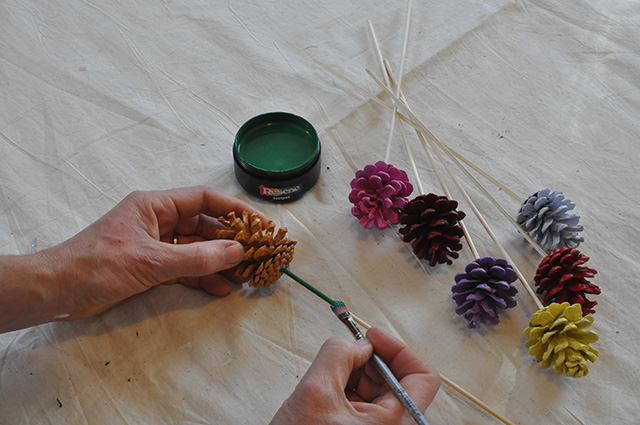
Step 5 Finish off by painting the very top of the pinecones in yellow. Fleur used Resene Festival.

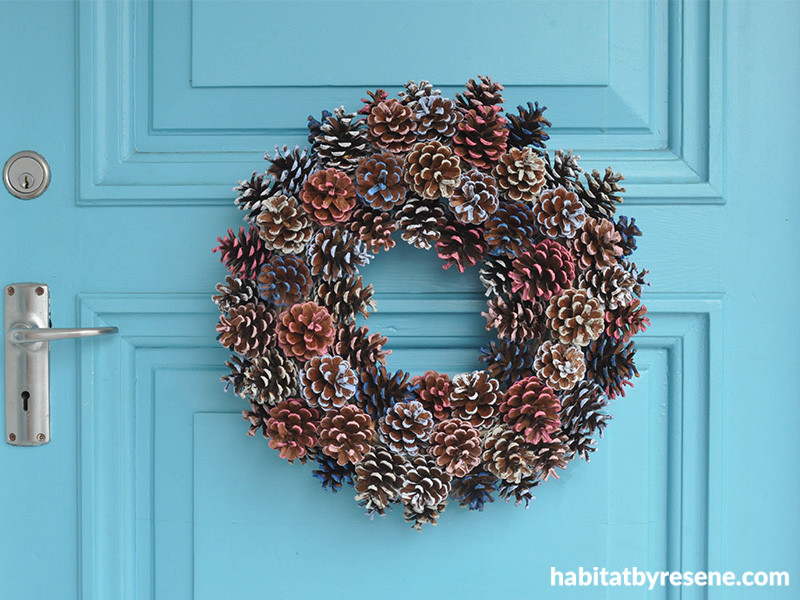
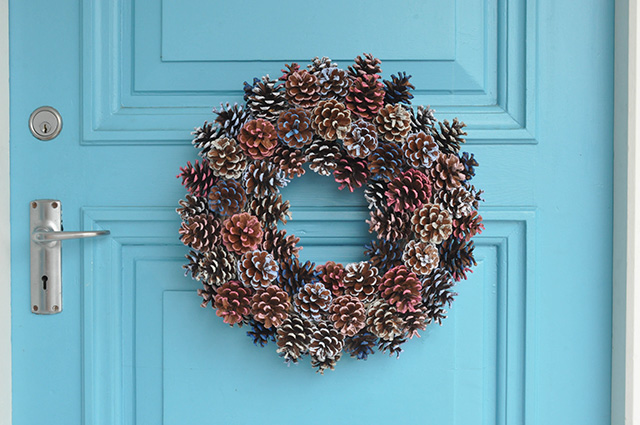
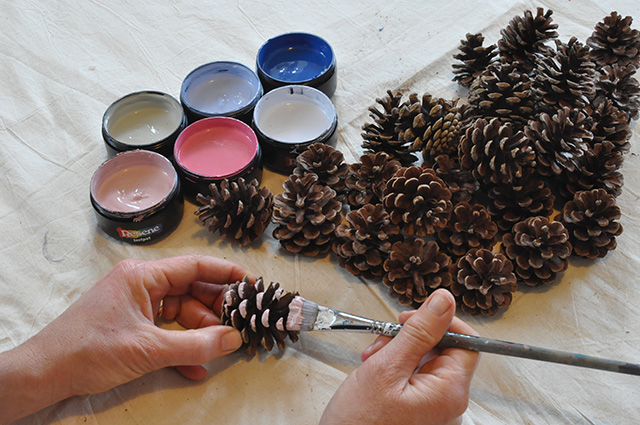
Pinecone wreath
The perfect decoration to mark the change of seasons, this pinecone wreath is also easy to construct.
You will need:
- Resene testpots in Resene Vintage, Resene Rouge, Resene Alaska, Resene Zephyr, Resene Submerge and Resene Grey Area
- Pinecones – Fleur used 70, but you may need more or less depending on the size you want to make your wreath
- Wreath frame/ring – Fleur used a 28cm diameter wreath
- Medium sized craft paintbrush
- Glue gun
Step 1 Take a medium sized craft paintbrush and paint the sides of the pinecones by brushing from the base up towards the top of the pinecone.
Step 2 Once the paint is dry, use a hot glue gun to glue the base of the pinecones to your wreath frame.
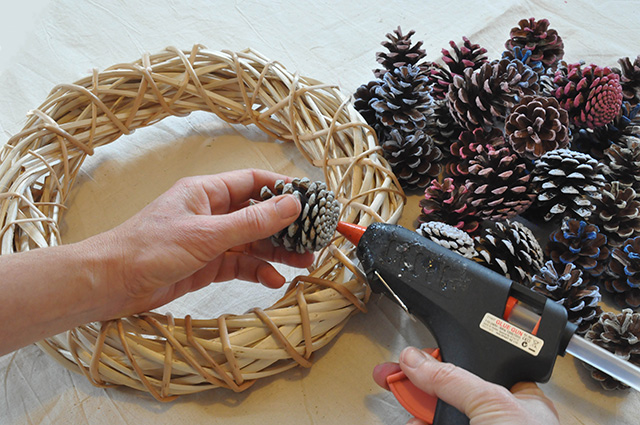
Step 3 When complete and the glue is dry, use a short length of string to hang your wreath.
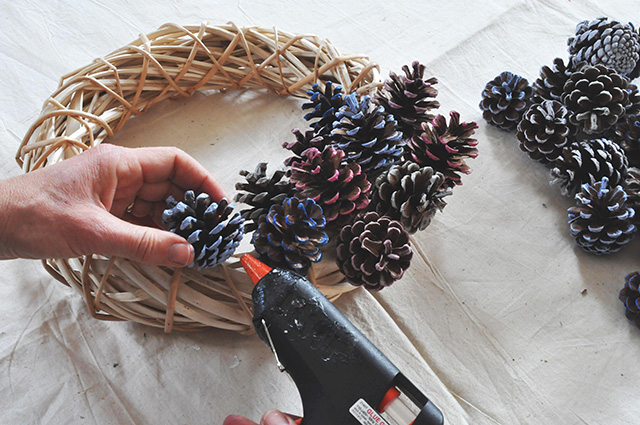
This wreath, made with Resene Vintage, Resene Rouge, Resene Alaska, Resene Zephyr, Resene Submerge and Resene Grey Area looks gorgeous on a front door painted Resene Shakespeare.
project and images Fleur Thorpe
Published: 18 Jul 2019

