
latest
habitat tv

Say goodbye to the morning scramble for keys, coats and sunglasses and hello to this… see this and more videos
blog

Brick Bay unveils its poetic new folly for 2026
The winner of the 2026 Brick Bay Folly competition has been unveiled. Within the Wings… more
4 easy ways to refurb furniture
01 Feb 2018
Before throwing out old furniture, take a second look... with a bit of sanding here and a coat of Resene paint there, you could give these pieces a whole new life.
Sarah Herring shows us four easy ways.
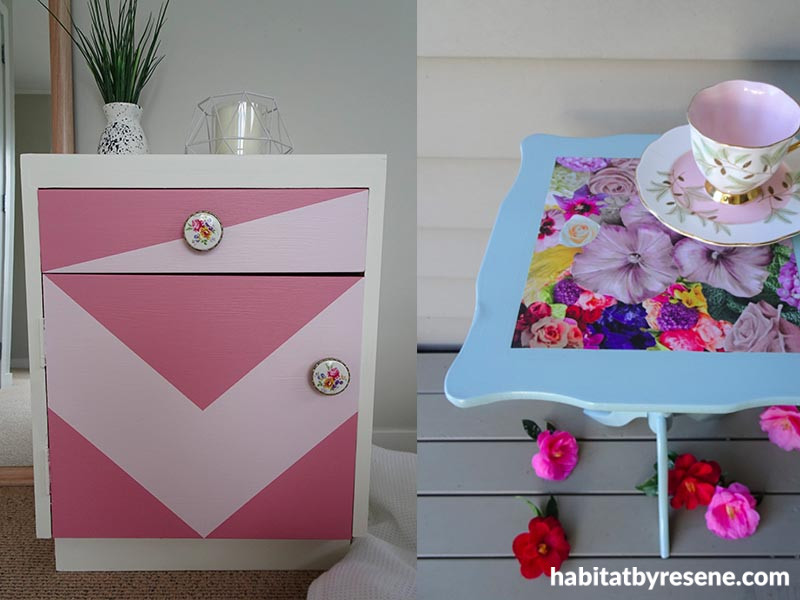
Bedside beauty
Update an old bedside cabinet while keeping its character.
You will need:
- Sandpaper
- Testpot brushes
- Masking tape
- Resene Quick Dry waterborne primer undercoat
- Resene testpots in Resene Vanilla Ice and Resene Turkish Delight
- Resene SpaceCote Low Sheen tinted to Resene Pearl Lusta
?
Step 1. Always give second hand items a thorough clean before you start working on them. After cleaning, sand to prepare it for painting. If your furniture has handles, now would be the time to remove or protect them so they don’t get damaged.
Step 2. Once sanded, apply a coat of Resene Quick Dry waterborne primer undercoat to the entire cabinet exterior. Sarah used a testpot brush but you could also use a Resene testpot roller for a large flat surface like this if you prefer.
Step 3. Once all the undercoat has completely dried, apply Resene Pearl Lusta to the main exterior of the cabinet.
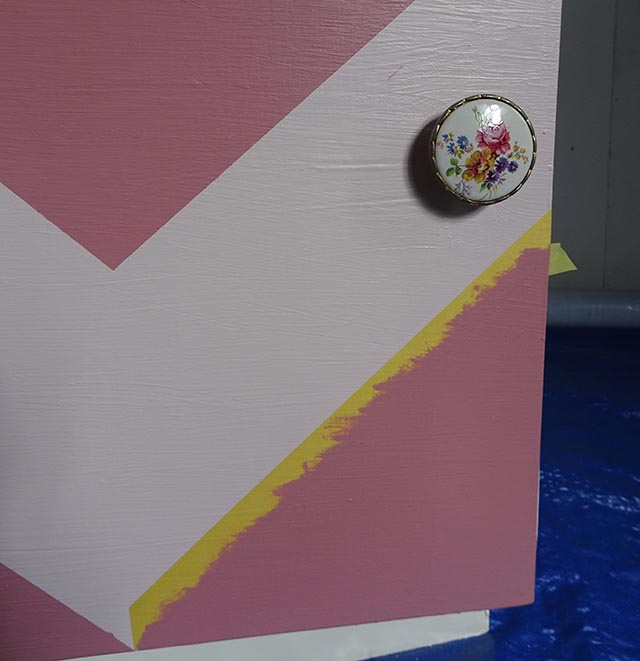
Step 4. Paint Resene Vanilla Ice all over the front exterior drawer and cupboard door.
Step 5. Once the paint has dried, mask out a design for your contrasting colour. Sarah used Resene Turkish Delight for this design.
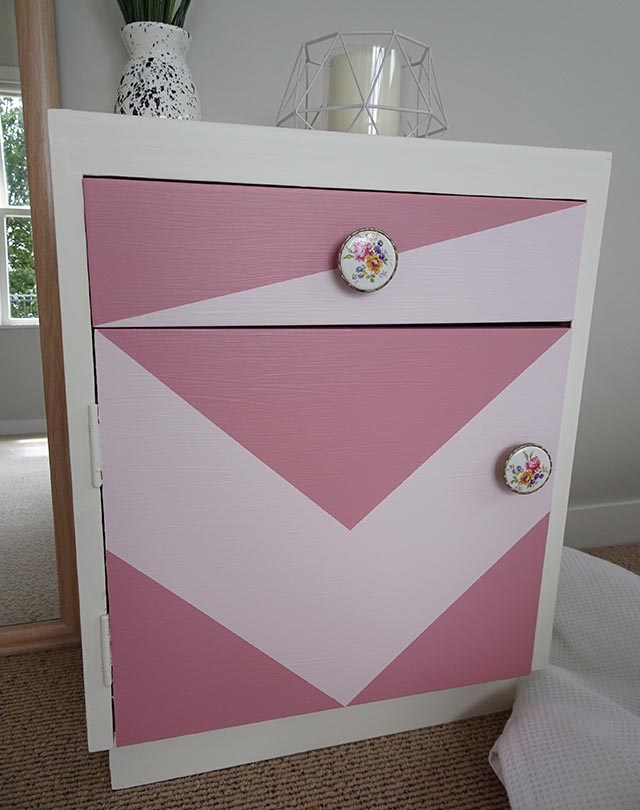
Step 5. Leave to dry, and then place the cabinet next to your bed. Looking pretty!
Basket case
Transform an old cane basket into a tribal-style plant pot.
You will need:
- Testpot brushes
- Masking tape
- Resene Testpots in Resene Glorious, Resene Half Bokara Grey and Resene Quarter Truffle
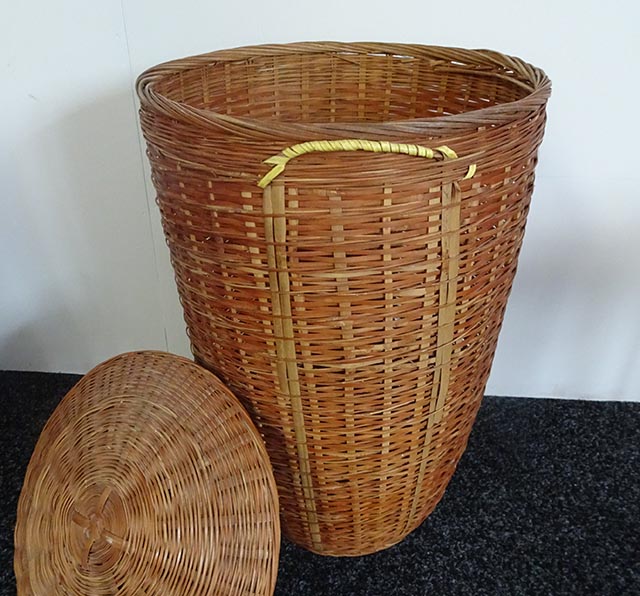
Step 1. Give the basket a good clean and remove all the bits of cobwebs and dust that could stick to the brush and get into the paint.
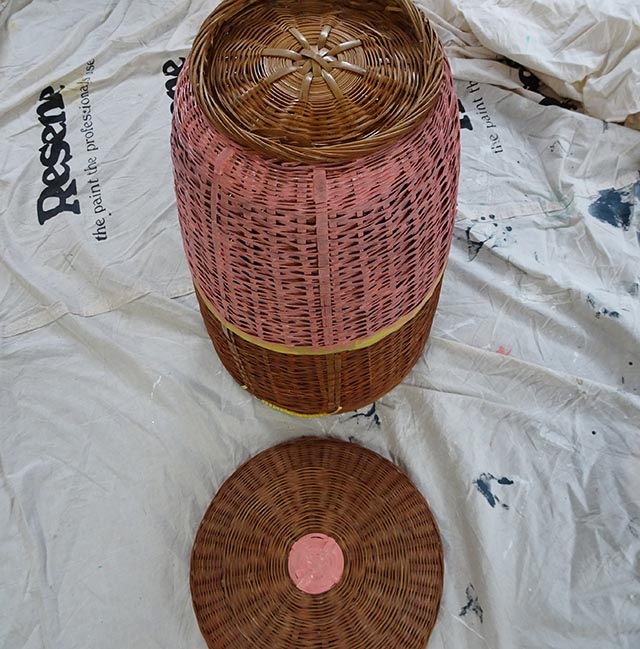
Step 2. Mask out the design onto the lower part of the basket using masking tape. It can be hard to get a straight line on a curved object, so measure up from the bottom and mark all the way around and then apply the masking tape along the marker points. Paint the base segment in Resene Glorious.
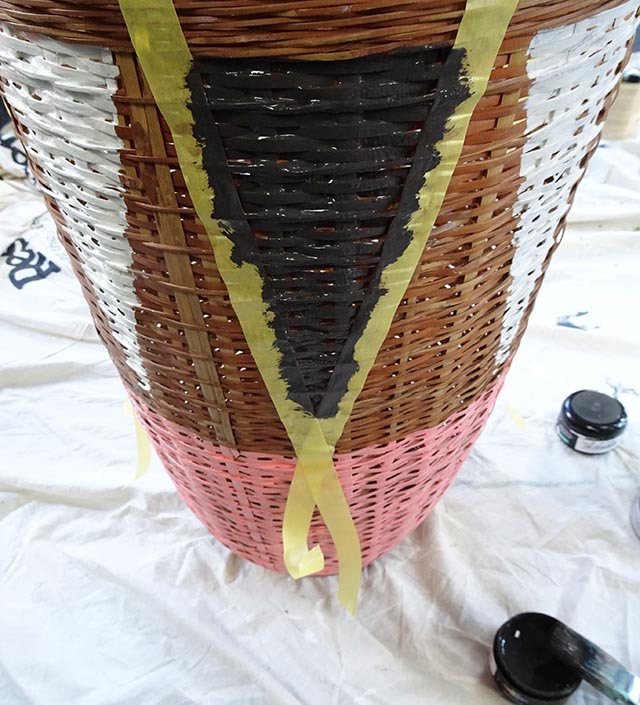
Step 3. Once all the paint is dry, mask out the triangle shapes evenly around the basket and paint them in two coats each of Resene Half Bokara Grey and Resene Quarter Truffle.
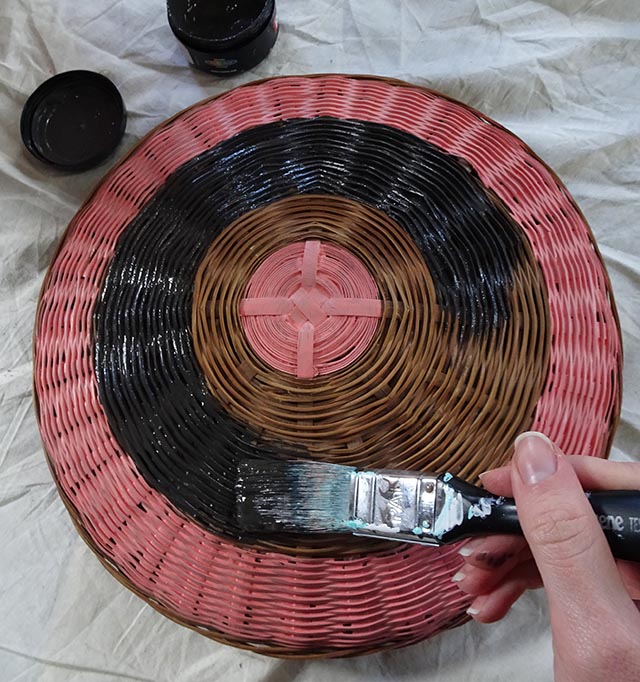
Step 4. Paint a circular design on the lid of the basket in Resene Glorious and Resene Half Bokara Grey. Sarah did this freehand without any masking tape. The circular pattern made for a good contrast with the geometric design.
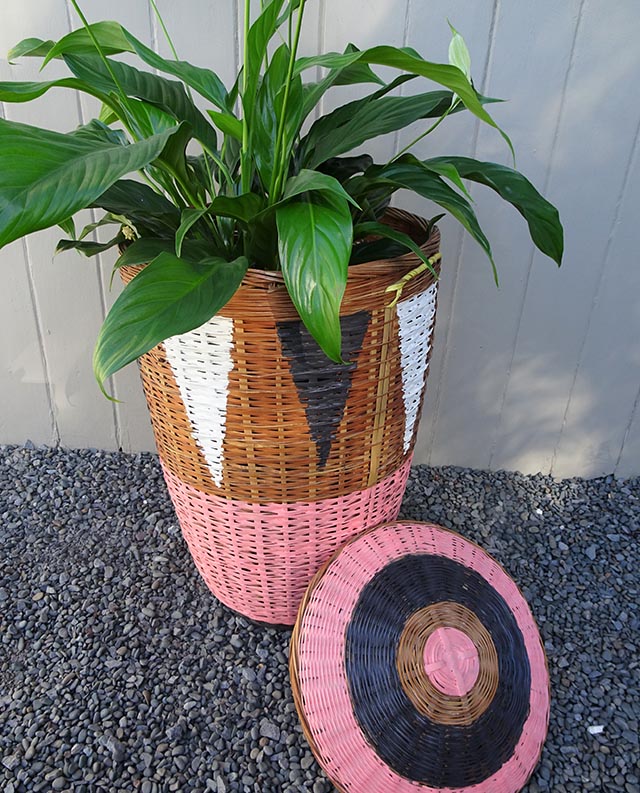
Step 5. All you have to do next is add your choice of pot plant. This method will work for almost any shape and size basket and is such an effective way to add some bright colour to your home decor.
Summer loving
Freshen up some old timber deck chairs with a bright nautical theme for summer.
You will need:
- Sandpaper
- Testpot brushes
- Resene Quick Dry waterborne primer undercoat
- Resene testpots in Resene Half Black White, Resene Double Resolution Blue and Resene Smashing
- Resene Waterborne Woodsman Stain in Resene Deep Oak, or for a chair mainly used under shelter or inside you could use Resene Colorwood with a clear finish
- An old cloth for applying the stain
Step 1. Give the chairs a wipe down and a quick clean to remove any dust and dirt. Then, lightly sand to prepare the surfaces for painting, and remove any old stains or coatings.
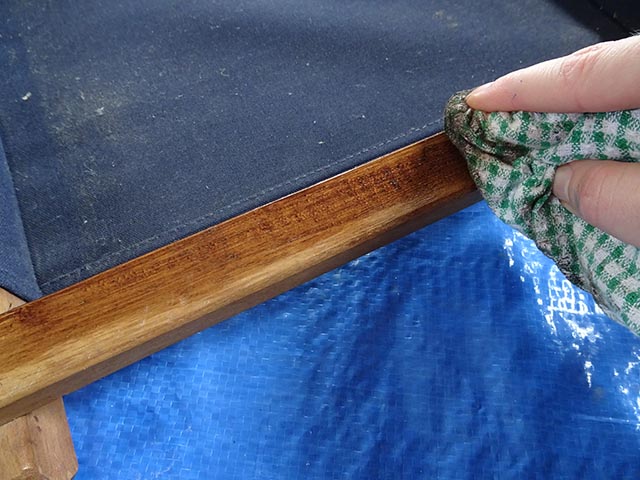
Step 2. Sarah painted the slats on the seats of the chairs, and applied Resene Waterborne Woodsman in Resene Deep Oak to the remaining timber that wasn’t going to be painted.
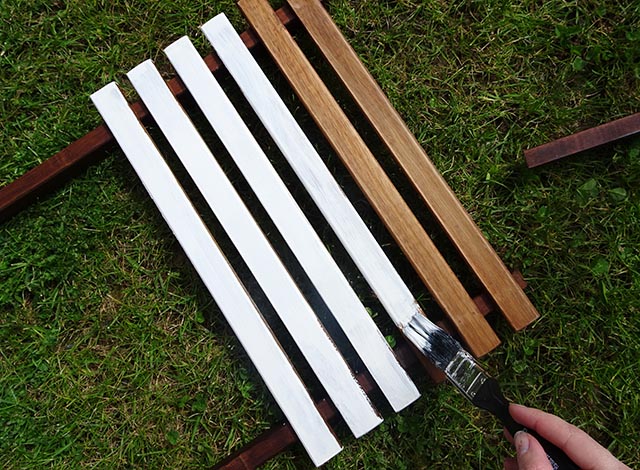
Step 3. Once all the stain is dry, apply a coat of Resene Quick Dry waterborne primer undercoat to the parts of the seat that are being painted. Use masking tape if you are worried about staying within the lines, and don’t overload the brush with paint as that is a surefire way to get big gloopy drips everywhere.
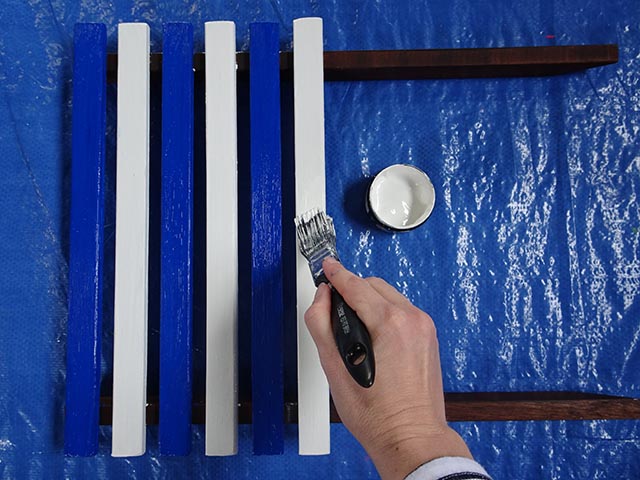
Step 4. Next choose your colours for painting. Sarah wanted to go for a fresh, nautical theme for summer so she selected Resene testpots in Resene Half Black White, Resene Smashing and Resene Double Resolution Blue, with one chair in the red/white combination, and the other chair in the blue/white combination.
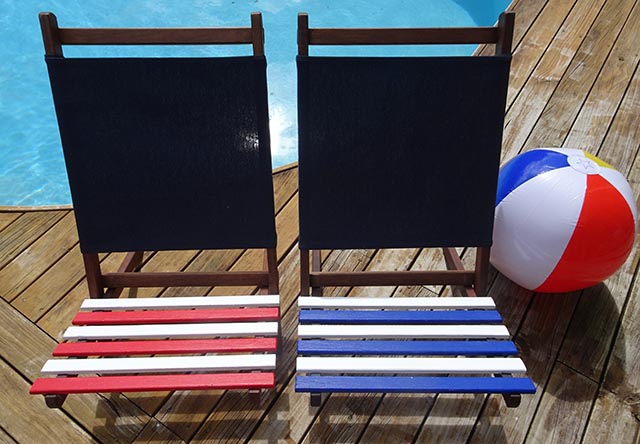
There you have it – two fresh nautical themed deck chairs perfect for the beach or by the pool this summer. Grab a glass of something cold and a good book, and relax.
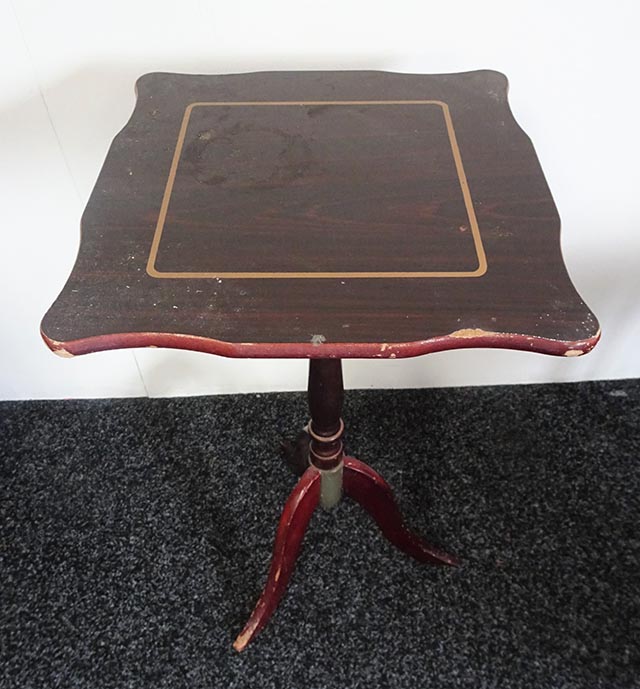
Garden tea party
Use colour and decoupage to transform a vintage side table into a bright floral feature piece. Perfect for a tea party!
You will need:
- Magazine cuttings
- PVA Glue
- Resene Aquaclear
- Resene Enamacryl in Resene Unwind
- Resene Quick Dry waterborne primer undercoat
- Sandpaper
- Testpot brushes
- Water
Step 1. Sand the table with sandpaper to remove the existing stain. Then apply a coat of Resene Quick Dry waterborne primer undercoat to the entire table.
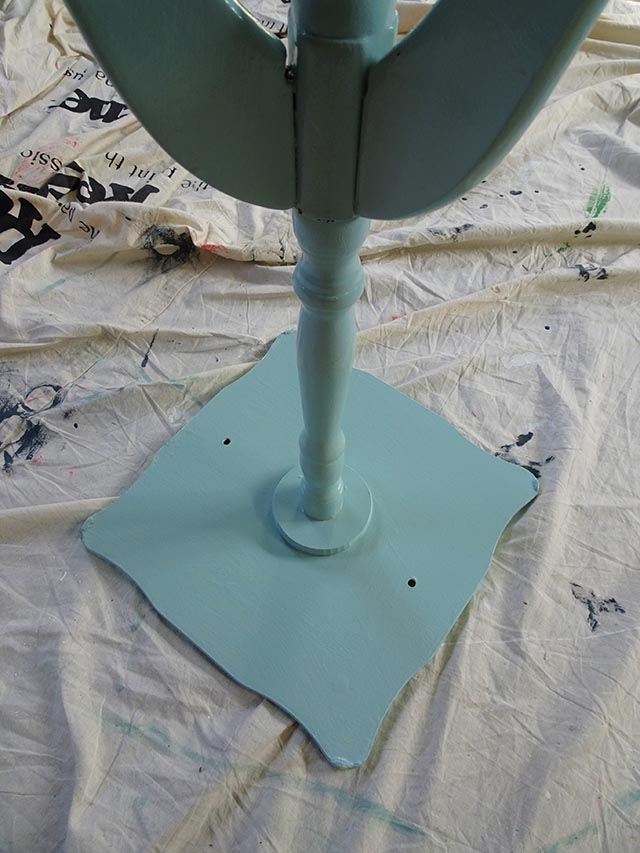
Step 2. Allow the undercoat to dry completely, then apply two coats of your chosen colour to the entire table allowing dry time between coats. This project uses Resene Unwind in Resene Enamacryl paint to give a beautiful glossy finish to the table.
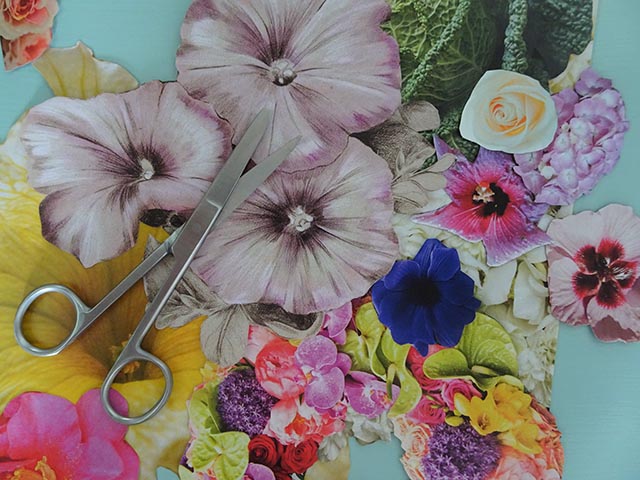
Step 3. While the final coat of paint is drying, cut out an assortment of flower images from magazines for the decoupage table top design.
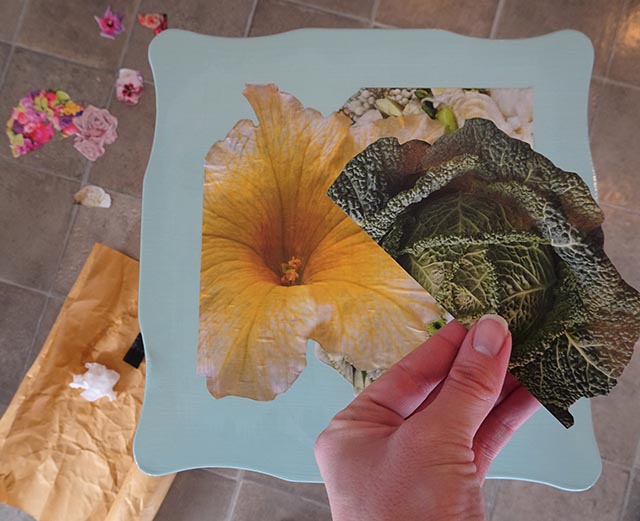
Step 4. Once all the flowers are cut out, mark out a square shape on the table top and roughly placed the cuttings within the square to plan the decoupage design.
Once the flowers are in the right place, start by gluing down the first layer of cuttings. Use a mix of 50% PVA glue and 50% water as a paste.
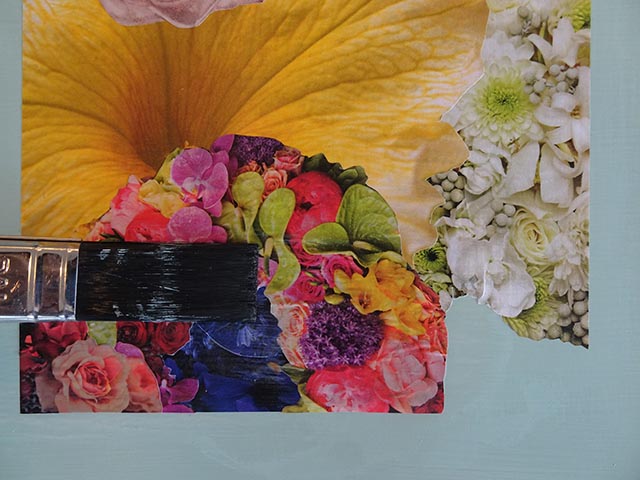
Step 5. To decoupage, apply one layer at a time, gluing the cuttings down and then applying the paste mixture over the top to seal each layer.
Add more layers of glued flower cuttings on top of each completed layer, applying the paste mix on top of each layer.
Once the square shape is filled up and all cuttings have been applied, wait for the final layer to dry.
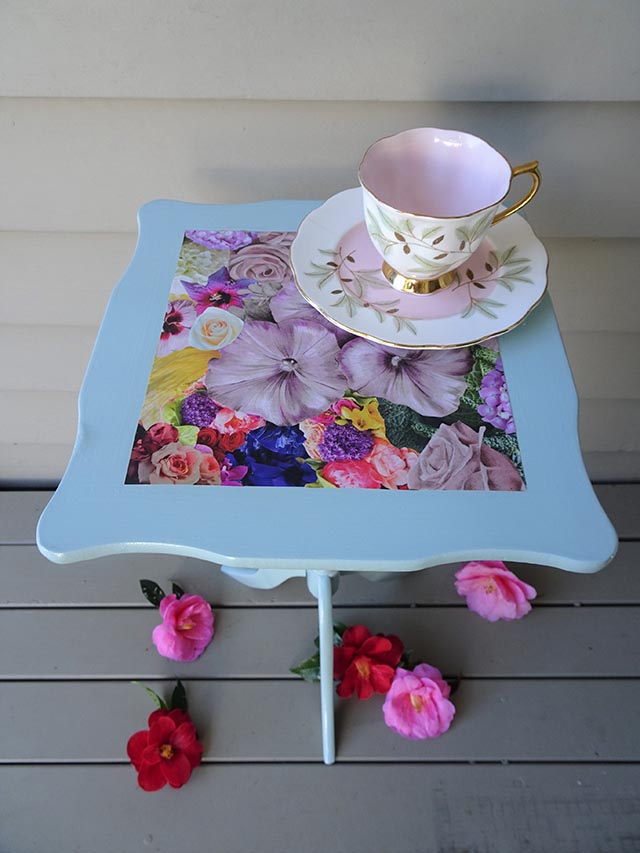
Step 5. Once completely dry, finish the table with three coats of Resene Aquaclear to seal and protect the decoupage and paintwork.
After the Resene Aquaclear has dried, all that is left is to make a cup of tea and enjoy your gorgeous new tea party table.
This DIY is brought to you by Upcycling for Good, a collaboration between Resene and The Salvation Army family stores. The project asks keen DIYers to upcycle second-hand items using Resene paint – look out for this regular feature on Habitat by Resene.
Published: 01 Feb 2018

