
latest
habitat tv

Say goodbye to the morning scramble for keys, coats and sunglasses and hello to this… see this and more videos
blog

Brick Bay unveils its poetic new folly for 2026
The winner of the 2026 Brick Bay Folly competition has been unveiled. Within the Wings… more
Celebrate Halloween in style with these 3 spooky décor ideas
27 Oct 2021
With the spooky season upon us, it’s the perfect time to upgrade your home from terrific to terrifying with these easy home décor ideas. We’ve got three wonderful ways to help you create a haunted house that’s both sophisticated and scary, with a touch of fun for any age.
Wrap it up
This sophisticated and spooky lounge features walls in Resene Black White with vase in Resene Black and canvas art in Resene Black and Resene White. Project by Vanessa Nouwens. Image by Bryce Carleton.
Make it monochrome with this marvellous mummy-themed lounge. With crisp Resene Black White on the walls and contrasting Resene Black décor, this space proves that don’t need to sacrifice style in order to get into the spirit of Halloween. An easy way to boost your themed room and tie your décor together is with a DIY painted canvas.
To make this mummy artwork, simply paint a canvas in two coats of Resene Black. Once dry, use a 4cm wide paintbrush to paint lines across the canvas in Resene White. Once the paint is dry, attach googly eyes to the canvas or paint your own using Resene White and Resene Black. For extra fun when the lights go out, paint Resene FX Nightlight over Resene White for a glow-in-the-dark effect. Hang your artwork in the lounge or kitchen for a spooky surprise!
Spirit of the sign
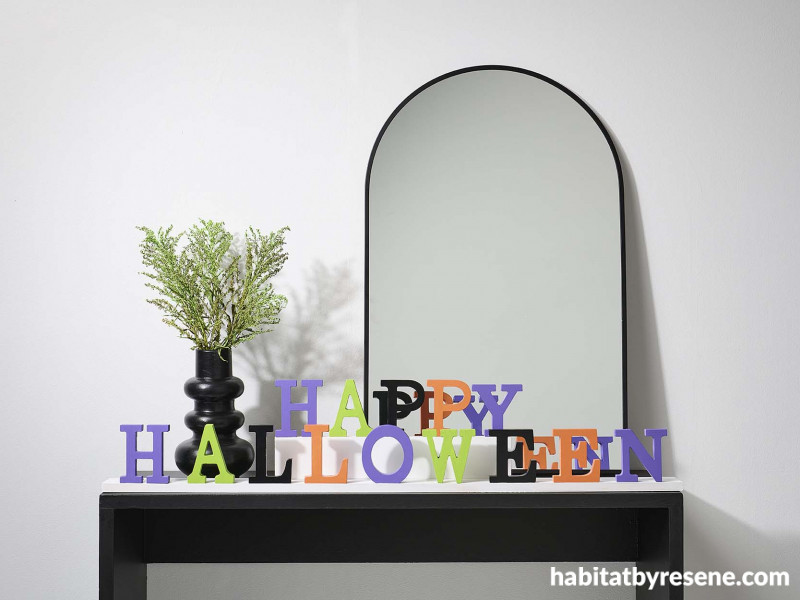
This colourful sign is in Resene Lima, Resene Ecstasy, Resene Black, Resene Daisy Bush and Resene White. The wall is in Resene Black White and the console and vase are in Resene Black. Project by Vanessa Nouwens. Image by Bryce Carleton.
Bring colour to Halloween with a colourful Happy Halloween sign. Liven up your home for Halloween with signs scattered throughout that use wooden letters from your local craft store painted in bright Resene colours or create your own letters using thick cardboard.
You will need:
- 1x piece of pine which is 120cm in length, 2cm thick and 9cm wide
- 1x piece of pine which is 50cm in length, 2cm thick and 9cm wide
- Wooden letters (or thick cardboard) to make your sign
- PVA glue
- Resene testpots in your choice of colours – Vanessa used Resene Lima, Resene Ecstasy, Resene Black, Resene Daisy Bush and Resene White
- Testpot brush
Step 1: Paint both pieces of wood front and back in Resene White. You will need two coats.
Step 2: Paint the wooden letters in your choice of Resene colours, alternating the colours as you go. Or use thick cardboard.
Step 3: Glue the short piece of wood to the back edge of the long piece of wood.
Step 4: Glue the letters onto the wood and allow to dry.
Step 5: Place your welcome sign in your entranceway for a colourful Halloween hello.
Let the games begin 
Games are a great way to celebrate Halloween. These tins are in Resene Ecstasy, Resene Black, Resene White, Resene Lima and Resene Daisy Bush. The table is in Resene Ecstasy and the wall is in Resene Black White. Project by Vanessa Nouwens. Image by Bryce Carleton.
If you’re ready for some freaky and fabulous fun, you’ll want to try this terrifying tin toss. Made from upcycled tins painted as quirky Halloween characters, this is a great trick or treat game to play with the kids (and adults who are still young at heart) with simple rules – knock all the tins down in one hit and you get a Halloween treat!
You will need:
- 6 recycled tins (all the same size)
- Resene paint in your choice of colours – Vanessa used Resene Ecstasy, Resene Black, Resene White, Resene Lima and Resene Daisy Bush
- Paintbrushes
- Tennis ball
- Pencil

Step 1: Paint each of tin with a basecoat of the Resene colour of your choosing.

Step 2: Draw faces such as a ghost, Frankenstein’s monster, or a cat onto the tins using a pencil.

Step 3: Using a fine brush paint each of the cans faces using contrasting colours – Vanessa used Resene Black and Resene White.
Step 4: Stack your tins on a table or arrange them in a corner for some Halloween fun!
Published: 27 Oct 2021

