
latest
habitat tv

Say goodbye to the morning scramble for keys, coats and sunglasses and hello to this… see this and more videos
blog

Re-living the 1980s through art
Clint C is an artist whose work instantly sparks recognition and joy. Based in Hamilton,… more
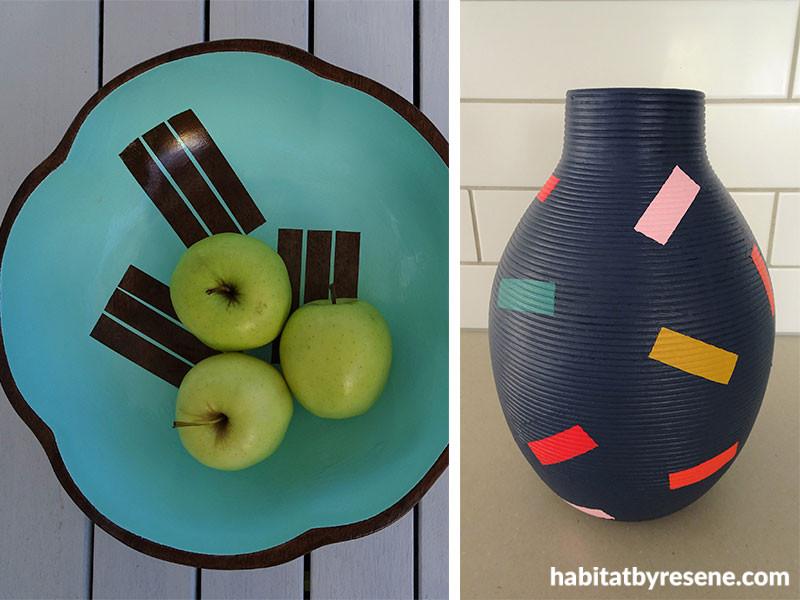
Colour pops revive second-hand finds
20 Sep 2018
Turn a bland wooden bowl into a fun statement piece, and give a plain vase a confetti-style pattern!
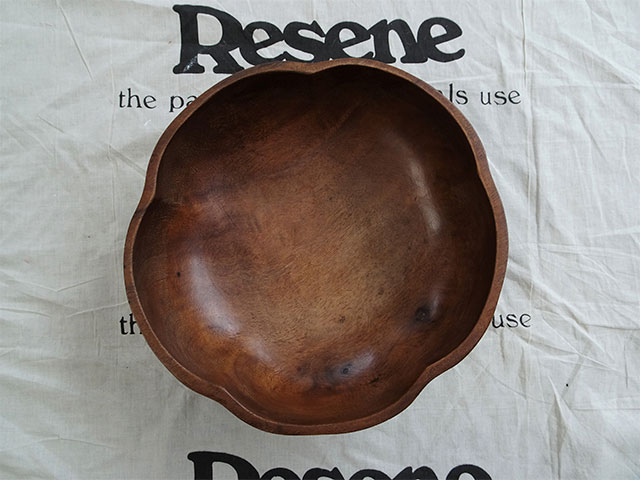
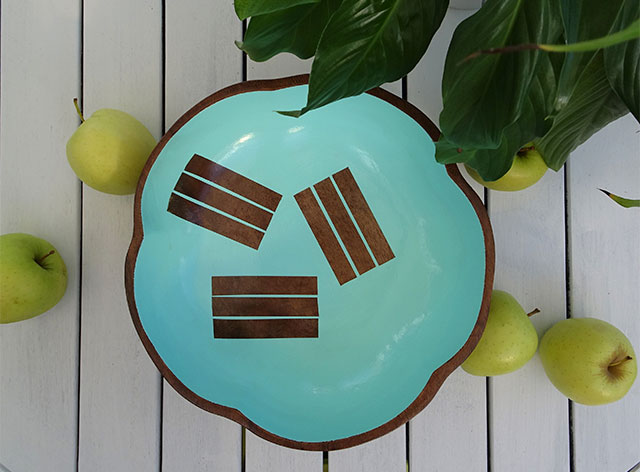
Retro wooden bowl
The combination of a bold colour, Resene Colorwood stain and varnish elevate this retro bowl into a modern feature piece.
You will need:
- Resene Aquaclear urethane
- Testpot of Resene Colorwood Bark stain
- Resene Enamacryl in Resene Riptide (you could use a Resene testpot if you prefer a low sheen finish)
- Testpot brushes
- Painter’s masking tape
Step one. Always clean and prepare your items before applying any paint or product. This bowl was in good condition and didn’t need sanding, so it was wiped down to remove any dust.
Step two. Apply two coats of Resene Colorwood stain in your chosen colour - we used Resene Bark. The stain can be applied by wiping it directly on to the wood grain with a clean cloth. Wait for the first coat to completely dry before applying another.
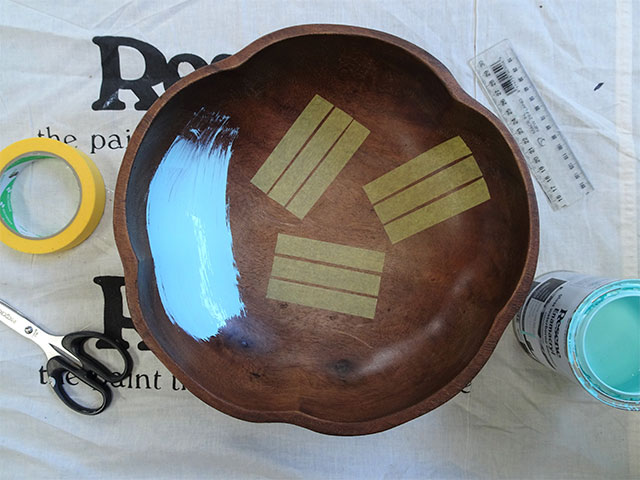
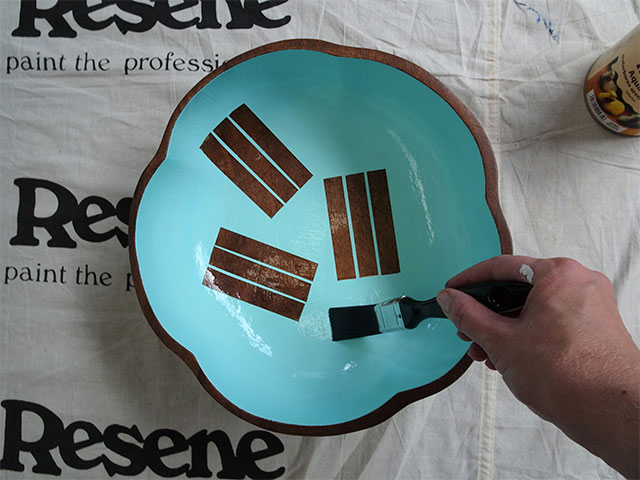
Step three. Once the stain has dried, use painter’s masking tape to mask out a pattern on the inside of the bowl; you are creating a negative-space pattern. We’ve opted for a striped design, but you could try diamonds, triangles or squares. Press down the tape firmly so it has no bubbles or corners peeling up.
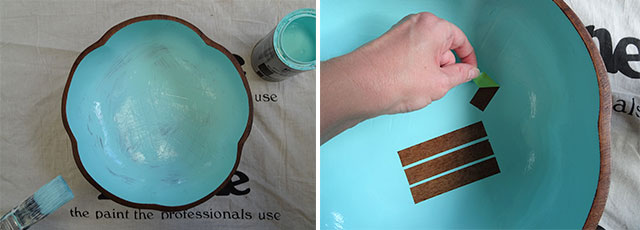
Step four. Apply a coat of Resene Enamacryl in your chosen colour - we used Resene Riptide. Resene Enamacryl paint gives a tough and beautiful gloss finish.
Paint over the masking tape completely. Once the first coat has dried, apply a second coat.
Step five. Carefully peel away all the pieces of masking tape to reveal the negative-space design.
Step six. To protect the paintwork, apply two coats of Resene Aquaclear urethane to the inside of the bowl using a clean testpot brush.
Confetti vase
A beige pottery vase is dressed up ready for a party with this bright confetti design.
You will need:
- Resene testpots – we used two testpots of Resene Zinzan, and one testpot of each of Resene Aloha, Resene Candy Floss, Resene Pursuit, Resene Sea Green and Resene Cupid
- Small detail paint brush
- Testpot brushes
- Painter’s masking tape
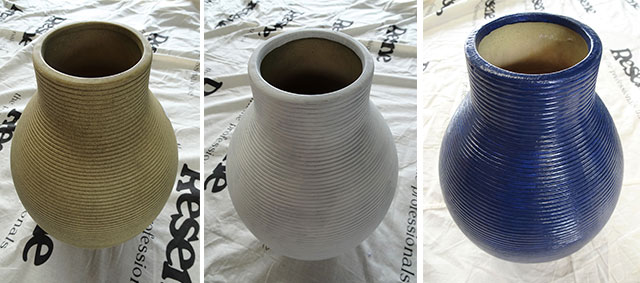
Step one. Check the vase is clean and has no cracks or damage. Apply one coat of Resene Quick Dry primer undercoat and allow to dry.
Step two. Choose your new base colour and apply two to three coats to get full coverage, making sure each coat is completely dry before applying the next.
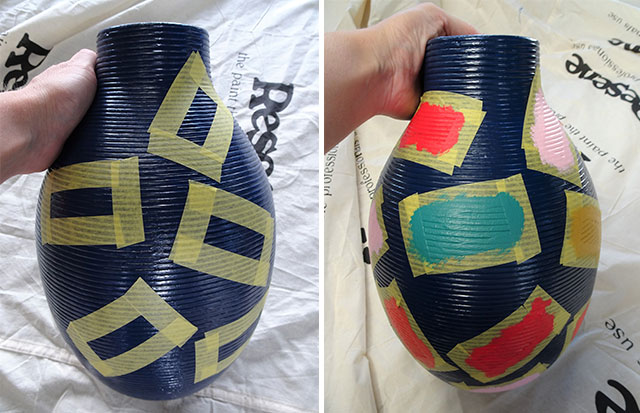
Step three. Using painter’s masking tape, mask out some small rectangle shapes randomly all over the vase to give a fun confetti effect. Always smooth your masking tape down so it is properly adhered to the surface you are painting to help give you a crisp result.
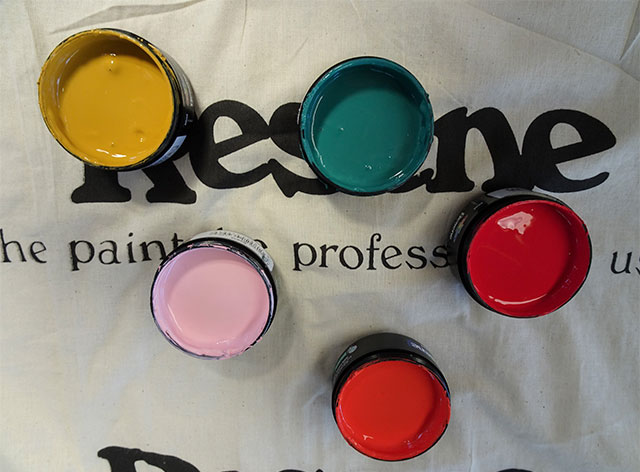
Step four. Paint all the masked rectangles in an assortment of bright Resene colours. We used Resene Aloha, Resene Candy Floss, Resene Pursuit, Resene Sea Green and Resene Cupid. Apply two coats of each colour using a small detail brush. You can wrap the brush in clear cling wrap between coats to save washing it out.
Step five. Carefully remove all the masking tape. Make sure your paint is dry before attempting this! Don’t worry if some of the colour has bled a little, it is easy to go along with some Resene Zinzan on a small brush and correct any mistakes.
Projects by Sarah Herring.
These DIYs are brought to you by Upcycling for Good, a collaboration between Resene and The Salvation Army family stores. The project asks keen DIYers to upcycle second-hand items using Resene paint – look out for this regular feature on Habitat by Resene.
Published: 20 Sep 2018

