
latest
habitat tv

Say goodbye to the morning scramble for keys, coats and sunglasses and hello to this… see this and more videos
blog

Re-living the 1980s through art
Clint C is an artist whose work instantly sparks recognition and joy. Based in Hamilton,… more
How to make a corner clothes rack
01 Mar 2025
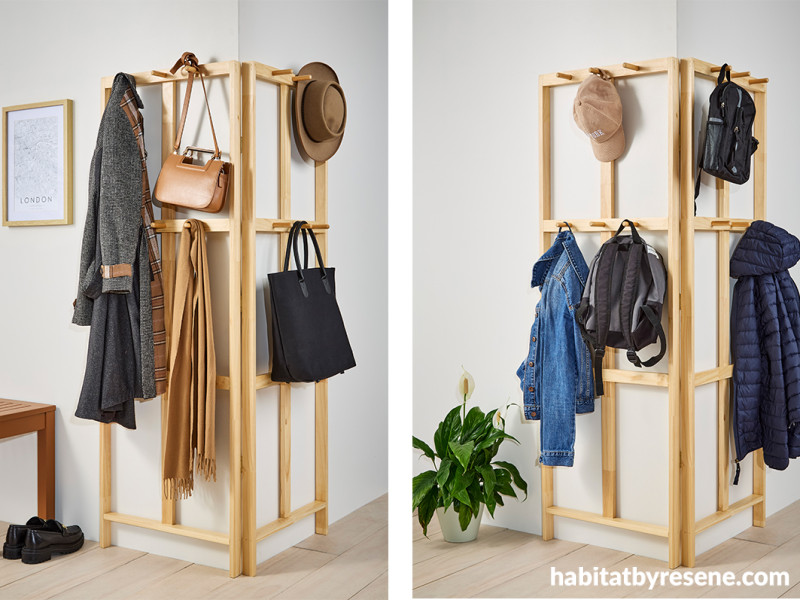
Rethink a hinged clothes rack by attaching it to a corner wall for a hugely useful hanging space, perfect for beside the front door or in a teenager’s bedroom. The minimalist design makes good use of space for added storage without taking up valuable floor space. Apply a clear Resene Aquaclear urethane finish to protect the wood or blend it into your room by painting the rack the same shade as your walls.
You will need:
4x uprights in radiata pine cut to 40mmx20mmx1600mm
2x centre uprights in radiata pine cut to: 40mmx20mmx1480mm
8x cross bars in radiata pine cut to: 40mmx20mmx500mm
12x doweling 16mmx80mm
3x 20mm hinges
30mm panel pins
Wood filler
Sandpaper 240 and 120 grit
Paintbrush
Resene Aquaclear satin
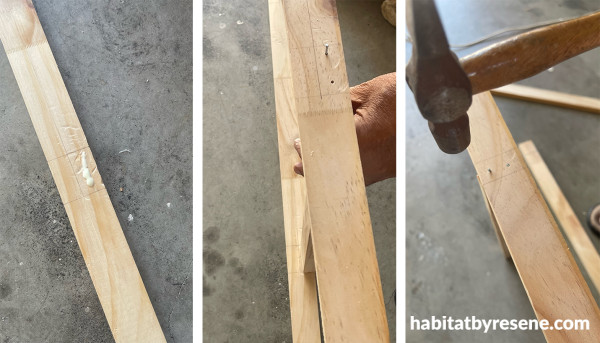
Step 1: Begin by cutting your timber to the appropriate size using a drop saw or hand saw.
Starting with two uprights and from the top measure and mark 486mm intervals, this is where your crossbars will attach to the uprights.
Add some PVA glue at these points and using panel pins, nail the top three cross bars into the uprights. Have the 40mm face of the crossbar pieces facing the front of the frame.
For the crossbar at the base of the uprights twist the crossbar so the 20mm edge is facing the front of the frame.
Repeat for both sets of uprights.
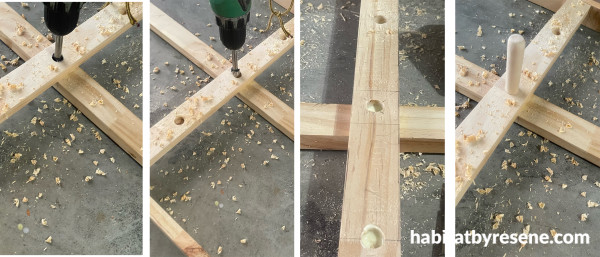
Step 2: Countersink the panel pins with a nail punch underneath the surface of the wood and fill the holes with wood filler.
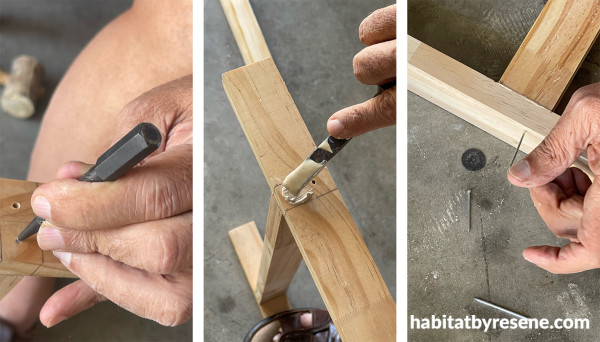
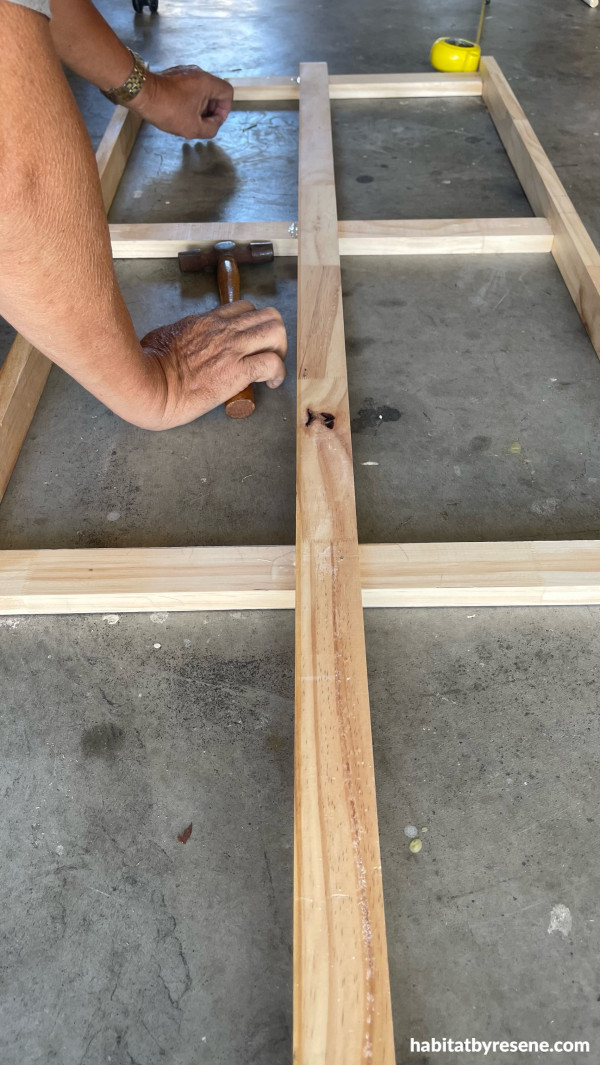
Step 3: Attach the upright that runs up the centre of the frames. This centre upright sits on top of the bottom rail and behind the top three crossbars. Complete the centre upright for both frames.
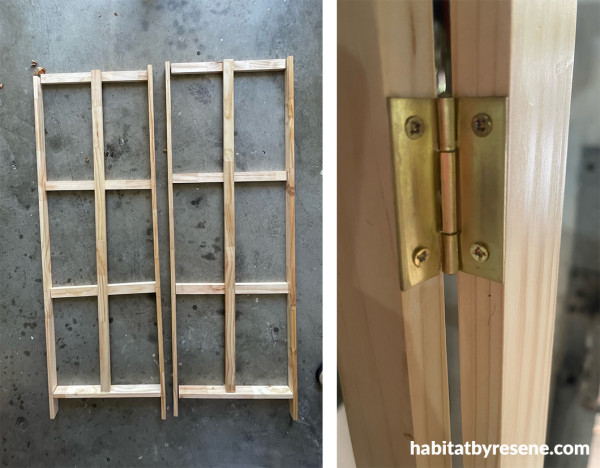
Ensure that the frames are square with a try square.
Sand all edges and corners with 240 grit sandpaper, then wipe off all sanding dust with a damp cloth.
Step 4: If not pre-cut, cut your doweling into 12x 80mm lengths. Round off one end of each with a sander or sandpaper. 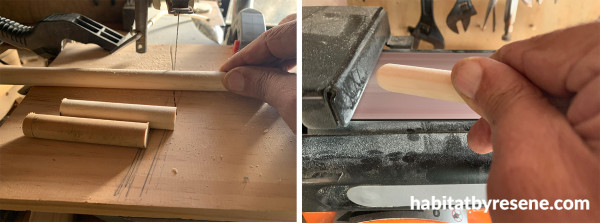
Step 5: Make 12 holes with a 16mm Forstner bit about 16mm deep into the top two cross bars. Add PVA glue into the holes and attach the dowels.
Step 6: Sand the frame and fill the gaps and cracks. Wipe with a damp cloth to remove all sanding dust. Apply two coats of Resene Aquaclear Satin to the entire project.
Lie the frames flat next to each other and add screw on the three hinges.
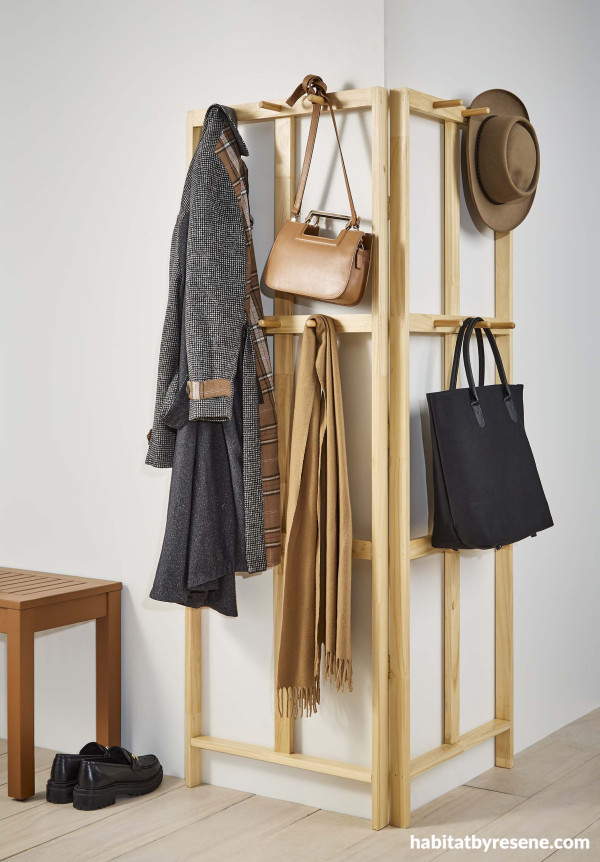
Rack finished in Resene Aquaclear semi-gloss, walls in Resene Sea Fog, floor stain washed in Resene Colorwood Breathe Easy, plant pot in Resene Eighth Lemon Grass and bench in Resene Cape Palliser.
Top tips:
Vary your sheen level to suit the look you like best. Resene Aquaclear satin will look more subtle and muted than Resene Aquaclear semi-gloss or gloss. The higher sheen gloss finish will be the easiest to wipe clean.
If your timber colour is looking a little too pale, you can enhance the colour by staining the timber first with Resene Colorwood wood stain or max Resene Colour Enhance into Resene Aquaclear for a tinted polyurethane finish.
For a beachwashed look, choose a colour from the Resene Colorwood We Speak Beach colour range.
If you’d like your clothes hanger to blend in with your room, use the same paint colour as your walls.
In a children’s bedroom or play space, add extra colour with Resene testpots.
Make sure the hanger is attached to the wall so it can’t fall over if knocked.
project: Ivan Moses
stylist: Megan Harrison-Turner
images: Bryce Carleton
Published: 01 Mar 2025

