
latest
habitat tv

Say goodbye to the morning scramble for keys, coats and sunglasses and hello to this… see this and more videos
blog

Brick Bay unveils its poetic new folly for 2026
The winner of the 2026 Brick Bay Folly competition has been unveiled. Within the Wings… more

Create your own DIY long charcuterie board
23 Dec 2025
Family-style dining – where food is served in a communal setting designed to foster relaxed social connectivity - has increasingly gained in popularity over the years in both restaurants and in our homes. This elevated charcuterie board is the ideal centrepiece to your next gathering and can be easily made with a few materials and tools, and of course, Resene paints and stains in your favourite colour combinations.
You will need:
- Resene testpots: We used Resene Mexican Red and Colorwood Walnut
- Dressed untreated pine board, 280mm wide x 18mm thick x 1.8m long (main board).
- 2x dressed untreated pine boards, 135mm wide x 10mm thick x 1.2m long (trim sides)
- 1x dressed untreated pine boards, 135mm wide x 10mm thick x 0.9m long (trim ends)
- Mitre saw
- Sandpaper
- Paint brush
- Pencil
- Jig saw
- Resene Quick Dry
- Wood glue
- Resene Aquaclear satin
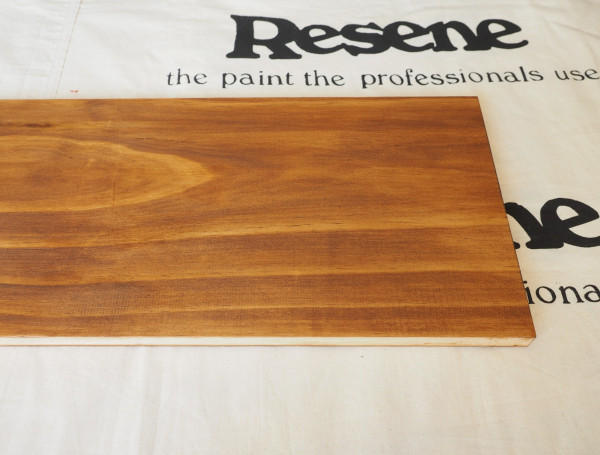
Step 1: Start by cutting the main board to width and length (mine is 22cm wide and 117cm long). Sand any rough edges smooth and then stain the board with one coat of Resene Colorwood Walnut, or for a darker finish apply two coats.
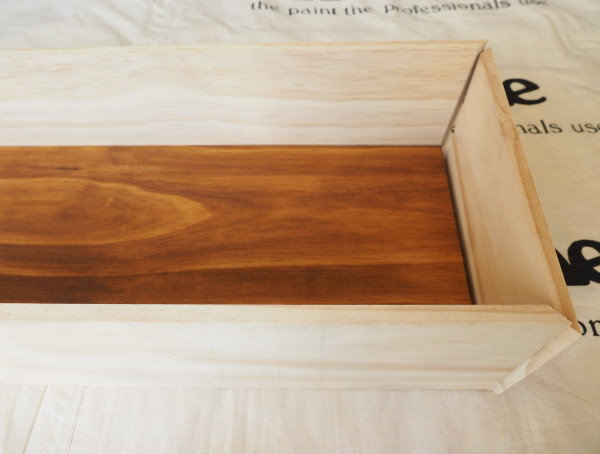
Step 2: Cut the trim boards to length for all four sides so that they fit around the main board. Use a mitre saw set at an angle of 45 degrees to cut the corners.
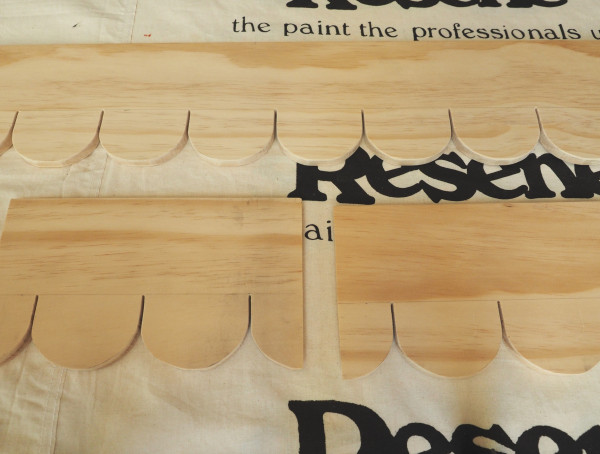
Step 3: Use a pencil to draw on a scallop edge along the length of each of the trim boards. Cut this out with a jig saw. Sand the rough edges smooth.

Step 4: Prime the trim boards with one coat of Resene Quick Dry. Once the primer is dry, apply two coats of Resene Mexican Red. Use wood glue to attach the trim boards to the main board.
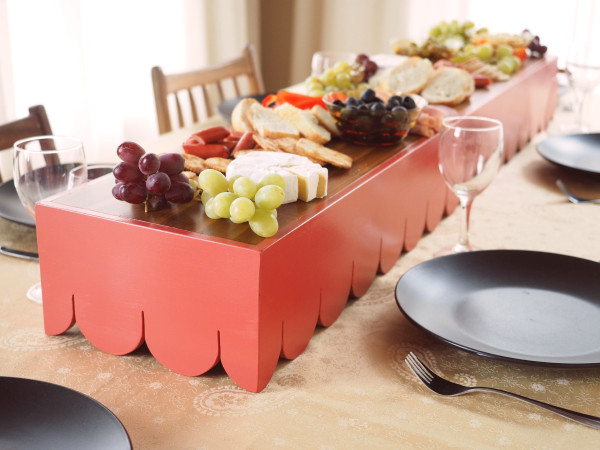
Step 5: Once the glue is dry, coat the main board with 2 or 3 coats of Resene Aquaclear in a satin finish.
project and images Fleur Thorpe
Published: 23 Dec 2025

