
latest
habitat tv

Say goodbye to the morning scramble for keys, coats and sunglasses and hello to this… see this and more videos
blog

Brick Bay unveils its poetic new folly for 2026
The winner of the 2026 Brick Bay Folly competition has been unveiled. Within the Wings… more
Make a wood-stained shelf to display your trinkets
27 Aug 2025
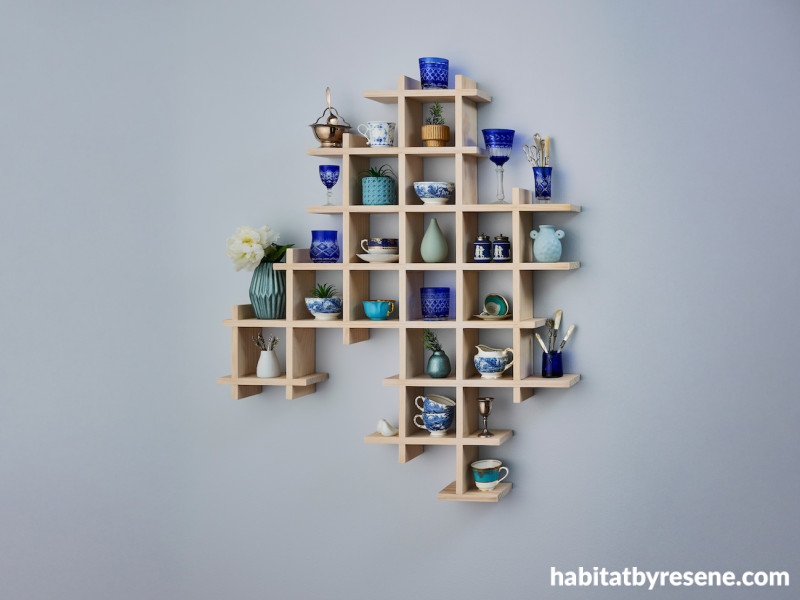
Create a stunning wall of trinkets with a cubed wooden shelf stained in Resene Colorwood Rock Salt, a soft, breezy blonding finish that lets the natural wood grain shine through. Perfect for adding character to your bedroom, this easy DIY shelf can be filled with your most cherished keepsakes, thrifted finds, or quirky decor items painted in your favourite Resene testpot shades. The result is a stylish, personalised display where even the smallest treasures take centre stage.
You will need:
- Drop saw
- Band saw
- Try square
- Drill
- Sander
- Chisel
- Marking gauge
- Metal hanger
- PVA glue
- Filler
- Sandpaper
- Resene Colorwood stain – we used Resene Colorwood Rock Salt
- Screws
- Trinkets of your choice
Materials (we used Radiata pine)
Note: The different horizontal parts are indicated with a number and the vertical parts with letters.
Horizontal measurements
1. 115mm x18mm x 520mm
2. 115mm x 18mm x 750mm
3. 115mm x 18mm x 830mm
4. 115mm x 18mm x 880mm
5. 115mm x 18mm x 510mm
6. 115mm x 18mm x 320mm
7. 115mm x 18mm x 380mm
8. 115mm x 18mm x 140mm
Vertical measurements
a. 115mm x 18mm x 580mm
b. 115mm x 18mm x 1760mm
c. 115mm x 18mm x 1060mm
d. 115mm x 18mm x 580mm
e. 115mm x 18mm x 420mm
f. 115mm x 18mm x 140mm
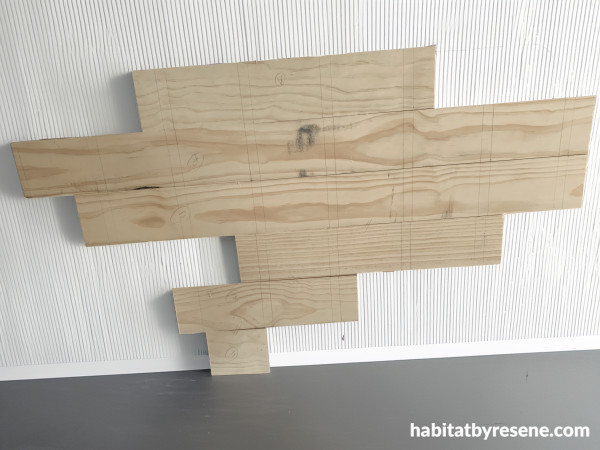
Step 1: Mark out all the parts with a try square and a ruler. All the shelf squares are 140mm (w) x 140mm (h). The shorter overhangs are 30mm (w) and the longer ones 100mm (w). The cross-halving joints are 57.5mm deep. The cross-halving joints have a depth of 57.5mm.
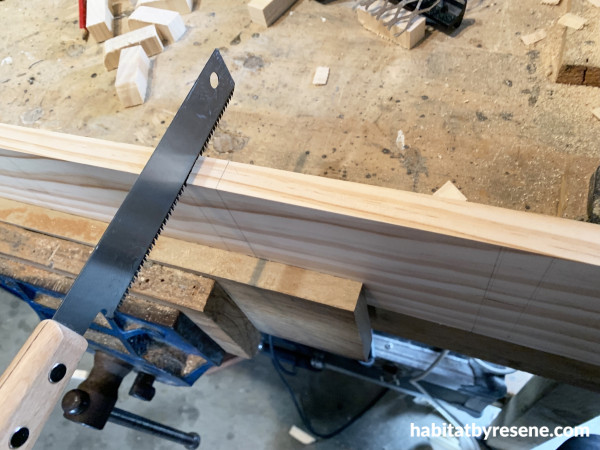
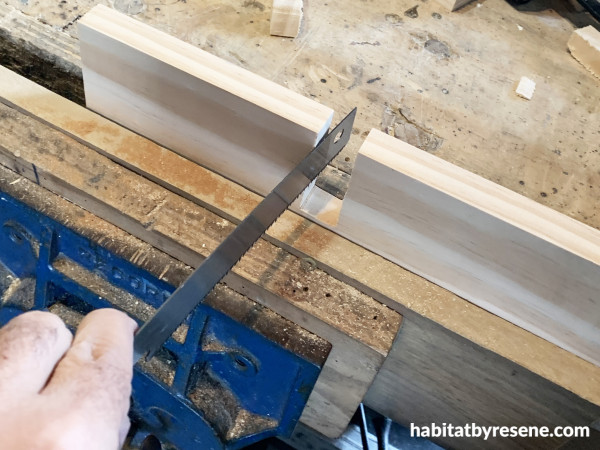
Step 2: After parts are marked, cut the cross-halving joints with a band saw and then clean with a chisel to fit.
Step 3: When all joints are fitting, glue the joints into place. Note: Take care to not let glue drip to the shelf, or wipe glue away if you see any drips.
Step 4: Sand the entire project and clean off any sanding dust.
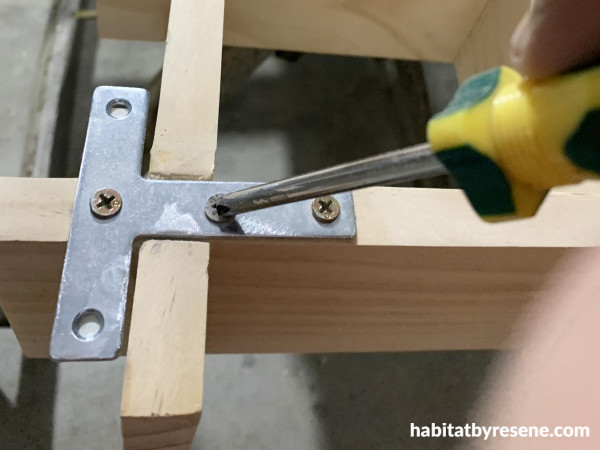
Step 5: Attach the four metal hangers as shown above. (This is how you’ll secure your shelf to the wall).
Step 6: Using a small brush, paint two coats of Resene Colorwood Rock Salt onto the wooden shelf, allowing dry time between coats.
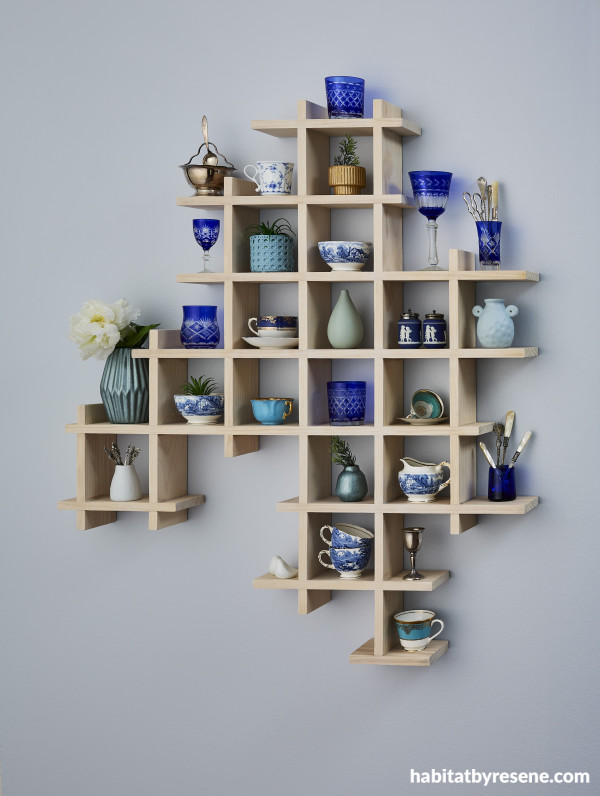
Step 7: Screw your trinket shelf onto a wall. Add your favourite keepsakes or trinkets onto your shelf, and to keep a cohesive look paint objects in your desired Resene testpot colours.
Above: Shelf stained in Resene Colorwood Rock Salt and sealed in Resene Aquaclear, wall in Resene Breathless and trinket items in Resene FX Metallic Dalek, Resene Haven, Resene Dusted Blue, Resene Rice Cake and Resene FX Metallic Gold Dust.
Top tip: Resene Colorwood stains are available in small pots, which are perfect for smaller wood projects. Remember that higher-density timber won’t absorb liquid as readily as less-dense timber so the stain will look less intense. Check out the timber samples at your local Resene ColorShop or reseller.
project Ivan Moses
main image Bryce Carleton
Published: 27 Aug 2025

