
latest
habitat tv

Say goodbye to the morning scramble for keys, coats and sunglasses and hello to this… see this and more videos
blog

Reader roundup: Public murals and powder blues
A Morningside mural, an exterior refresh, and striped walls. Let these projects be your inspiration… more
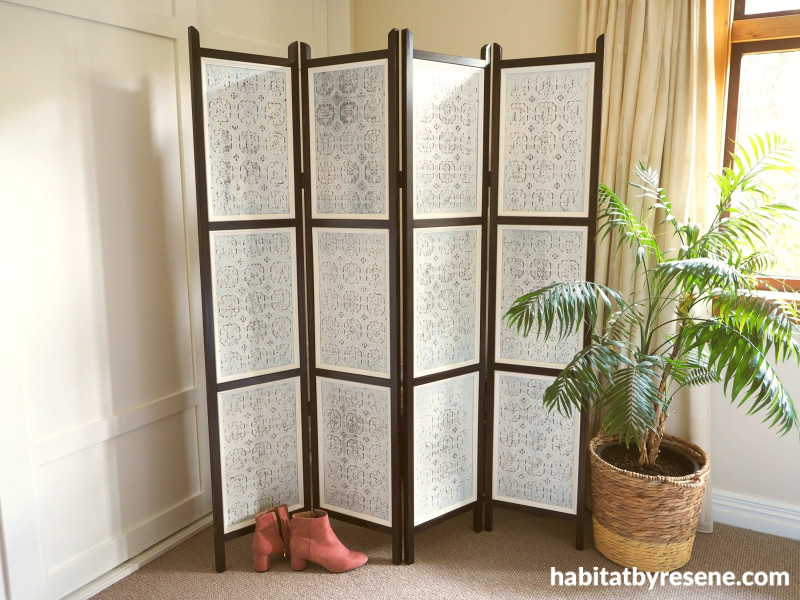
Divide and conquer: DIY privacy screen and room divider
11 Jan 2023
Do you need more privacy? Or perhaps you are bored of your room looking the same? A privacy screen or room divider might be just the thing you are looking for and could save you from having to knock down or build new walls, which can be costly. This DIY screen decorated with Resene products will jazz up your room, and is easily moveable to create the different spaces you need, especially handy for studio apartments or lofts.
You will need:
- 2m x 2.4m sheet of 4mm thick untreated ply wood
- Resene wallpaper, Fleur used Resene Wallpaper Collection RD124
- Scissors
- PVA glue
- 11 1.8m lengths of 24mm x 24mm untreated wood
- Paintbrush
- Candle
- Sandpaper
- Mitre saw
- Table saw
- Resene Colorwood wood stain, Fleur used Resene Dark Ebony
- Rag/cloth
- Resene Aquaclear
- Resene Quick Dry
- Screws
- Electric drill
- Wood glue
- Hinges
- Resene testpots in the colours of your choice. Fleur used Resene Kilimanjaro, Resene Hairy Heath, Resene Bullion and Resene Quarter Parchment

Step 1: Start by cutting out 12 rectangles from your chosen Resene Anaglypta wallpaper. Fleur used Resene Wallpaper Collection RD124. Since this wallpaper has a geometric pattern, you can easily cut it following the pattern. Fleur cut her wallpaper to 45.3cm long and 26.8cm wide. Cut the 4mm plywood to be slightly larger than the wallpaper. Leave a margin on the sides to allow for the wood trim and a bigger margin on the top and bottom for the wood trim plus 5mm to slot into the horizontal grooves. Use PVA glue to glue the wallpaper onto the plywood.

Step 2: Paint the wallpaper all over with one of your chosen Resene paint colours. Fleur used Resene Kilimanjaro. Then do some random swipes of your second Resene paint colour. Fleur used Resene Hairy Heath and Resene Bullion metallic.

Step 3: When the paint it dry, rub over the wallpaper with a candle. The build-up of wax on the wallpaper helps protect the paint from being removed when sanded.

Step 4: Paint over the entire wallpaper panel with your chosen topcoat colour, Fleur used Resene Quarter Parchment. Once this is dry, sand off some of the Resene Quarter Parchment with medium grit sandpaper.

Step 5: Now you can start working on the frame. With three lengths of the 24mm x 24mm wood, cut 16 lengths to be the same width as the wallpaper panels – these will be the horizontal bars. Use a table saw to cut a 5mm deep groove along the length of each piece of wood. Make sure that the grooves are 4mm wide to fit the plywood. 8 of the pieces need one groove, as these will be the tops and the bottoms of the wallpaper panels, and the remaining eight panels need two grooves, one on opposite sides. Stain these with two coats of Resene Colorwood interior wood stain in the colour of your choice, Fleur used Resene Dark Ebony.

Step 6: Cut the remaining 8 long lengths of wood for the vertical uprights – Fleur’s were 1.67m long – and round off the tops. Stain these with two coats of Resene Colorwood in your chosen colour, Fleur used Resene Dark Ebony. Attach everything together using wood glue and screws. The top and bottom wallpaper panels slot into the horizontal bars with one groove cut in them, while the middle panel slots into the horizontal bar with two grooves cut into it. Once everything is assembled, fill the screw holes, sand them flat once dry and dab a bit more stain over them.

Step 7: Apply two coats of Resene Aquaclear clear urethane in a semi-gloss finish to all the stained wood. Allow drying time before applying the second coat.

Step 8: While this is drying, cut all the trim to size to fit within each of the 12 panels. Prime the trim pieces with one coat of Resene Quick Dry, followed by two coats of your chosen colour, Fleur used Resene Quarter Parchment.

Step 9: Use strong wood glue to glue the trim in place.

Step 10: Finish by attaching hinges to each panel.
Wall painted in Resene Eighth Canterbury Clay and wardrobe and skirting in Resene Half Rice Cake.
project and images Fleur Thorpe
Published: 11 Jan 2023

