
latest
habitat tv

Say goodbye to the morning scramble for keys, coats and sunglasses and hello to this… see this and more videos
blog

Brick Bay unveils its poetic new folly for 2026
The winner of the 2026 Brick Bay Folly competition has been unveiled. Within the Wings… more
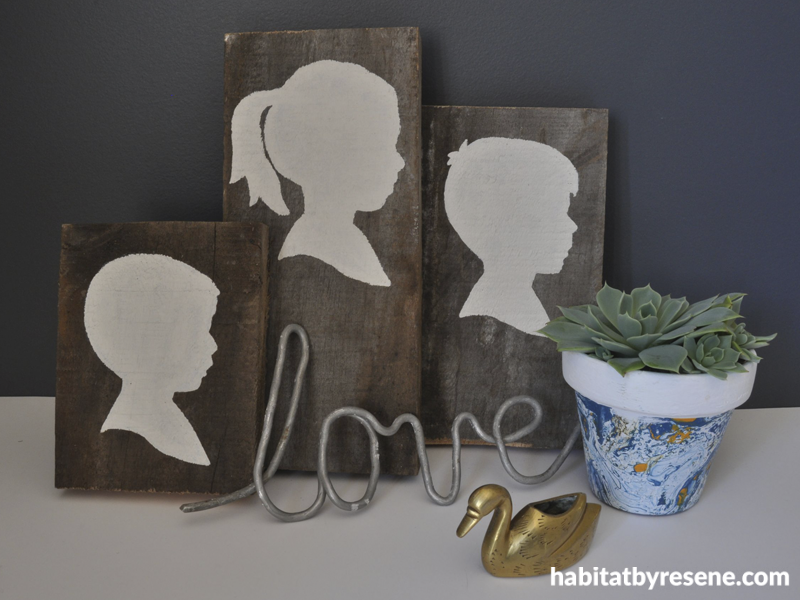
DIY: Painted silhouettes
02 Mar 2017
Silhouette art is an elegant and timeless way to display portraits of your loved ones. Here's a simple DIY that modernises silhouettes, and would look great anywhere in the home. All it takes is one Resene testpot, pieces of wood offcuts, and a few other accessories.
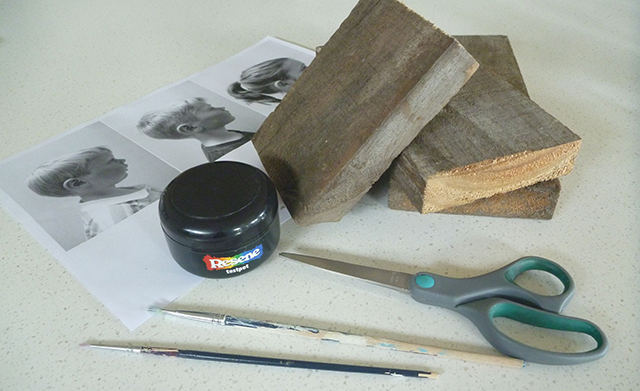
You will need
Printed photos of your kids, yourself, pets, etc. taken in profile (on the side), scissors, double-sided tape/Blu-Tack®, pencil, offcut pieces of wood, craft paintbrushes, and testpot in Resene Triple Blanc.
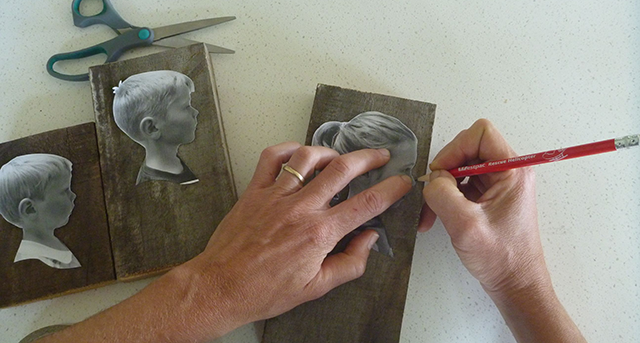
- Taking the photos, cut around the silhouette of the subject's head to use as an outline.
- Using double-sided tape or Blu-Tack®, stick them to your wood.
- With the pencil, draw around your head cut-outs onto the wood.
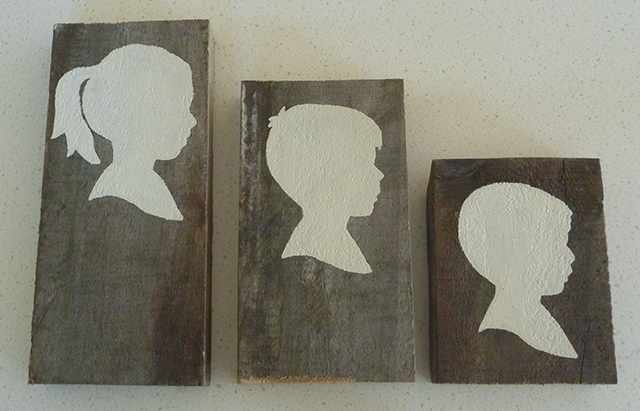
- Paint the outline of the head with a small paintbrush and Resene Triple Blanc testpot.
- With a bigger paint brush, paint the interior of the head.

- Repeat until all the silhouettes are complete.
Project and photographs by Fleur Thorpe.
Published: 02 Mar 2017

