
latest
habitat tv

Say goodbye to the morning scramble for keys, coats and sunglasses and hello to this… see this and more videos
blog

Re-living the 1980s through art
Clint C is an artist whose work instantly sparks recognition and joy. Based in Hamilton,… more
DIY palette generator drawers
08 Jan 2020
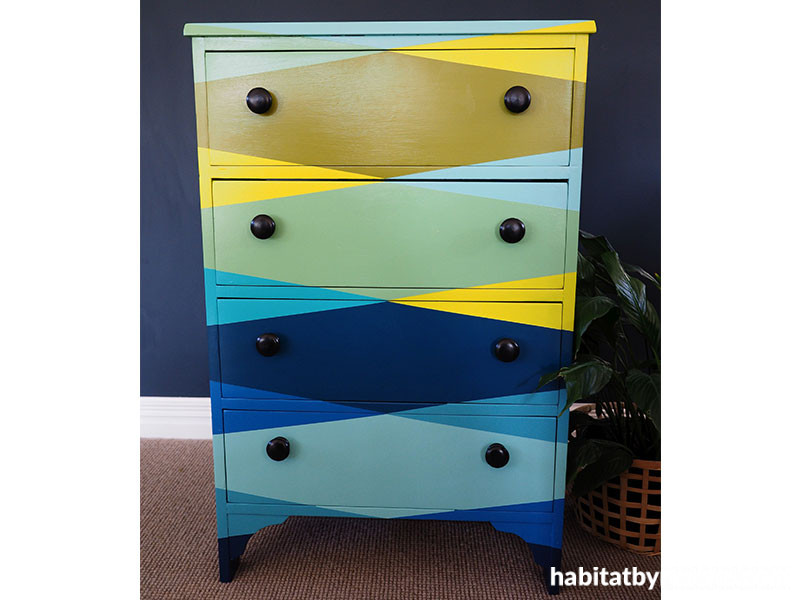
If your furniture is in desperate need of a pick-me-up, why not give it a fun and inspired twist? With the free online Resene Colour Palette Generator, you can translate a favourite image or pattern into a Resene paint palette to turn your furniture into a unique work of art.
You will need:
- Electric sander
- 120 grit sandpaper
- Resene Quick Dry
- Smooth surfaces microfibre blend mini roller
- Small paint tray
- Soft sanding block or finishing sandpaper
- Ruler or measuring tape
- Pencil
- Paintbrush
- Painter’s tape
- Wood glue?
- Resene testpots in your choice of colours – Fleur used Resene La Rioja, Resene Good Life, Resene Grass Hopper, Resene Gulf Stream, Resene Java, Resene Sea Crest, Resene Captain Cook, Resene St Kilda, Resene Regatta and Resene Black.
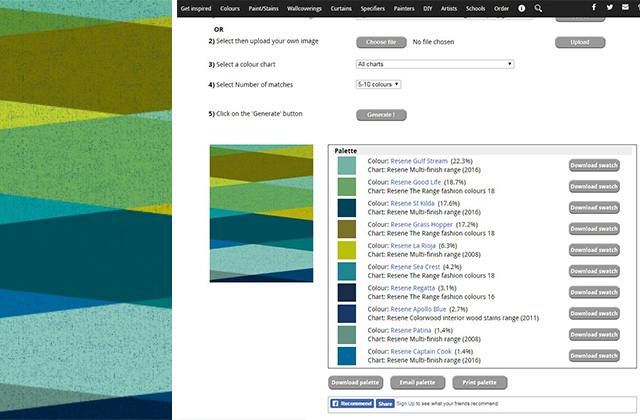
Step 1 Open a web browser to the Resene Colour Palette generator - https://www.resene.co.nz/swatches/generate_palette.php. Then, follow the instructions to use an image from the internet by entering its URL or upload an image from your own computer’s files.
Next, choose a colour chart. Try a simple pattern in the latest Resene fashion colours range for similar on trend options or use the Resene Multifinish collection to pick up the subtleties of a photographic image. You can also choose the number of colour match results. 5-10 colours is enough for simple patterns, but you can select a greater number of colour options to give yourself even more choices.
Finally, click the ‘Generate’ button. A palette of Resene colours will be created based on your image. You can use this list of colours to purchase paint at your nearest Resene ColorShop.
Step 2 Once you have your paint sorted, you can start work on your furniture. For a dresser like this one, remove the drawers as well as the knobs from each drawer. Number each drawer on the back with a pencil so that you remember which one fits in which space when you go to put them back in.
Step 3 Using 120 grit sandpaper, sand the drawer fronts and the main body of the dresser. Pay particular attention to the edges and corners where paint may be cracking and flaking. Make sure you remove all loose paint and wipe down the whole piece down with a soft cloth to remove all the dust.

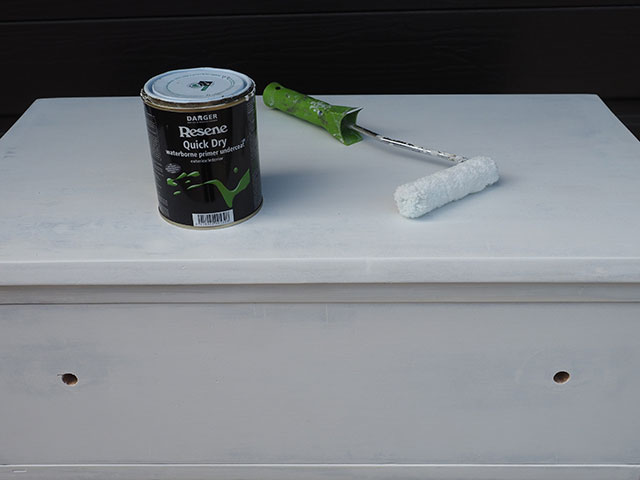
Step 4 Use a small smooth surfaces microfibre blend roller to paint the drawer fronts and the body of the drawers with Resene Quick Dry. Once dry, lightly sand everything with a soft sanding block or very fine finishing sandpaper. Dust down with a soft cloth.
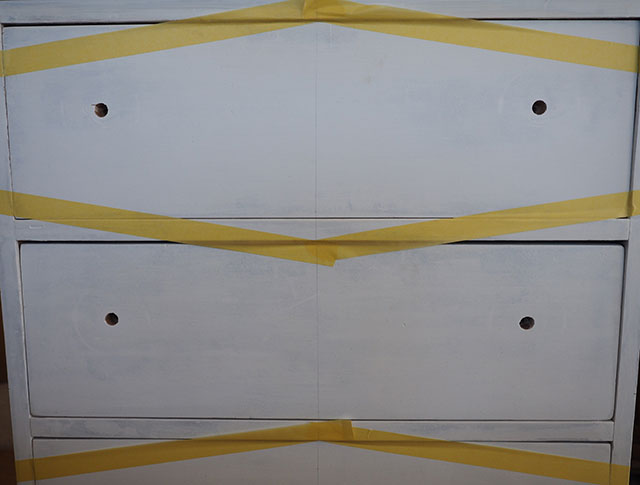
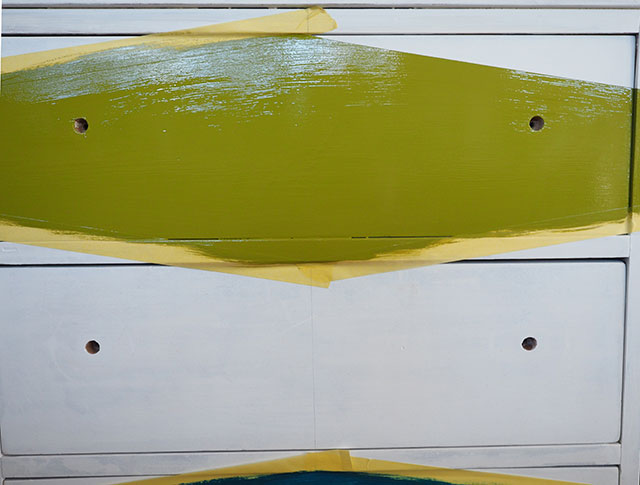
Step 5 Use a ruler or measuring tape and a pencil to mark out your pattern.
Step 6 Use high quality painter’s tape to mask off the sections of the pattern that you will be painting first. Fleur used Sellotape Washi Advance Masking Tape from her Resene ColorShop. Make sure to press the tape down firmly to prevent any bleed-through of paint under the tape.
Step 7 With a good quality paintbrush, paint your first colour in two coats, allowing the first to dry before applying the second. As soon as you have finished the second coat, remove the tape, pulling it away at a right angle, while the paint is still wet.
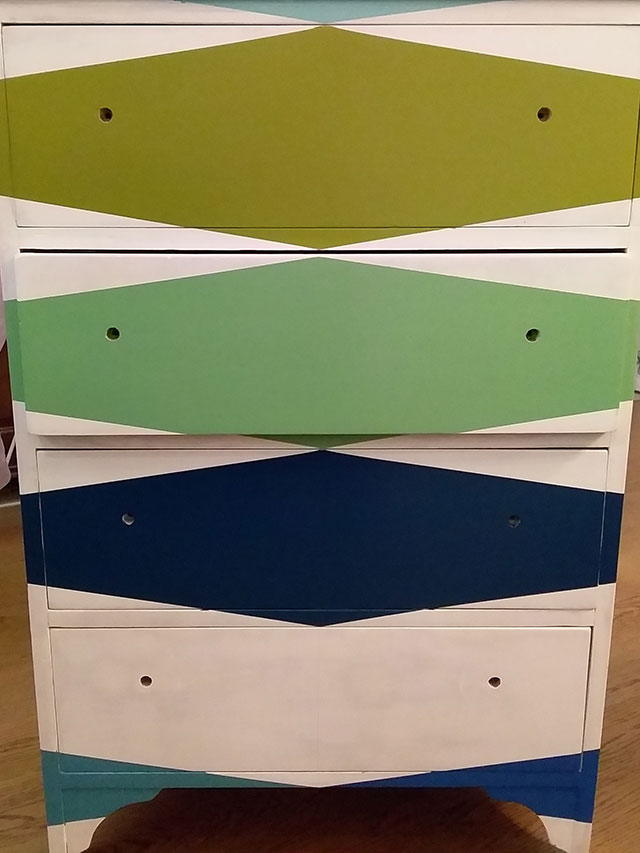
Step 8 Proceed with taping and painting out the rest of your pattern. It’s a good idea to work on areas which aren’t adjacent to each so the paint has time to properly dry before you put more tape on it to do the next section. If you want to speed things up, use a hair dryer on any wet sections.
Step 9 If you would like to change the colour of your handles too, sand, prime and wipe them clean first. Fleur painted her handles in Resene Black.
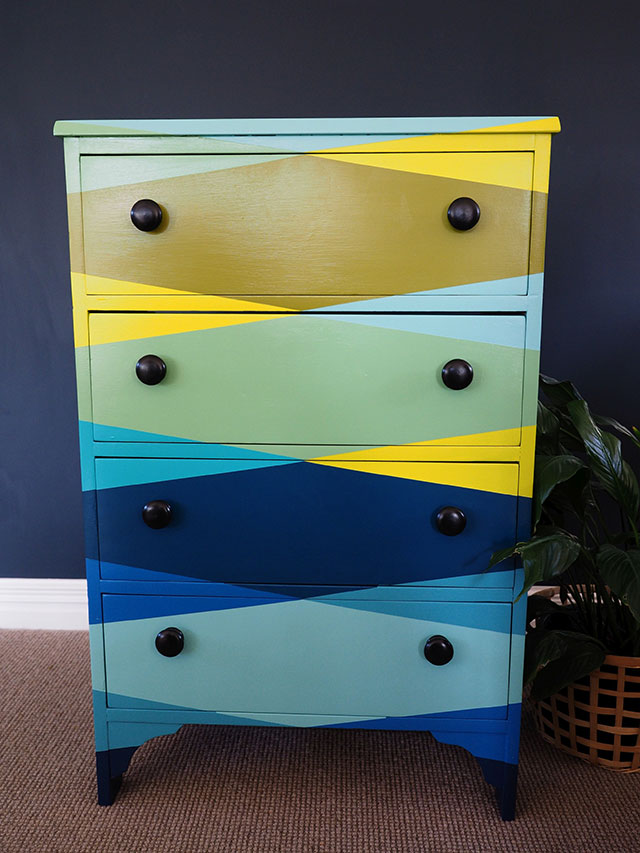
Finished dresser painted in Resene La Rioja, Resene Good Life, Resene Grass Hopper, Resene Gulf Stream, Resene Java, Resene Sea Crest, Resene Captain Cook, Resene St Kilda, Resene Regatta and Resene Black. Wall in Resene Dark Knight and skirting board in Resene Half Rice Cake.
project and images Fleur Thorpe
Published: 08 Jan 2020

