
latest
habitat tv

Say goodbye to the morning scramble for keys, coats and sunglasses and hello to this… see this and more videos
blog

Reader roundup: See what our readers have been up to!
Refurbished vintage furniture, charming exteriors and magnet walls for kids. These projects are sure to… more
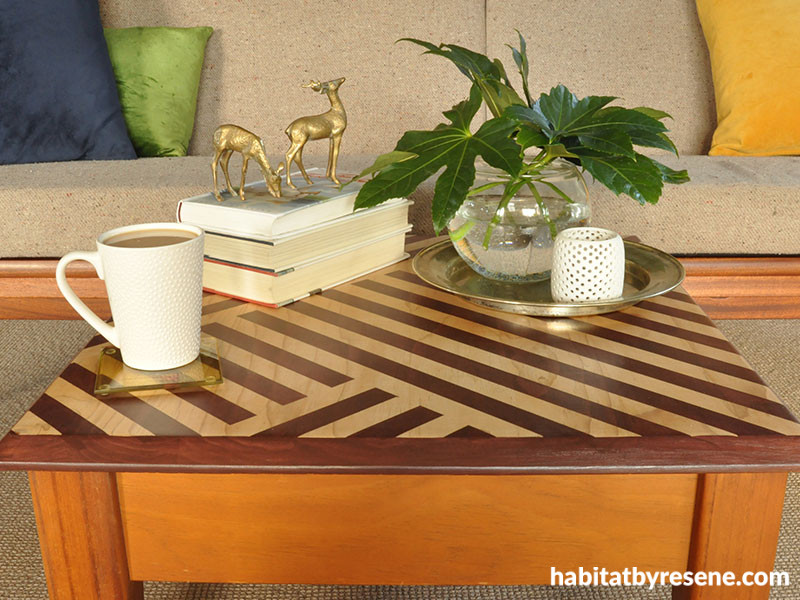
DIY stained pattern coffee table
04 Sep 2019
A coffee table is one of the most essential pieces of furniture and its design can affect the whole aesthetic of your living space. With a bit of elbow grease and a testpot of Resene Colorwood timber stain, you can turn your coffee table into the focal point of your living room.
You will need:
- Electric sander
- 80, 120 and 180 grit sandpaper
- Painter’s tape
- Ruler and right-angle set square
- Testpot in Resene Colorwood Mahogany
- Soft cloth
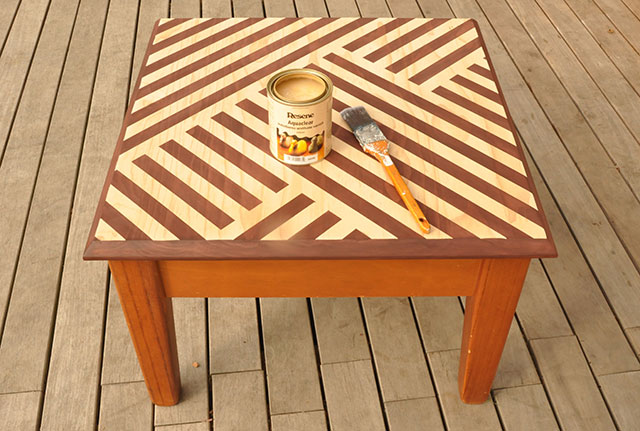
- Resene Aquaclear Satin
- Paint brush
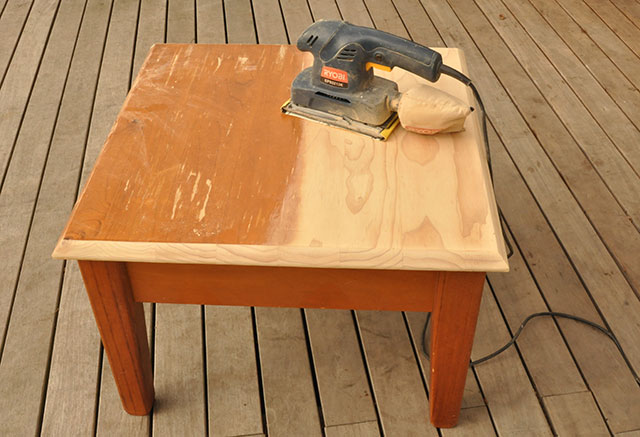
Step 1 Use an electric sander to remove the old varnish. Start with a high grit sander (80 grit), followed by 120 grit and finish with a fine sandpaper of 180 grit. Once the varnish is removed and the wood is smooth, wipe the dust away with a soft dry cloth.
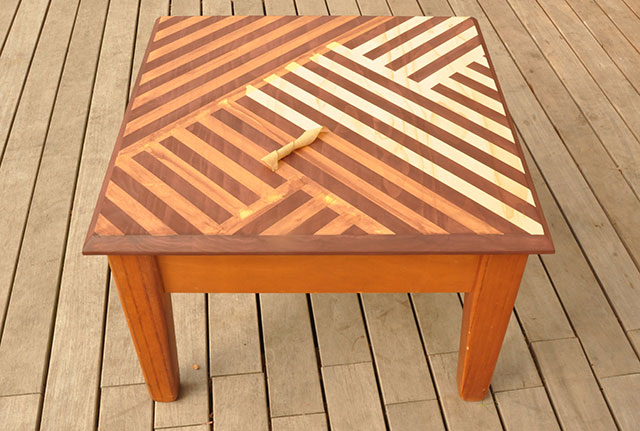
Step 2 Use painter’s tape to make your pattern. Use a set square to get right angles. Instead of using a ruler to measure out the distance between each row of tape, put your first tape length down and then put another second length of tape down right next to it. Put a third length down next to the second length. Remove the second length and both the first and the third lengths will be nicely parallel to each other.
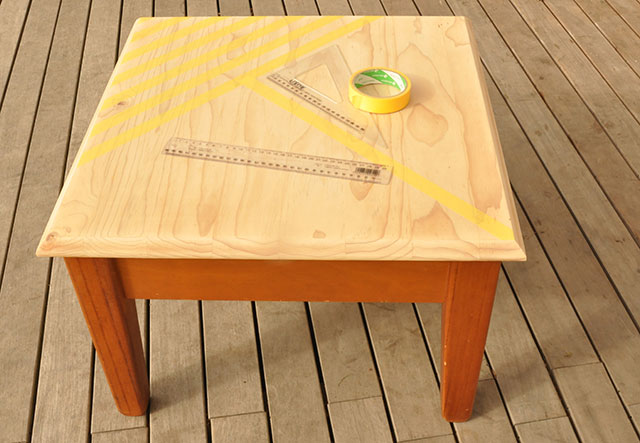
Step 3 Press the tape down firmly to avoid the stain bleeding underneath the tape.
Step 4 Use a craft knife to neatly cut the ends of the tape.
Step 5 Once your tape pattern is finished and the tape is firmly pressed down, use a soft dry cloth and wipe on the Resene Colorwood Mahogany stain. Fleur applied one coat of stain, but if you want a darker finish, apply multiple coats and allow it to dry between each coat.
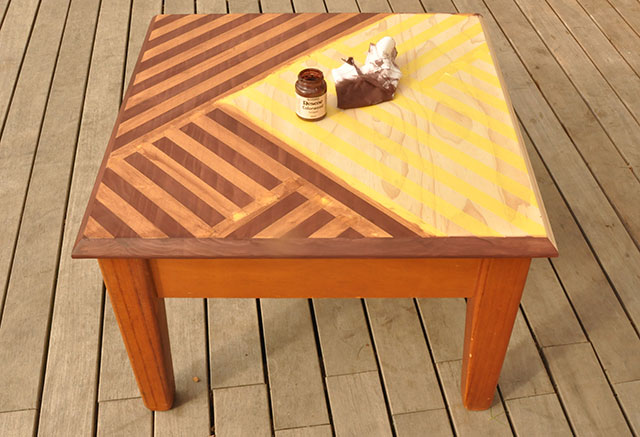
Step 6 Carefully remove the painter’s tape.
Step 7 Once the stain is dry, apply two coats of Resene Aquaclear satin.
images and project Fleur Thorpe
Published: 04 Sep 2019

