
latest
habitat tv

Say goodbye to the morning scramble for keys, coats and sunglasses and hello to this… see this and more videos
blog

Re-living the 1980s through art
Clint C is an artist whose work instantly sparks recognition and joy. Based in Hamilton,… more
DIY vintage sideboard revival
15 May 2019
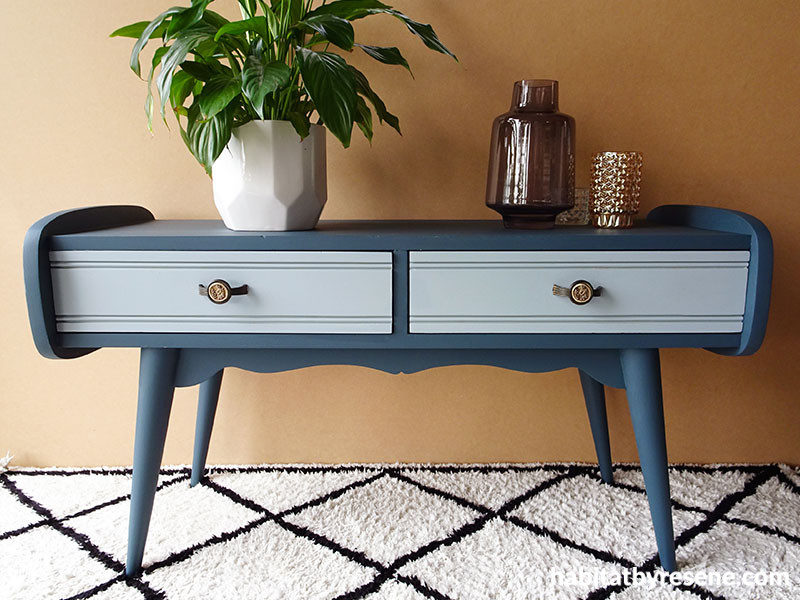
With a bit of TLC and careful colour choice, old pieces of furniture like this vintage sideboard can easily be revived and renewed.
Although this was a beautiful piece of solid, sturdy furniture, it had faded and there were imperfections in the timber that couldn’t be sanded out. Sometimes if you can’t restore timber back to its original glory, a fantastic paint job is the next best option for breathing new life into old wooden furniture.
You will need:
- a piece of furniture in need of a refresh
- sandpaper and/or an electric sander
- testpot brushes
- painter’s masking tape and scissors
- Resene Quick Dry primer undercoat
- Resene SpaceCote Low Sheen in your choice of colour, (Sarah used Resene Big Stone)
- Resene SpaceCote Low Sheen in your choice of colour (Sarah used Resene Bounty)
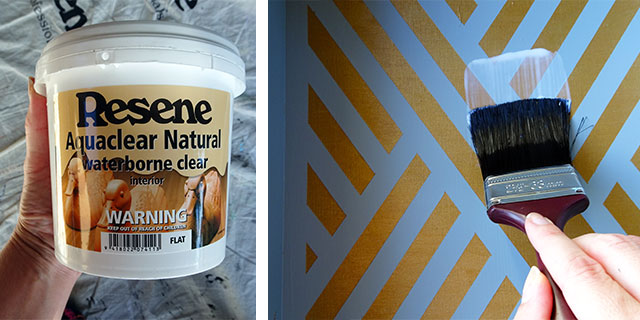
- Resene Aquaclear Natural
- Resene testpots in your choice of colours (Sarah used Resene Gold, which has a metallic finish, and Resene Shabby Chic)
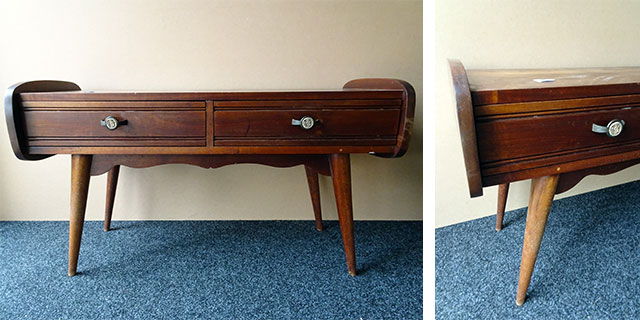
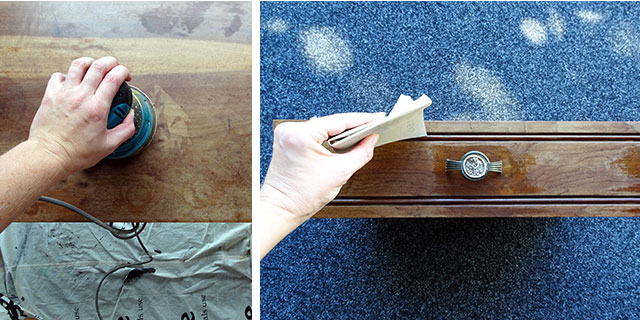
Step 1 Always check old furniture items for any repairs they might need before you start painting. This sideboard was in excellent condition with no need for repairs. However, the timber had some old stain on it, so it needed to be sanded back thoroughly before any paint could be applied. You could either sand this back by hand with sandpaper, or use an electric sander if you have access to one. Sarah sanded all the surfaces that would be painted and wiped them clean. She also wrapped masking tape over the drawer hardware before painting too.
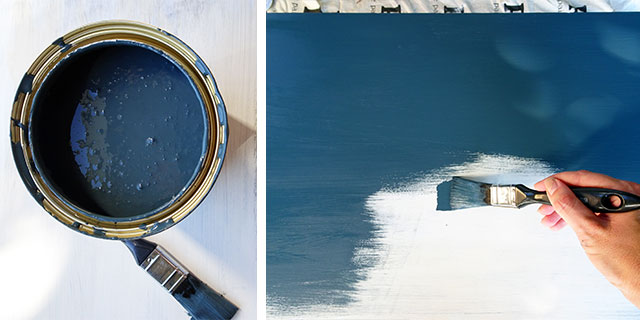
Step 2 Apply one coat of Resene Quick Dry primer undercoat to all the surfaces that will be painted.
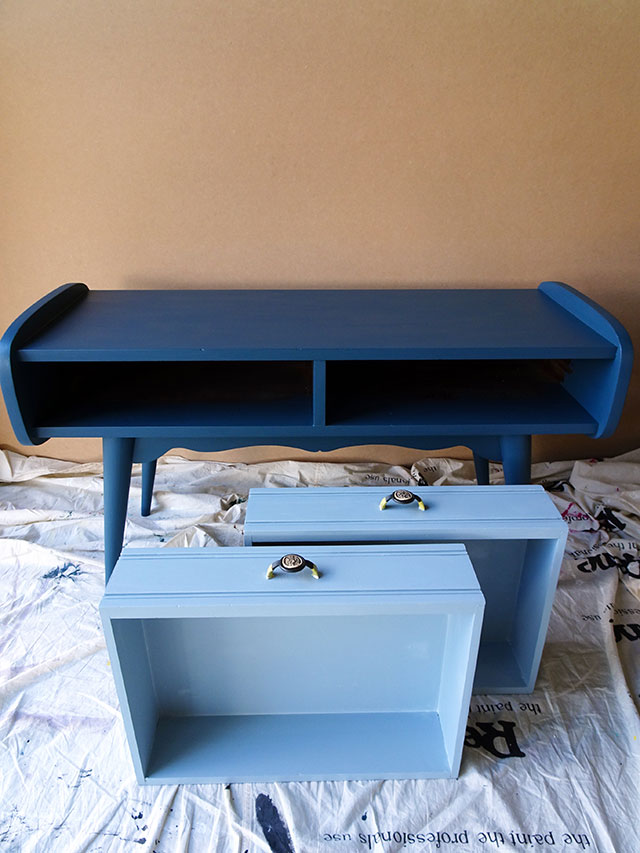
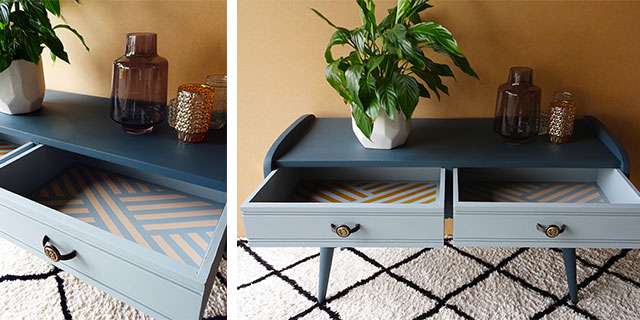
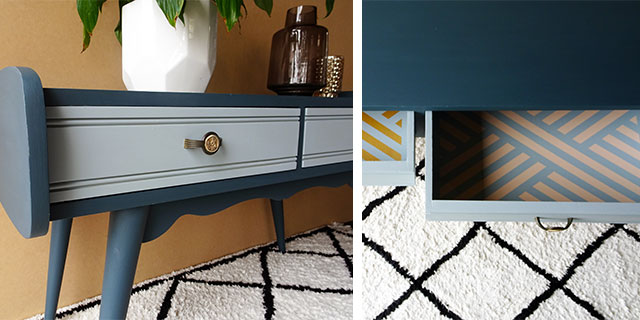
Step 3 Once the primer is dry, apply two coats of your chosen colours. Sarah decided to use Resene SpaceCote Low Sheen for a relaxed, matte finish tinted to Resene Big Stone for the main unit and Resene Bounty on the drawers for a cool, retro vibe that really suits this item.
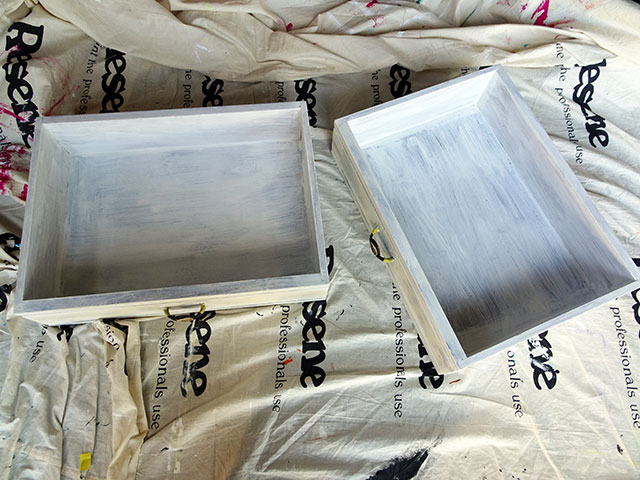
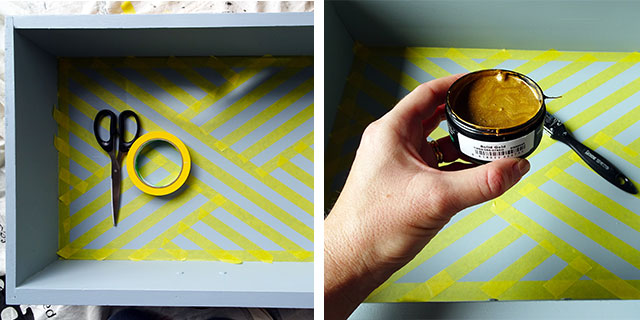
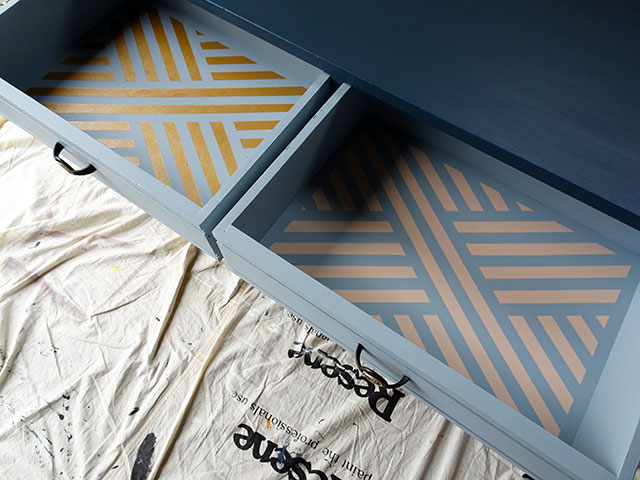
Step 4 To add a surprise pop of colour and for a bit of fun, mask out a diagonal stripe design on the inside of each drawer with some painter’s masking tape. Sarah made up the design as she went along but you could mask out a shape, text or just paint freehand! If you are taping, once the tape is in place, paint your design with a Resene testpot. Sarah used Resene Gold metallic in one drawer and Resene Shabby Chic on the other. Once touch dry carefully remove the masking tape.
Step 5 At this stage, you can choose to leave your piece it as is, or apply a clear finish. Sarah applied Resene Aquaclear Natural for a soft look finish.
top tip: If you prefer a higher gloss finish, use Resene Lustacryl semi-gloss or Resene Enamacryl gloss waterborne enamel instead of Resene SpaceCote Low Sheen. For an even flatter finish, use Resene SpaceCote Flat.
This DIY is brought to you by Upcycling for Good, a collaboration between Resene and The Salvation Army family stores. The project asks keen DIYers to upcycle second-hand items using Resene paint – look out for this regular feature on Habitat by Resene.
Published: 15 May 2019

