
latest
habitat tv

Say goodbye to the morning scramble for keys, coats and sunglasses and hello to this… see this and more videos
blog

Brick Bay unveils its poetic new folly for 2026
The winner of the 2026 Brick Bay Folly competition has been unveiled. Within the Wings… more
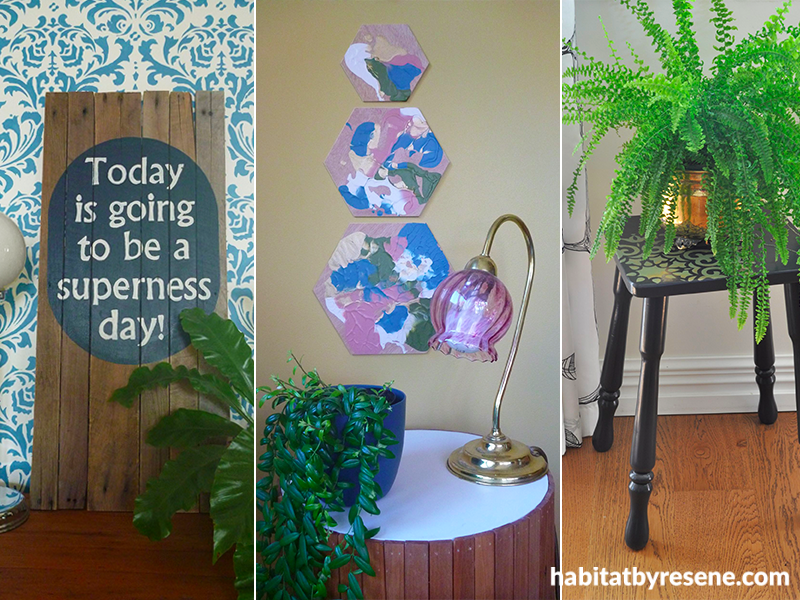
Easy DIY: 3 creative ideas for interiors
19 Oct 2017
Looking for a new DIY project to dive into this weekend? Using Resene testpots, Fleur Thorpe shares these three creative ideas that will look gorgeous in any interior.
Pallet kid's quote
Quote art and pallets are on trend at the moment. Instead of using a generic quote of someone else's, I used something cute that one of my kids once said.
You will need
- Old pallet wood
- Wood glue or screws/nails
- Resene testpots in Resene Dark Knight and Resene Triple Blanc
- Paint brush and a small craft paint brush
- A round item, such as a pot lid
- Favourite quote printed on to paper
- ?Ballpoint pen
- Sellotape
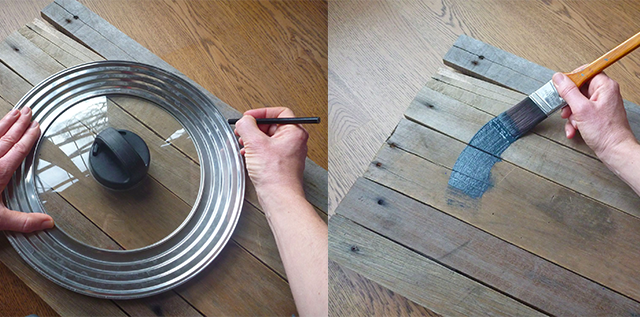

Pull apart the pallet, cut the wood to your desired length and reassemble using wood glue, screws or nails.
Using a large round item (I used a frying pan lid), trace around it to make your shape. I made an oval.
Paint the shape in Resene Dark Knight.
Once the paint has dried, place your printed quote in the middle of the painted shape and secure with sellotape.
Using a ballpoint pen, trace around each letter of the quote, pressing firmly so that you make an indentation in the wood.
Remove the stencil. Using a small craft paint brush, fill in the words with Resene Triple Blanc, following the indentation made with the pen.
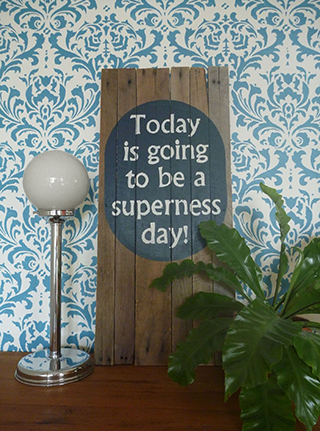
Fleur stencilled the damask pattern on the wall using Resene Jelly Bean and Resene Eighth Canterbury Clay.
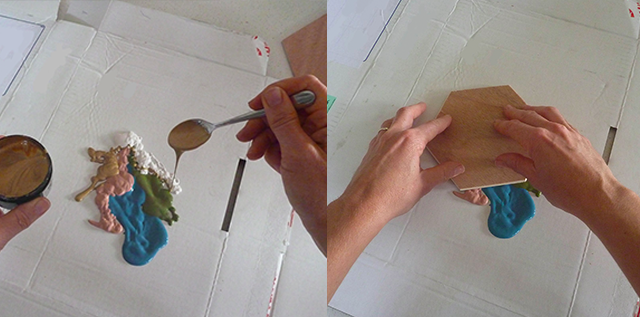
Hexagon Wall Art Squish
I did this project with my 9 year old daughter – it’s a great project to do with kids.
You will need
- Flattened cardboard box
- Wooden shapes
- Resene testpots in Resene Ebb, Resene Blumine, Resene Saratoga, Resene Coral Tree and Resene FX Metallic Gold Dust
- Spoon
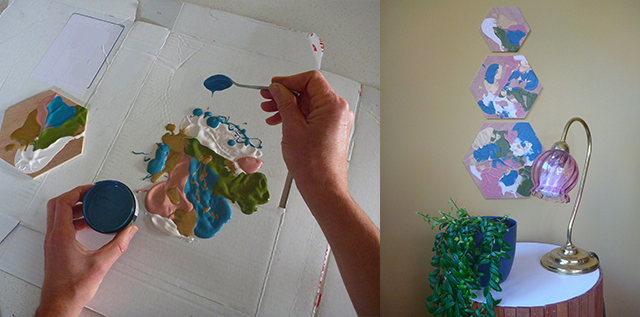
- Use an impermeable surface that won’t let the paint soak through, such as a flattened cardboard box.
- Using a spoon, dollop paint onto the cardboard.
- Carefully place your shape on top of the paint and press down. Remove the shape by pulling it straight up so that the paint doesn’t smear. (I cut my shapes out of thin plywood, but you could try craft stores for similar shapes made from MDF, or you could make your own from stiff cardboard).
- For the bigger shapes, I added more paint and experimented with pattern and the amount of pressure I applied while pushing down.
- Let dry for several days and then attach to the wall.
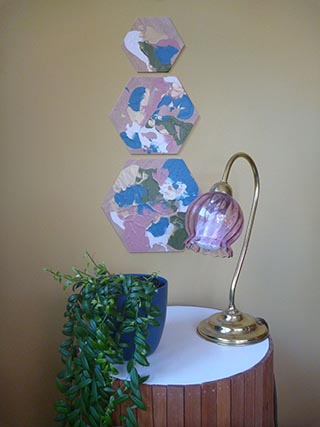
Wall painted in Resene Bittersweet.
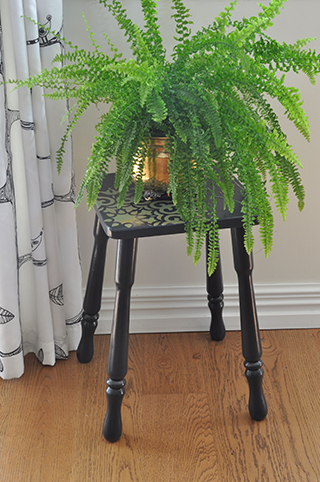
Paint a stool
It's amazing how a quick sanding and paint of an old stool can transform smaller pieces of furniture into something spectacular. This discarded red stool is unrecognisable after its makeover.
You will need
- 120 grit sandpaper
- Resene Lustacryl in Resene Double Foundry
- Paintbrush
- Resene testpots in Resene Woodland and Resene Metallic Gold Dust
- Painters tape
- Small piece of sponge
- Stencil
- Plate or piece of cardboard
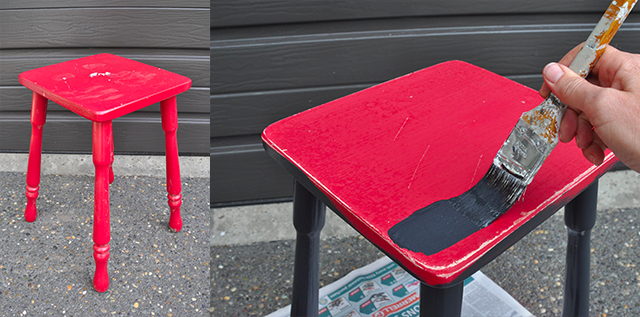
- Lightly sand the stool. (I knew the old red paint was water-based, so I didn’t need to prime the stool first).
- Apply two thin and even layers of Resene Double Foundry, allowing the first coat to dry before applying the second coat.
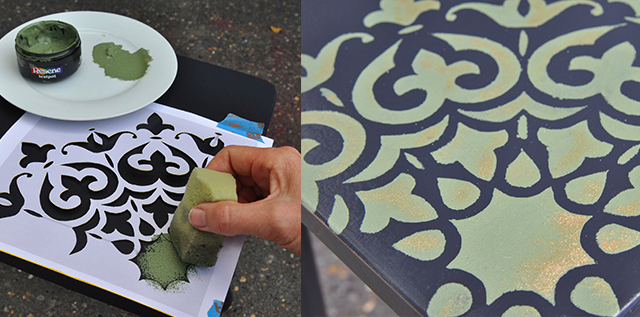
- Using loops of painters tape on the back and sides of the stencil, position the stencil in the desired location.
- Using a small piece of sponge, dip it into the Resene Woodland testpot and then dab it on to a plate or piece or scrap cardboard to ensure that you get a thin and even coverage of paint on the sponge. Too much paint on the sponge will cause bleed-through on the underside of the stencil.
- Dab the sponge on to the opening holes of the stencil and move it using a circular motion so that paint gets into all the tight corners. Don’t do this too vigorously as bleed-through can occur. Do this all over the stencil until it is all painted in.
- While the green paint is still wet, use the other end of the stencil to dip into the Resene FX Metallic Gold Dust testpot. Use this on the edges of the stencil openings.
- Leave to dry and voila! Your beautiful new stool awaits.
Published: 19 Oct 2017

