
latest
habitat tv

Say goodbye to the morning scramble for keys, coats and sunglasses and hello to this… see this and more videos
blog

Behind the scenes of NZ RenoTok with Brad and Alex
Over an exciting six-week TikTok Live series, NZ RenoTok’s season one was a roaring success, seeing four… more
Easy DIY: garden art
22 Mar 2017
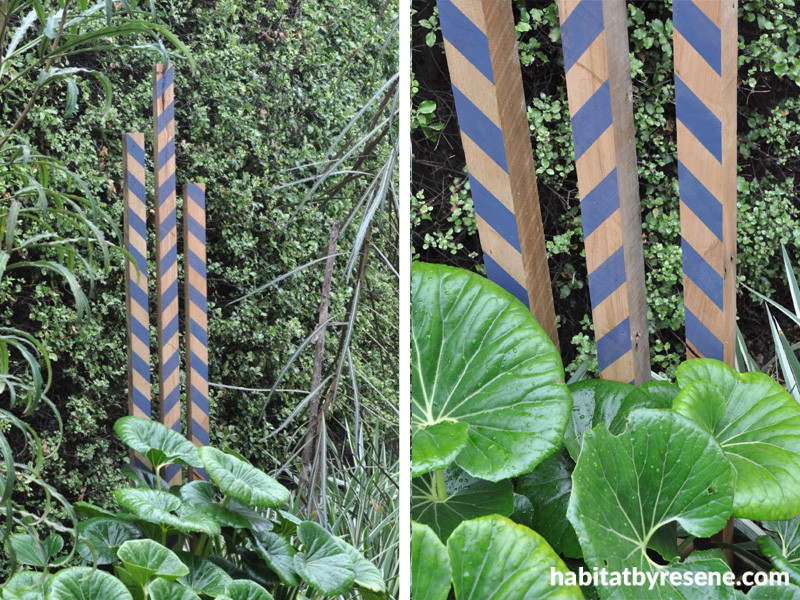
Before the summer deserts us altogether and as an easy way to brighten up the garden for winter, Fleur Thorpe shows us how to create a piece of garden art. With her own garden, Fleur wanted to create height and was inspired by the jagged, zig zag leaves of her lancewood trees.
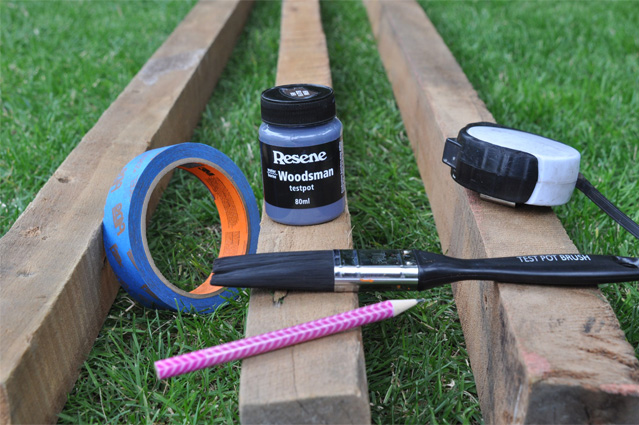
You will need:
- A Resene testpot of Resene Waterborne Woodsman Skywater
- Masking tape
- Measuring tape
- Pencil
- Paint brush
- 3 lengths of timber - these range in length from 140-160cm. If you want your art to last, use treated timber.
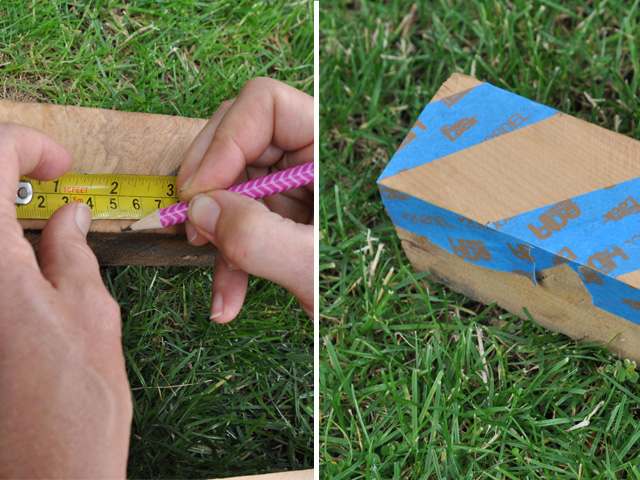
Step 1: Make pencil marks down the length of each timber at 5cm intervals.
Step 2: Mask off every second interval so that the stripes are on an angle. Remember to mask off the edges to protect it from the stain.
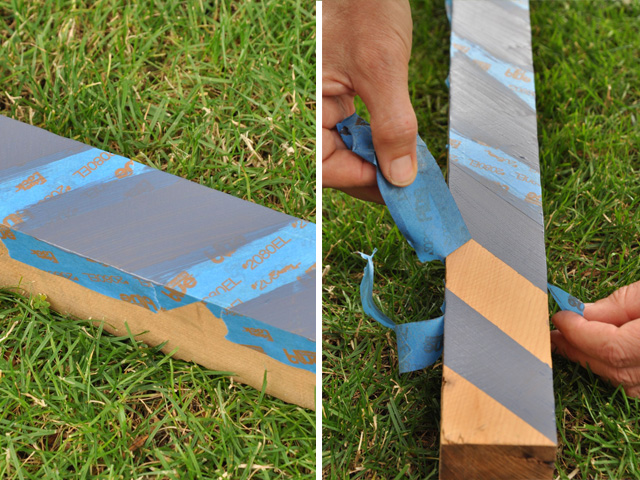
Step 3: Brush on the Resene Waterborne Woodsman stain, then remove the masking tape.
Step 4: Once the stain is dry, dig a hole for each piece of timber, about 30cm deep and 'plant' your art. Stamp the soil firmly around the base of the wood. For a more permanent setting, use quick-dry concrete.
Published: 22 Mar 2017

