
latest
habitat tv

Say goodbye to the morning scramble for keys, coats and sunglasses and hello to this… see this and more videos
blog

Re-living the 1980s through art
Clint C is an artist whose work instantly sparks recognition and joy. Based in Hamilton,… more
Easy DIY: teddy bear print
27 Apr 2017
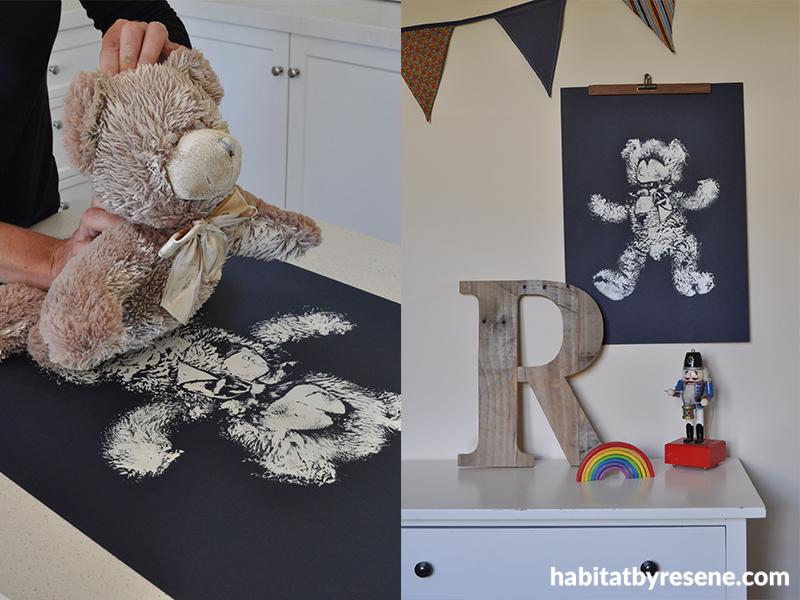
This is a great project for preserving the memory of a child’s well-loved bear or soft toy. Fleur Thorpe shows us how to create this cute print.
You will need
- Fluffy teddy bear
- Cardboard (Fleur’s is A3, but will it depend on the size of the bear)
- Testpot in Resene Cararra
- Small foam roller
- Roller paint tray
Step 1: Pour all the paint from the testpot into the roller tray.
Step 2: Load the roller up with lots of paint – don’t roll or squeeze the paint out of the roller on the tray. The bear is very absorbent, so you need a lot of paint on your roller to get any coverage.
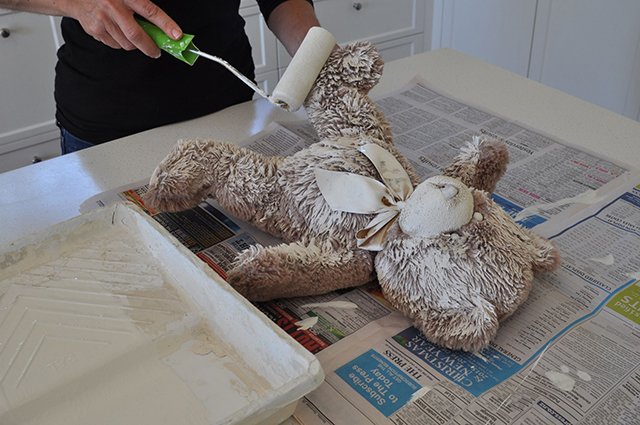
Step 3: Working quickly, roll the paint all over the bear’s front, paying attention that you cover all the surfaces that will be pressed on to the cardboard.
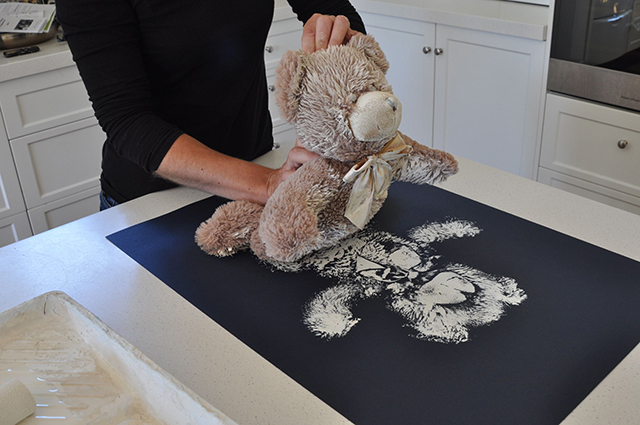
Step 4: Flip the bear over and carefully lay the bear on to the cardboard. Press the bear’s body down all over. Be careful not to move the bear on the cardboard.
Step 5: Gently take the bear off the cardboard, being careful not to smudge the print.
Step 6: Straight away, put the bear by itself into the washing machine on a normal cycle.
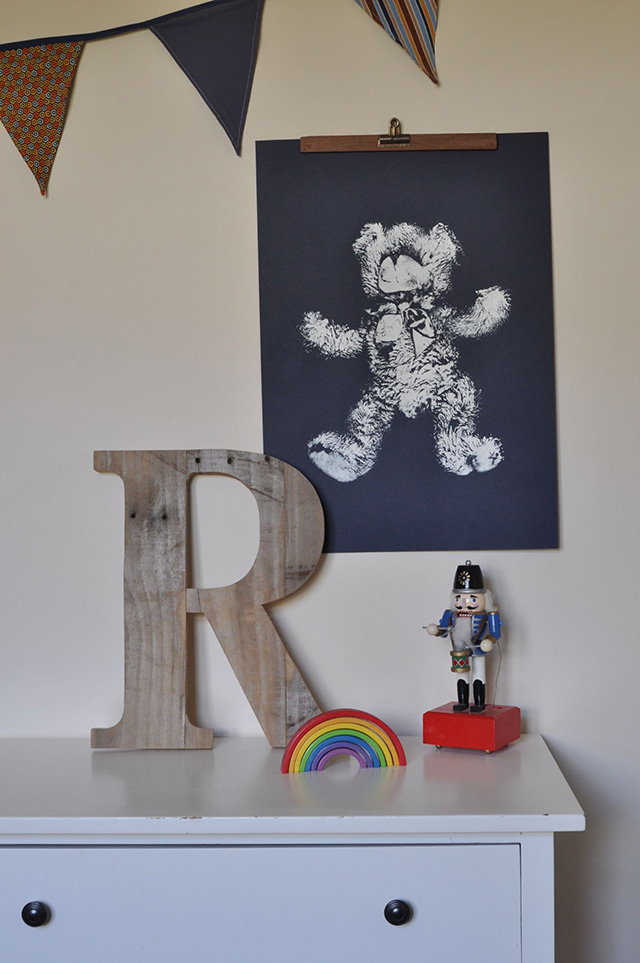
Teddy bear print painted in Resene Cararra. Walls painted in Resene Eighth Canterbury Clay. Drawers painted in Resene Pearl Lusta.
Tips
- Choose a bear that has a short snout and a soft nose so that it is easier to get a good print of the bear’s forehead and face. If the snout is too long and firm, it makes it difficult to make contact with the cardboard and could cause the bear to slip, therefore smudging your print.
- Before painting the bear, do a 'dry-run' and practice how you are going to press it onto the cardboard.
- You need to get enough paint on the bear so that a successful print will be made, but not so much paint that the bear’s fur becomes sodden with paint.
Published: 27 Apr 2017

