
latest
habitat tv

Say goodbye to the morning scramble for keys, coats and sunglasses and hello to this… see this and more videos
blog

Re-living the 1980s through art
Clint C is an artist whose work instantly sparks recognition and joy. Based in Hamilton,… more
Entertain the kids these upcoming holidays with these two fun DIY projects
19 Jun 2025
The next school holiday break is almost here and we’re getting you ready early so the kids have something to do. While jumping in puddles is fun, with the weather getting colder it’s a great idea to think of some fun projects to do inside. Here’s two fun DIY activities that you can do with the kids – and that they can have fun using well after the project ends too!
Ice ice baby goals
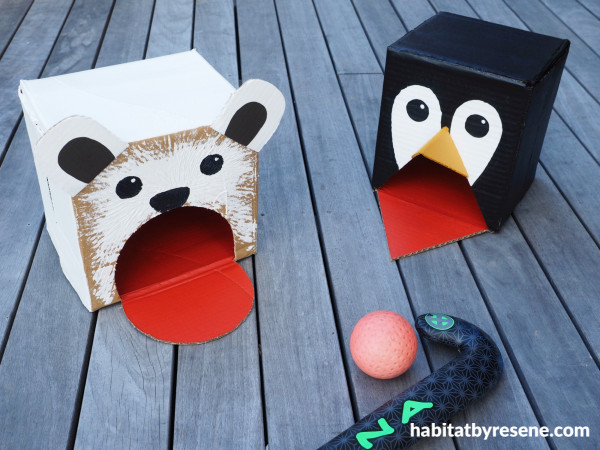
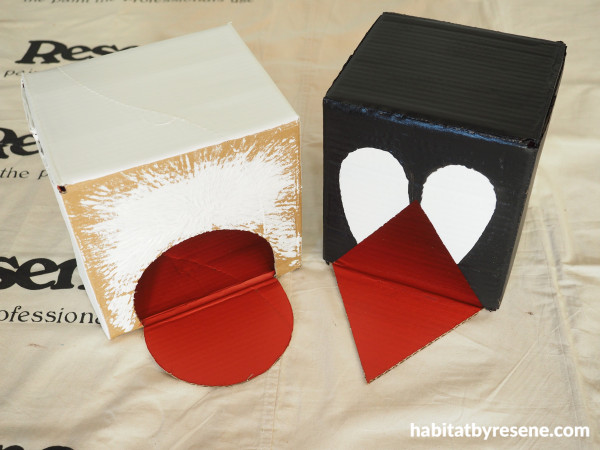
A great outdoor (or indoor if you have foam balls) game sure to keep the kids entertained. Use any old cardboard box you have lying around and let the kids be creative with what they paint on there. We went with a polar theme for ours – to match the chilly weather!
You will need:
• Cardboard boxes
• PVA glue
• Paintbrush
• Craft knife
• Bottle lid
• Pencil
• Scrap cardboard
• Hot glue gun
• Resene testpot paints in your children’s choice of colours. For these polar themed boxes Fleur used Resene Rice Cake, Resene Black, Resene Red Red Red, Resene Monkey and Resene Pirate Gold
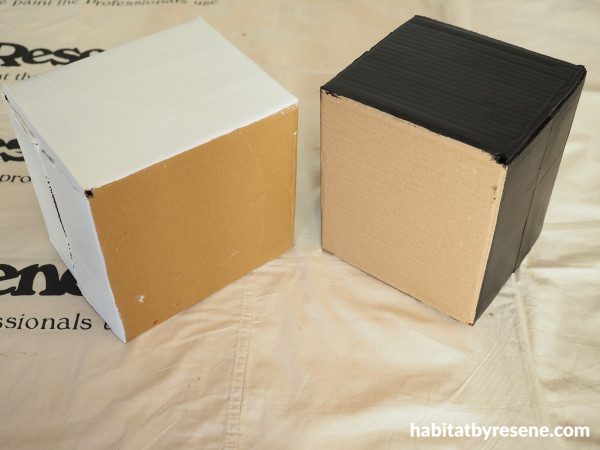
Step 1: Start by removing the tape from the boxes and gluing all the flaps shut with some PVA glue. Next let the kids paint a basecoat of their chosen colour over the boxes, all but one side if you’re following Fleur’s design. Fleur used Resene Rice Cake for one and Resene Black for the other. Apply two coats.
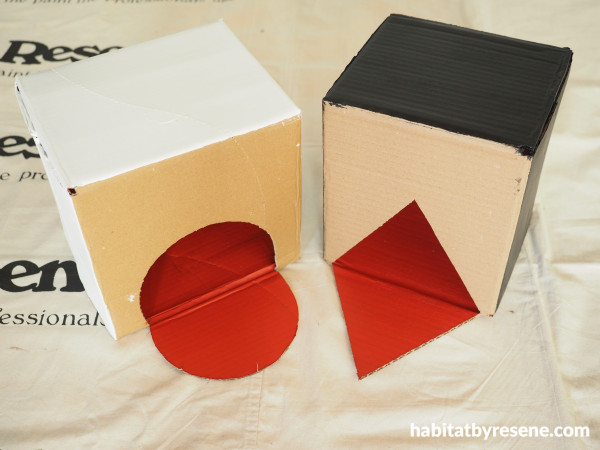
Step 2:Now is time to cut a mouth (hole for the ball). If you’re following Fleur’s design, use a craft knife to cut a circular flap in the front of the white box and a triangular flap in the black box. Open the flaps and paint it and the inside of the box with two coats of Resene Red Red Red or another colour your children choose.
Note: An adult should always be in control of the craft knife, or be supervising children using one at all times.
Step 3: Let the kids finish painting their boxes in whatever design they have chosen. For Fleur’s, dollop some Resene Rice Cake onto the front of the white box above the flap and use a fork to scrape the paint out so that it looks like fur. Paint the front of the black box with Resene Rice Cake with Resene Black to look like penguin eyes.
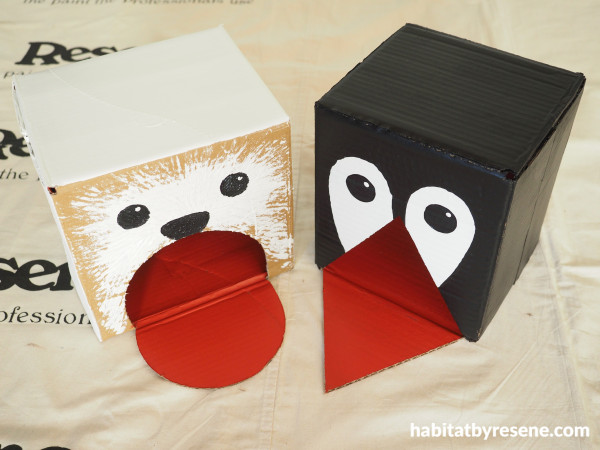
Step 4:On both boxes, add eyes by tracing around a bottle lid with a pencil and paint these in with more Resene Black and a dab of Resene Rice Cake.
Step 5:Let the kids add other details on if they want like ears, whiskers or arms! For Fleur’s design, use a craft knife and some scrap cardboard to cut out two ear shapes for the polar bear box and paint these with Resene Rice Cake and Resene Monkey. Use hot glue to glue these on to the top corners of the box. For the penguin, cut out a triangular beak shape, paint this in Resene Pirate Gold, and attach to the top of the triangular cut out with more hot glue.
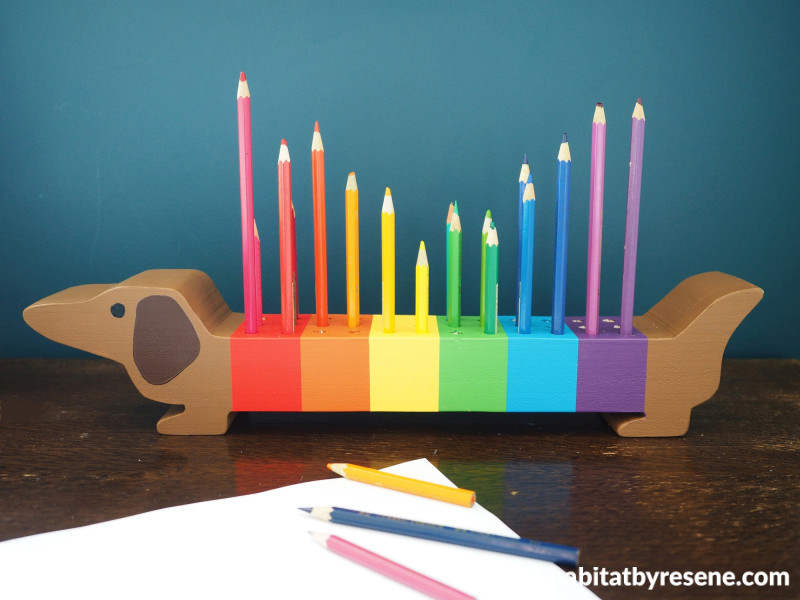
Pawfect pencil pup
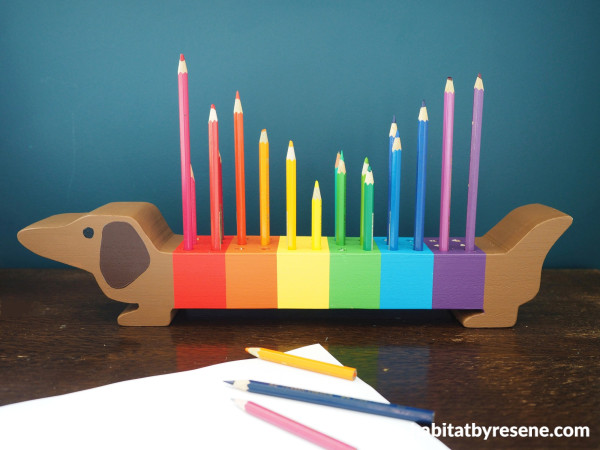
This project is not only adorable but also functional. The kids will have somewhere to put their pencils and they can even match them up to their chosen Resene testpot colours they choose for their dog!
You will need:
• Length of untreated pine, 42cm long x 9cm tall x 6cm wide
• Jig saw or band saw
• Sandpaper
• Pencil and ruler
• Electric drill and 8mm drill bit
• Paintbrush
• Resene Quick Dry
• Painters tape
• Resene testpot paints in your children’s favourite colours. Fleur used Resene Jambalaya, Resene Bright Red, Resene Rock Spray,Resene Bright Spark, Resene Bilbao, Resene Optimist, Resene Grapevine, Resene Brown Pod and Resene Black
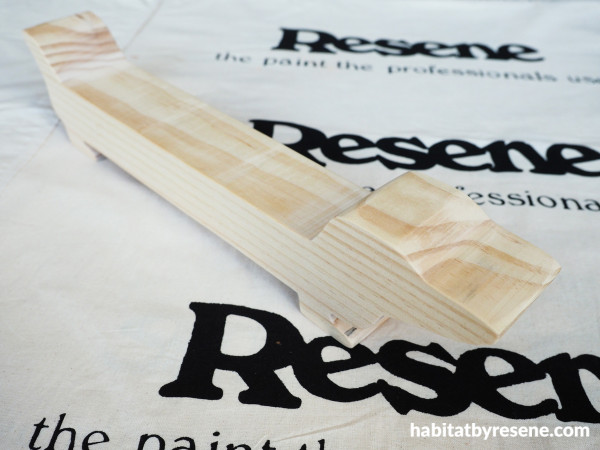
Step 1:Start by drawing the dog shape on to the side of the wood and use a jig saw or band saw to cut the shape out. Sand any rough edges smooth with sandpaper and wipe off any dust.
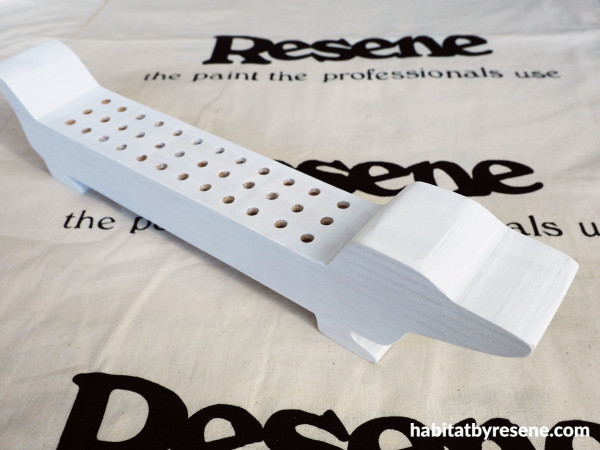
Step 2:Measure and mark out a grid for the holes along the back of the dog and use an 8mm drill bit and an electric drill to drill all the holes. Sand any rough areas smooth and wipe off any dust. Paint on one coat of primer using Resene Quick Dry.
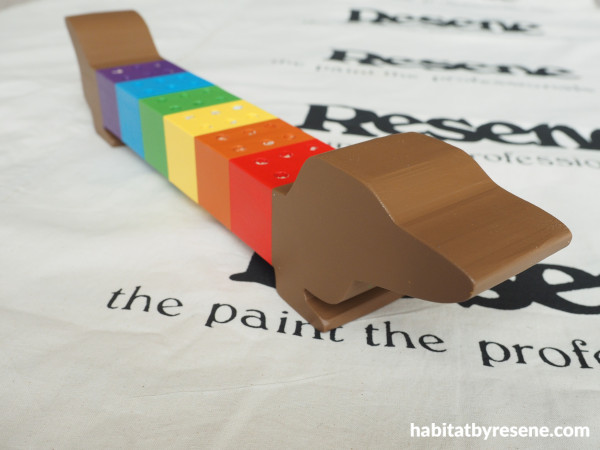
Step 3:Let the kids choose their favourite Resene testpot colours and let them get creative with their design. If they love the look of this one, they can replicate Fleur’s design using two coats of Resene Jambalaya for the front and back and Resene Bright Red, Resene Rock Spray, Resene Bright Spark, Resene Bilbao, Resene Optimist and Resene Grapevine for the coloured stripes. If opting for stripes, use painters tape to tape off equally spaced stripes and paint these with two coats of your chosen colours.
Step 4: Paint on any details in more of your chosen colours. Fleur used Resene Brown Pod for the ears and Resene Black for the eyes.
The wall is painted in Resene Tarawera.
project and images Fleur Thorpe
Published: 19 Jun 2025

