
latest
habitat tv

Say goodbye to the morning scramble for keys, coats and sunglasses and hello to this… see this and more videos
blog

Reader roundup: See what our readers have been up to!
Refurbished vintage furniture, charming exteriors and magnet walls for kids. These projects are sure to… more
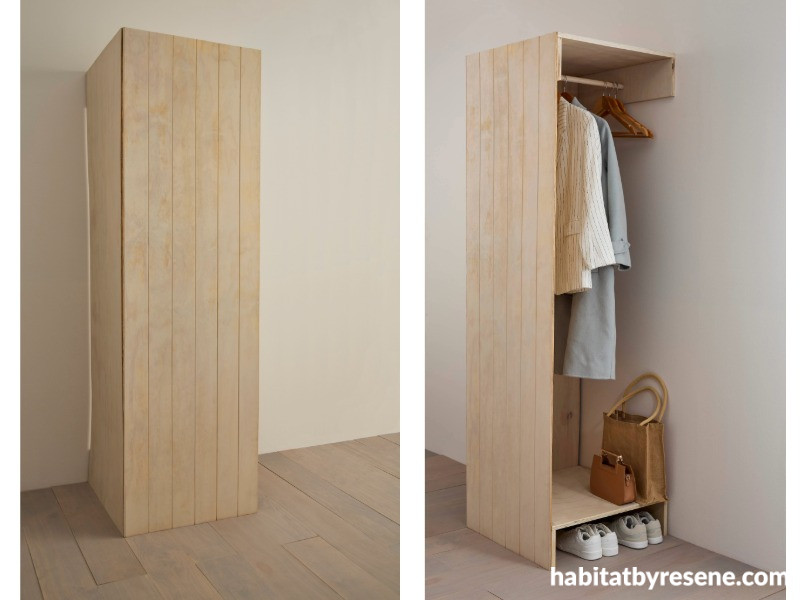
How to build a wall-drobe for your entranceway
27 Aug 2025
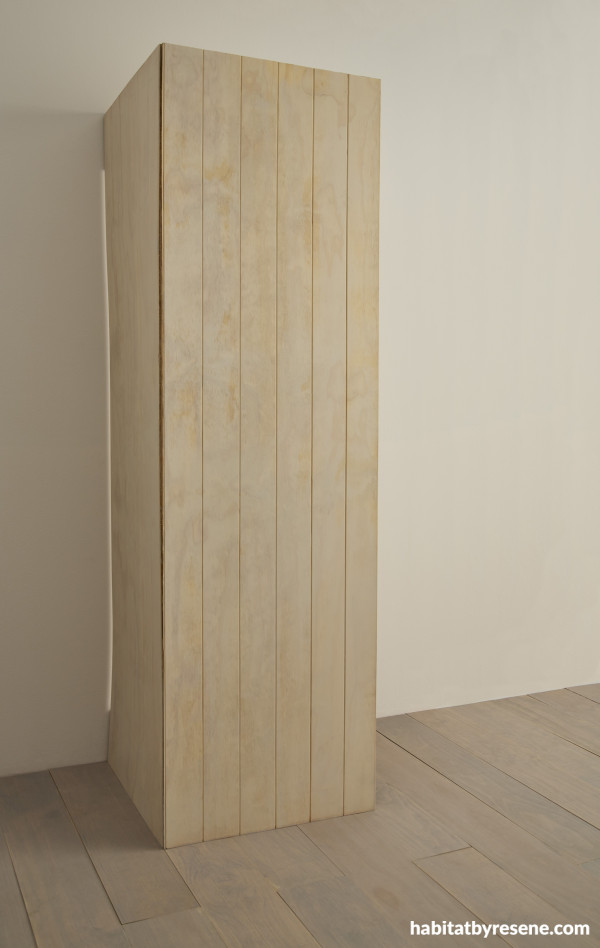
Make a functional and fabulous first impression with a streamlined entranceway wall-drobe – the ideal storage spot for coats, bags, and shoes. With Pinterest searches showing a surge in wall-drobe popularity for small homes, baches, and cabins, this on-trend design keeps your entryway tidy and stylish.
For a soft, cohesive look, we’ve colour washed the timber in Resene Colorwood Breathe Easy, enhancing the natural panelled texture while keeping the palette calm. For a seamless effect, try painting your wall-drobe in the same colour as your walls to let it blend beautifully into the space.
You will need:
- Circular saw
- Drill
- Twist drill (3mm)
- Forstner drill bit (22mm)
- Screwdriver
- Counter sink bit
- Resene EzyFill lightweight filler
- Screws
- PVA glue
- Resene Colorwood stain of your choice – we used Resene Colorwood Breathe Easy
Wood materials
- V-groove front panel: 1800mm (h) x 600mm (w) x 9mm (d)
- V-groove side panel: 1800mm (h) x 600mm (w) x 9mm (d)
- Plywood top and base shelf: 600mm (h) x 600mm (w) x 18mm (d) plywood
- Shelf supports: 600mm x 150mm x 18mm
- Wooden hanging rail pole: 600mm (h) x 22mm diameter
Step 1: Cut the wooden materials to size, as above.
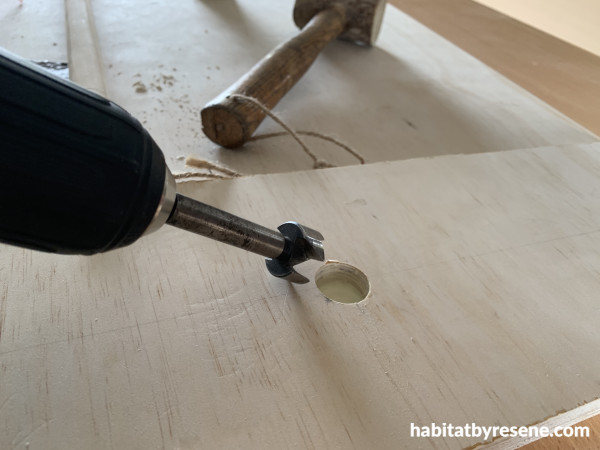
Step 2: Drill a hole with a 22mm Forstner drill bit in each side of the shelf supports - 75mm from the side and 50mm from the bottom. (This is for the wooden rail to fit into).
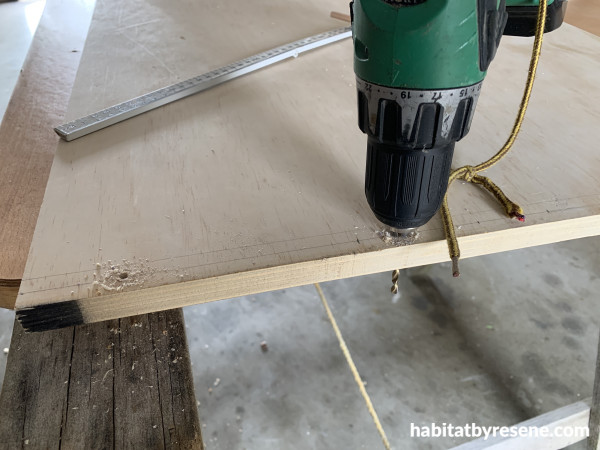
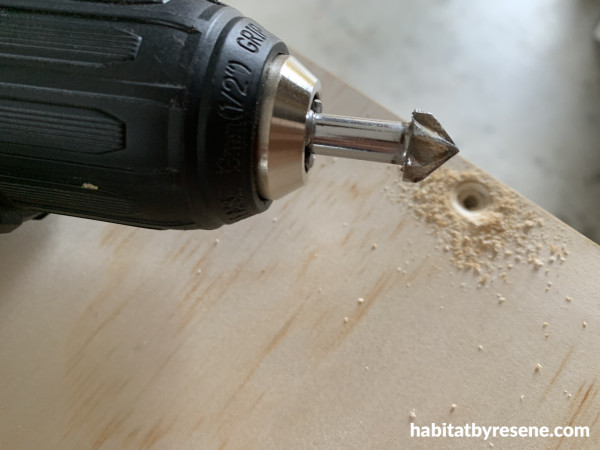
Step 3: Drill four holes on each side of the plywood top and base shelf, on the sides that will screw into the support panels. Countersink holes.
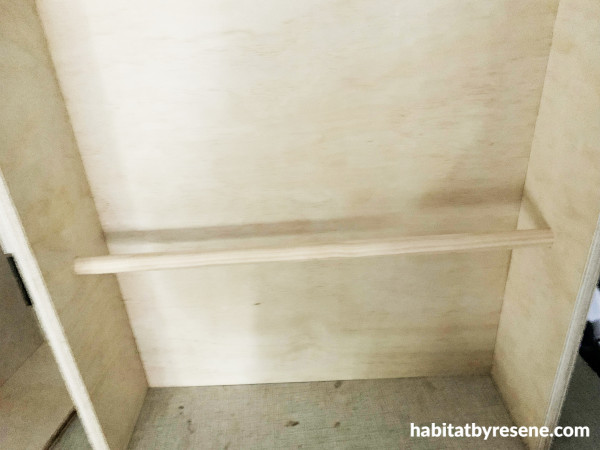
Step 4: Insert the wooden hanging rail into the 22mm holes, and glue them in for support.
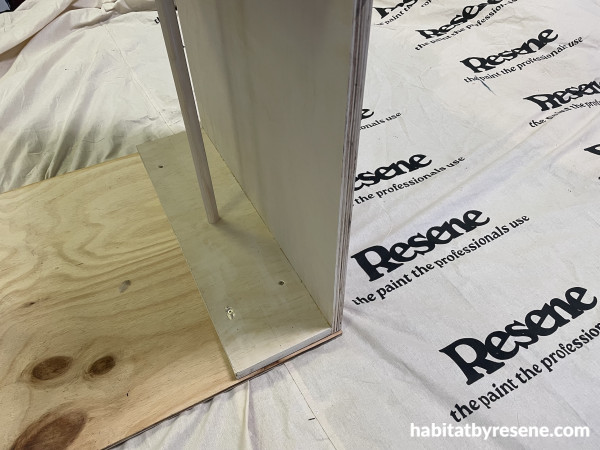
Step 5: Screw the top and bottom panels into the support panels and fill the screw holes with Resene EzyFill lightweight filler.
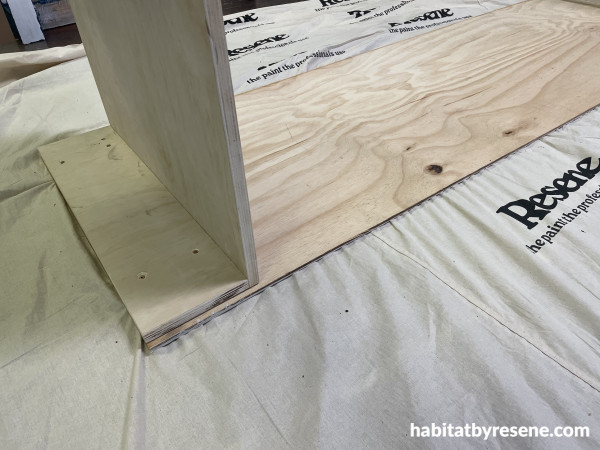
Step 6: Screw the vertical V-groove panels onto what will be the ‘back’ and ‘outer side’ of your horizontal shelves.
Step 7: Sand the entire project to remove any sharp edges or wood splinters. Clean off any sanding dust.
Step 8: Using a brush, colour wash the project in Resene Colorwood Breathe Easy.
Step 9: Attach the wall-drobe to your wall and enjoy having a place to store coats, shoes and bags.
Above: View from outer-back angle. Wall-drobe stain colourwashed in Resene Colorwood Breathe Easy, wall in Resene SpaceCote Low Sheen in Resene Quarter Biscotti and floor stained in Resene Colorwood Bleached Riverstone.
project Ivan Moses
main image Bryce Carleton
Published: 27 Aug 2025

