
latest
habitat tv

Say goodbye to the morning scramble for keys, coats and sunglasses and hello to this… see this and more videos
blog

Reader roundup: See what our readers have been up to!
Refurbished vintage furniture, charming exteriors and magnet walls for kids. These projects are sure to… more
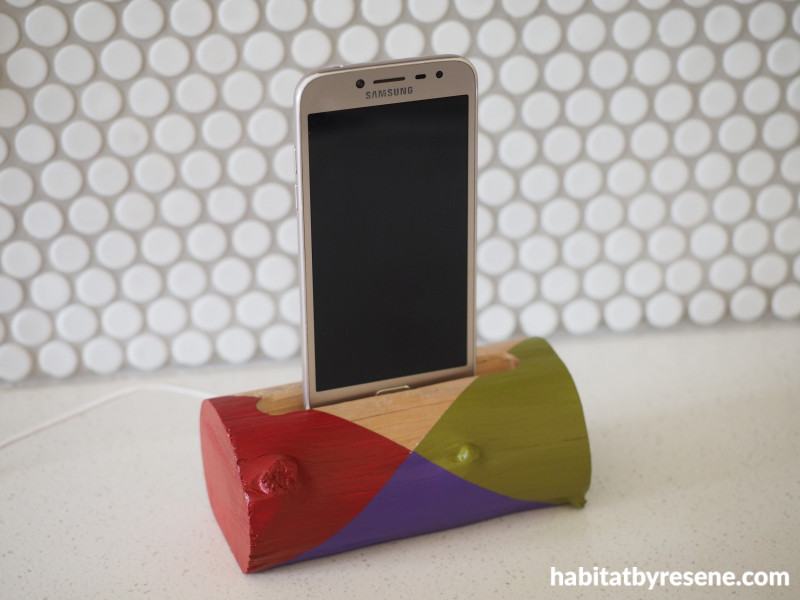
Go against the grain and create a wooden charging station
26 Aug 2021
Turn a piece of wood into a creative and useful charging port. This DIY charging station holds your phone vertically, so you can continue to use it while it charges. Paint the port with a vibrant range of Resene colours to match your décor or go for a beachy theme and paint ocean waves along the base.
You will need:
- A length of thick driftwood or a timber offcut about 30cm long – Fleur’s was 7.5cm in diameter
- Saw
- Router
- Sandpaper
- Electric drill and a large drill bit
- Ruler and pencil
- Paintbrush
- Purple painters’ tape
- Resene Quick Dry
- Resene testpots in your choice of colours – Fleur used Resene Salsa, Resene Planter and Resene Blue Diamond

Step 1: Start by cutting your piece of wood to about twice as long as you want the finished piece to be. It is easier to work with a longer piece of wood when using a router. Decide which side is going to be the bottom and flatten this off. Fleur used a saw to cut the bottom off or you could use sandpaper.

Step 2: Clamp your piece of wood to a work bench and mount a straight edge next to it as a guide for the router to run along. Use the router and a rebating router bit to make a slot wide enough for your phone in the top of your wood about 10cm long and about 13-15mm deep. Trim down the length of wood to the desired finished length. Fleur’s is 14cm long. Use some sandpaper to sand down any rough edges.

Step 3: Drill a hole in the middle of this slot right through to the bottom of the wood. Make sure the hole is big enough to fit the plug of your phone charger cord. On the underside, cut a groove out from the hole so that your charger cord will fit in it and so the piece of wood will still sit flat on a flat surface.

Step 4: For painting the wood, use a ruler and measure the halfway point along the front of the wood. Use purple painters’ tape and tape off one end of the wood. Paint on one coat of Resene Quick Dry and let dry.

Step 5: Paint on two coats of your first chosen colour – Fleur used Resene Salsa – allowing for each coat to dry before applying the next. Remove the tape while the topcoat is still wet.

Step 6: Once the paint has dried apply more painters’ tape, this time from the other end and make sure it intercepts the Resene Salsa paint at the midway mark that you made earlier. Paint over the raw wood with Resene Quick Dry, followed by two coats of your second colour – Fleur used Resene Planter – again allowing for each coat to dry.

Step 7: Do not remove the tape at this point, but instead add a shorter length to finish off the last triangle where the two paint colours intercept. Paint this triangle in two coats of your third chosen colour – Fleur used Resene Blue Diamond. Remove all the painters’ tape.

Step 8: (Optional) You may want to consider using some epoxy to permanently glue the plug of the charger cable into the drilled hole. When the epoxy is setting, make sure you have your phone plugged into the cable so that the cable dries at the correct angle, but be careful not to glue your phone to the piece of wood!
project and images Fleur Thorpe
Published: 26 Aug 2021

