
latest
habitat tv

Say goodbye to the morning scramble for keys, coats and sunglasses and hello to this… see this and more videos
blog

Reader roundup: A whimsical shed, blushing doors and exterior refreshes
We’ve got a great roundup of projects from our readers this month. From community paint… more
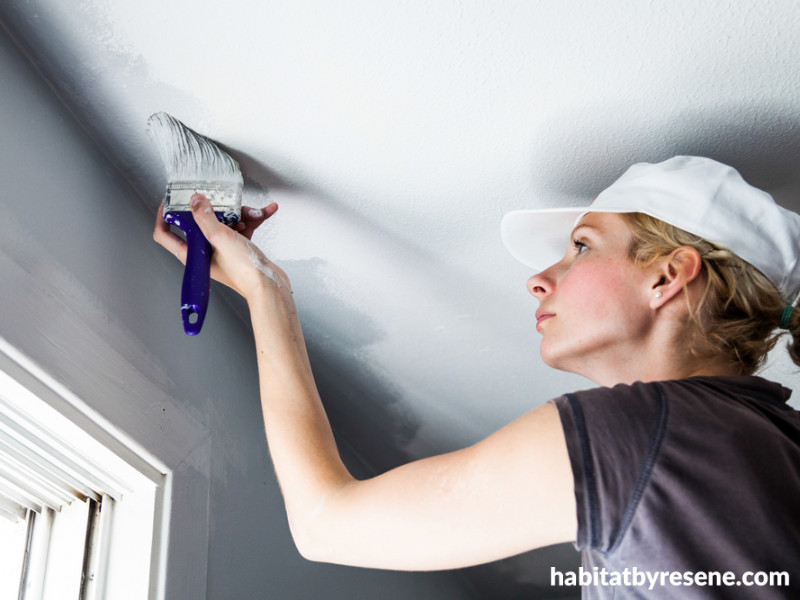
How to paint a ceiling
29 Mar 2016
Ceilings are usually painted using flat or very low-sheen paints as glossier finishes show up any defects in the surface. It’s not so bad when your light fitting has a solid top and light is cast downwards but for those that direct light upwards, you don’t want to wince at your less-than-perfect ceiling surface every time you turn on the lights.
Resene has a number of products suitable for ceilings:
Resene Ceiling Paint
Resene SpaceCote Flat is a washable waterborne enamel wall and ceiling paint
Resene Earthsense Ceiling Paint made from a special renewable pigment
Top tip: Ask for Resene Fly Deterrent to be added to your chosen ceiling paint. It can be added to decorative waterborne paints and discourages flies from sitting on the surface. The less they sit the fewer and smaller the fly spots, which helps to keep your ceiling looking cleaner.
And for bathroom, kitchen and laundry ceilings, use Resene SpaceCote Flat Kitchen & Bathroom to minimise mould growth.
Painting a ceiling
step 1 If your ceiling is new, make sure it is clean and dust free and has been sealed with either Resene Broadwall Waterborne Wallboard Sealer, Resene Broadwall Surface Prep & Seal or Resene Sureseal (recommended for bathrooms and wet areas).
If the ceiling is previously painted, wipe it down with a clean cloth using a solution of Resene Interior Paintwork Cleaner and clean water, paying particular attention to any fly dirt.
step 2 Fill any gaps and cracks before sanding the filled areas and spot priming.
step 3 Protect your flooring and furniture with drop sheets. It is also a good idea to mask light fittings so they don’t get covered in paint spatter.
step 4 Using a PAL No. 1 roller sleeve, a roller handle and extension pole, a roller tray and 50mm cutting-in brush, pour 1 to 1½ litres of paint into the tray. Now add about half a litre of paint to a paint pot. Replace the can’s lid until you need it again.
step 5 It is important to paint the ceiling in one go. Work across the shortest distance of the ceiling and complete each coat in a single application without stopping, and away from light sources such as large windows and skylights. Paint the ceiling before the walls and any joinery or trims – it is easier to cut into the top of the wall than the edge of the scotia so it makes sense to bring the ceiling paint over the edge of the scotia on to the wall.
step 6 Using the brush, paint around the edges of the ceiling and around light fittings etc. Work on a 40-50cm section each time, laying off the paint as you go. Start about 15cm from the edge and work the paint back to the just completed area before continuing along the scotia.
step 7 Work the roller well into the paint – with new roller sleeves this usually takes a couple of minutes. It’s a good idea to lightly dampen the roller first. Begin in the corner closest to any light sources. When you first start, place the roller about a metre from any corners and edges and roll back towards them, laying on the paint evenly.
step 8 Aim to complete approximately 1m2 for each roller load, and lay off the paint in the same direction as you go. Get as close to the corners and edges as you can so that the brushed area doesn’t create a ‘frame’ around the edge.
step 9 Once the full width is complete return to the starting edge and repeat the process laying off as you go, alongside and slightly over the previously completed section.
step 10 Once the ceiling is complete allow two to four hours to dry and apply a second coat. Ensure the room has good ventilation and warmth to ensure the paint cures well.
watch Painting a ceiling with Resene SpaceCote Flat
Published: 29 Mar 2016

