
latest
habitat tv

Say goodbye to the morning scramble for keys, coats and sunglasses and hello to this… see this and more videos
blog

Re-living the 1980s through art
Clint C is an artist whose work instantly sparks recognition and joy. Based in Hamilton,… more
How to create a DIY striped cabinet
06 Jul 2022
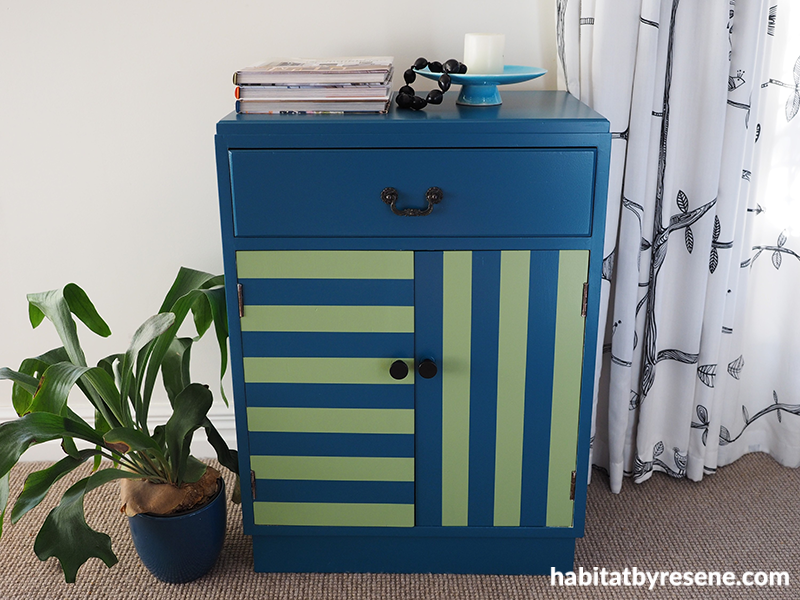
The use of lines in interior design is perfect for creating height and width, to capture movement and breathe new life into a piece of furniture. This striped cabinet is reminiscent of pyjamas and looks adorable as a standout feature in a bedroom.

This pyjama-striped cabinet is bright and fresh in Resene Teal Blue and Resene Koru. Wall in Resene Carrara and architraves in Resene Half Rice Cake.
You will need:
- Cabinet
- Sandpaper
- Cloth/rag
- Resene Quick Dry
- Resene testpots (Fleur used Resene Teal Blue and Resene Koru)
- Small microfibre roller
- Resene Lustacryl semi-gloss waterborne paint
- Paintbrush
- Painter masking tape

Step 1: Start by removing the handles and giving all surfaces a sand with medium grit sandpaper. Wipe the dust away with a soft cloth/rag. Use a small microfibre roller to apply one coat of Resene Quick Dry. Once this has dried, give it a quick sand with fine grit sandpaper. Wipe the dust away again.

Step 2: Paint the body of the cabinet and the drawer front in Resene Teal Blue. Use Resene Lustacryl semi-gloss waterborne enamel for a hardwearing surface. Paint the two cupboard doors in Resene Koru. Fleur left the paint to cure overnight before doing the next stage.

Step 3: Measure the width of one cupboard door and divide this by the number of stripes you want. Now measure the length of the other door and divide this by the number of stripes you want. Fleur managed to get her stripes to be the same width on both doors, but you could try doing different sized stripes on either door for a different look. Use painter masking tape to tape the stripes. Use a paintbrush to paint on more Resene Teal Blue to create the blue stripes.

Step 4: Paint two coats and remove the tape as soon as you finish the second coat, while the paint is still wet. Once the paint has cured overnight, reattach the handles.
project and images Fleur Thorpe
Published: 06 Jul 2022

