
latest
habitat tv

Say goodbye to the morning scramble for keys, coats and sunglasses and hello to this… see this and more videos
blog

Brick Bay unveils its poetic new folly for 2026
The winner of the 2026 Brick Bay Folly competition has been unveiled. Within the Wings… more
How to make your own chic and classic DIY round side table
19 May 2022
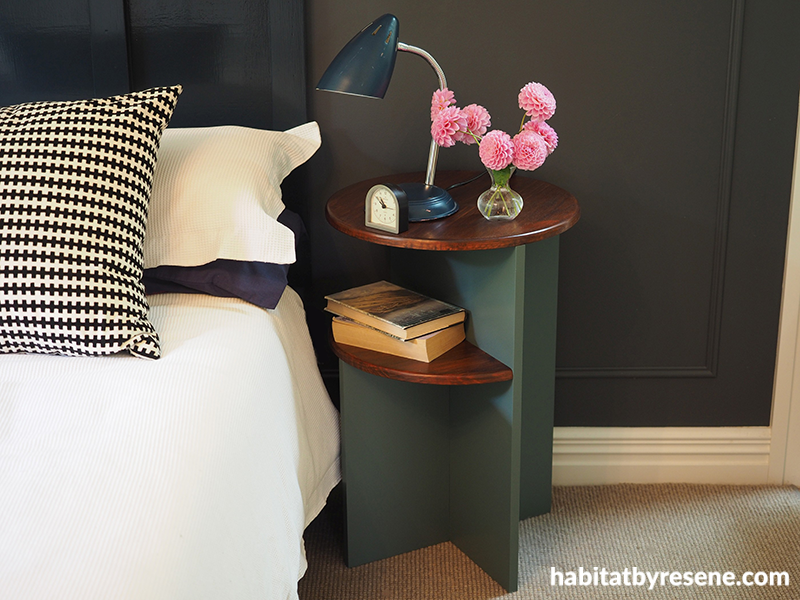
This DIY round side table makes for a fantastic addition to a bedroom. If you have books stacking up on the ground, or simply want a spot to place a vase of flowers or a mug of coffee, this DIY is a perfect weekend activity.

This side table in Resene Green Meets Blue looks chic against its backdrop of Resene Tuna (on the walls), skirting boards in Resene Half Rice Cake and the headboard in Resene Dark Knight.
You will need:
- 2m piece of 450mm x 18mm untreated laminated pine panel
- Saw
- Sandpaper
- Pencil
- String
- Nail
- Jig saw
- Electric drill
- Screws
- Small microfibre roller
- Wood glue
- Cloth
- Resene Quick Dry
- Resene paint in your choice of colour (Fleur used Resene Lustacryl tinted to Resene Green Meets Blue)
- Paintbrush
- Resene Colorwood in your choice of stain colours (Fleur used Resene Teak)
- Resene Aquaclear
How to:

Step 1: Start by cutting your pine panels into the following sizes:
- 45cm wide x 66cm tall (main base)
- 7cm wide x 66cm tall (tall base leg)
- 7cm wide x 42cm tall (short base leg)
These will form the base of the table. For the tabletop and shelf, cut two pieces as follows:
- 45cm x 45cm (tabletop)
- 45cm x 22cm (shelf)

Step 2: To make a round tabletop, make a simple compass out of a nail, string and pencil to make a circle that has a diameter the same size as the widest piece of wood (i.e. 45cm). For the shelf, make a semi-circle that has a radius the same width as the smallest piece of wood (i.e. 21.7cm). Use a jig saw to cut these out and sand the edges smooth.

Step 3: Prime the three base pieces of wood and legs with Resene Quick Dry. Once this has dried, give it a light sand with a fine grit sandpaper.

Step 4: Paint the base wood with Resene Lustacryl tinted to Resene Green Meets Blue. Fleur used a small microfibre roller for a nice finish.

Step 5: Leave the paint to cure overnight, then use wood glue to stick the short base wood into place in the middle of the largest piece of wood. Secure it with screws by screwing in from the other side. Make sure you countersink your drill holes so that the screws sit flush with the wood.

Step 6: Attach the last remaining piece of wood to the opposite side. Glue it first, then screw it into place.

Step 7: For the tabletop and shelf, stain with Resene Colorwood in Resene Teak. You will usually need two coats. You can do fewer or more coats depending on the depth of colour you would like. Once dry, seal with two coats of Resene Aquaclear.

Step 8: To secure the tabletop and shelf to the base, glue them in place first. Add blocking so you can screw into the base, then the top and shelf from underneath.
project and images Fleur Thorpe
Published: 19 May 2022

