
latest
habitat tv

Say goodbye to the morning scramble for keys, coats and sunglasses and hello to this… see this and more videos
blog

Brick Bay unveils its poetic new folly for 2026
The winner of the 2026 Brick Bay Folly competition has been unveiled. Within the Wings… more
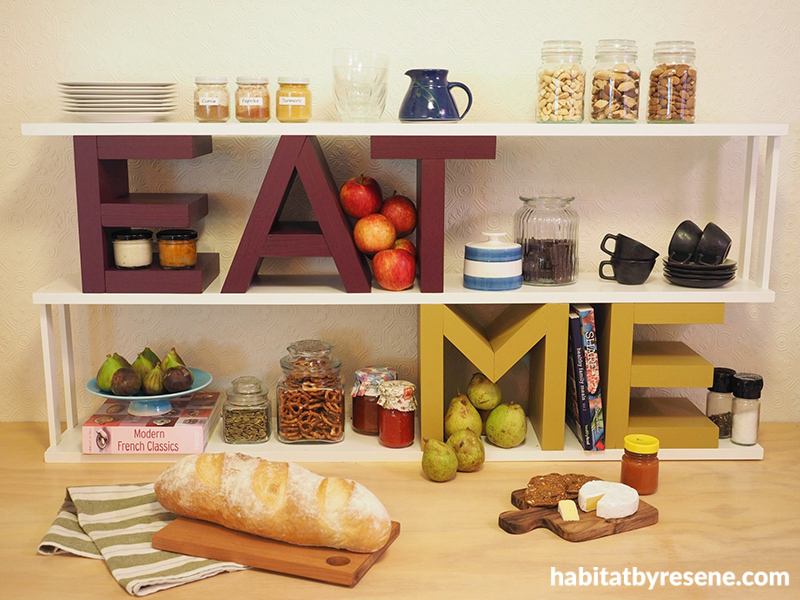
How to make your own DIY ‘Eat Me’ kitchen shelf
26 May 2022
Inject a little fun and colour into your kitchen with this clever wooden DIY. The shelf spells out ‘Eat Me’, and is quirky and bright in Resene Blackberry,Resene Lemon Ginger and Resene Half Rice Cake. It’s a great project for the weekend over the cooler months.

This DIY lettered kitchen shelf is in Resene Blackberry,Resene Lemon Ginger and Resene Half Rice Cake. The wall is in Resene Wallpaper Collection RD0151 and Resene Cararra.
You will need:
- 4 lengths of 1.8m x 180mm x 18mm untreated pine planks
- 3 lengths of 1.2m x 180mm x 18mm untreated pine planks
- 8m x 30mm x 10mm untreated pine trim
- Wood working clamps
- Mitre saw
- Sandpaper
- Resene Quick Dry
- Small microfibre roller
- Paintbrush
- Resene testpots in your choice of colours (Fleur used Resene Blackberry, Resene Lemon Ginger and Resene Half Rice Cake)
- Wood glue
- Jig saw
- Electric drill
- Black screws
How to:

Step 1: Start by gluing the four 1.8m lengths of pine together to form two pairs. Fleur used wood glue for this and clamped them tight and left them overnight. If you don’t have clamps, place heavy items on them, such as stacks of books.

Step 2: Cut the glued wood to make your letters. You might find it helpful to print out your letters online and take measurements from these for the different lengths required. Make sure that your finished letters will all be the same height (Fleur’s are 25cm tall). Sand any rough bits smooth.

Step 3: Use a small microfibre roller to apply one coat of Resene Quick Dry to the letter pieces. When this is dry, give it a light sand with fine sandpaper.

Step 4: Paint your letters, again using a small microfibre roller. Fleur painted the word “Eat” in Resene Blackberry and the word “Me” in Resene Lemon Ginger.

Step 5: Glue your letters together. Fleur found it best to glue these in place on to the shelves, rather than gluing the letters independently and then gluing them to the shelves. For the shelves she used three lengths of 1.2m pine wood (180mm wide by 18mm thick). Fleur primed them with Resene Quick Dry, gave them a light sand, and then painted them with two coats of Resene Half Rice Cake. Use a jig saw to cut notches out of the ends for the upright supports.

Step 6: Once you’ve glued everything in place, leave it overnight to dry. The next day screw the letters to the shelves, by either screwing in from underneath a shelf or at an angle from the back. To finish, prime four lengths of 30mm x 10mm pine trim with Resene Quick Dry, give it a light sand and paint it with two coats of Resene Half Rice Cake. Then insert these into the notches on the shelves that you made earlier. Screw these into place with black screws.
project and images Fleur Thorpe
Published: 26 May 2022

