
latest
habitat tv

Say goodbye to the morning scramble for keys, coats and sunglasses and hello to this… see this and more videos
blog

Brick Bay unveils its poetic new folly for 2026
The winner of the 2026 Brick Bay Folly competition has been unveiled. Within the Wings… more

Make this easy rustic side table
28 Sep 2017
Painted in a colour palette of dusky blue, green and grey, we rustled up this rustic side table with a few tools and Resene testpots. The colour scheme is perfect for the beachy bach, or for a hint of coastal colours in your home.
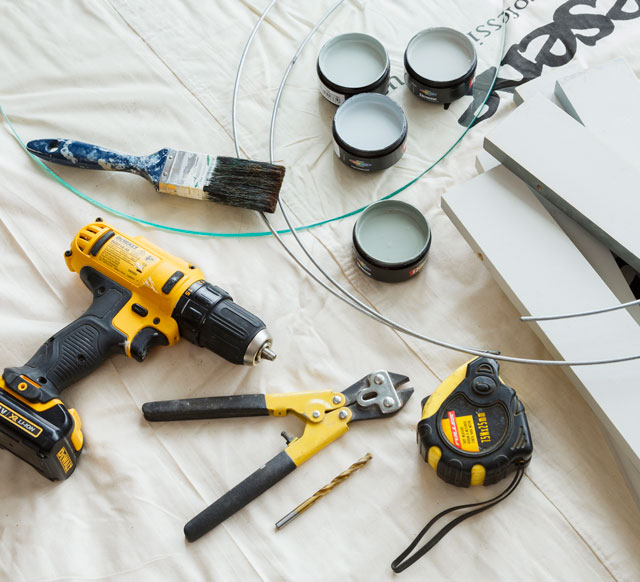
You will need:
- 75mm x 25mm dressed pine boards, cut to 16 x 450mm lengths
- 2 galvanised metal rings, 500mm (available at craft stores)
- 480mm diameter, 5mm thick clear glass top (ours was cut by Sauvarins Glass)
- Measuring tape, electric drill and bits and Pliers and wire cutters
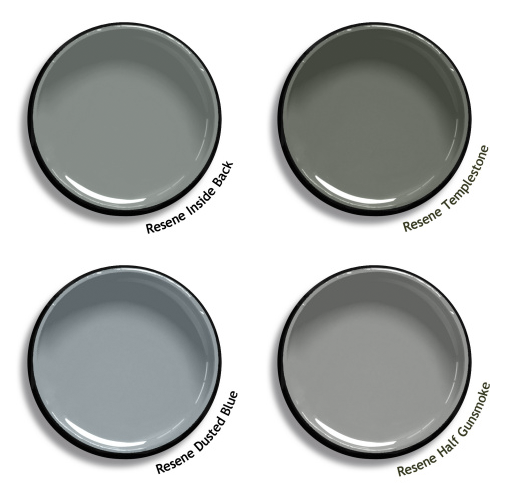
- Resene testpots in Resene Inside Back, Resene Templestone, Resene Dusted Blue and Resene Half Gunsmoke
?
?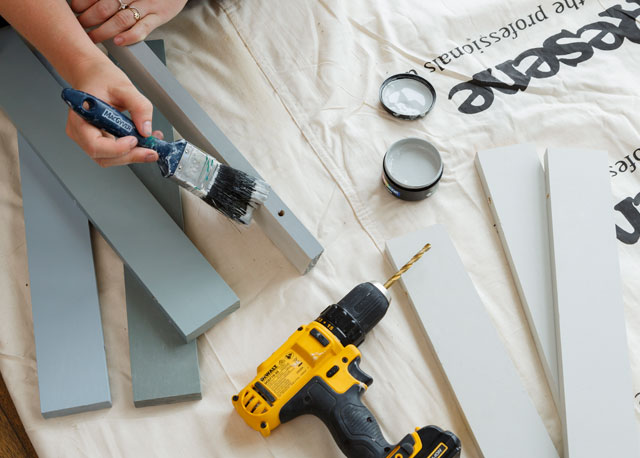
Step one
Drill holes through the tops and bottoms of each board, on the thinner edge, 55mm away from each end. Measure carefully so that the table will sit straight.
Divide the slats into four, and paint each set a different colour. We used a neutral grey-based tonal scheme but you can go for more contrast, use just one colour or use two alternating colours.
Step two
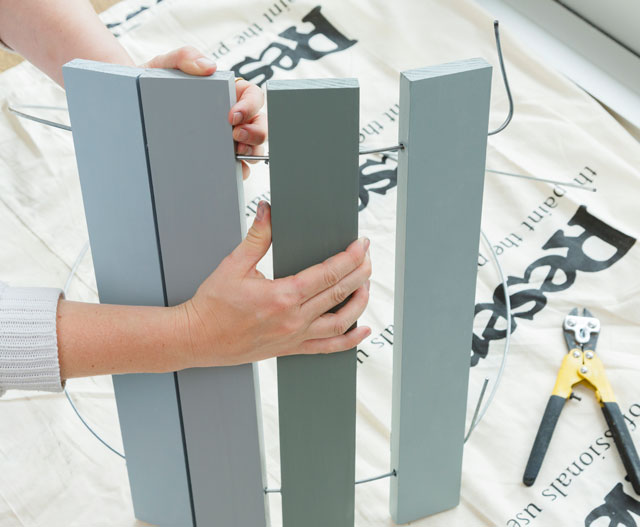
Once dry, place the boards in the order you’ll be threading them. We used the four colours in sequence.
Cut the metal rings and bend one end of each so the boards don’t fall off as you’re threading. Thread the wire through each board, one at a time.

Step three
Once the circle is complete, use the pliers to twist the ends of the wire together, securing it from the inside of the circle.
Use wire cutters to snip each end. Place the glass on top, and decorate it to suit your home's aesthetic. We love it with a bunch of dried flowers and your latest read at the ready.
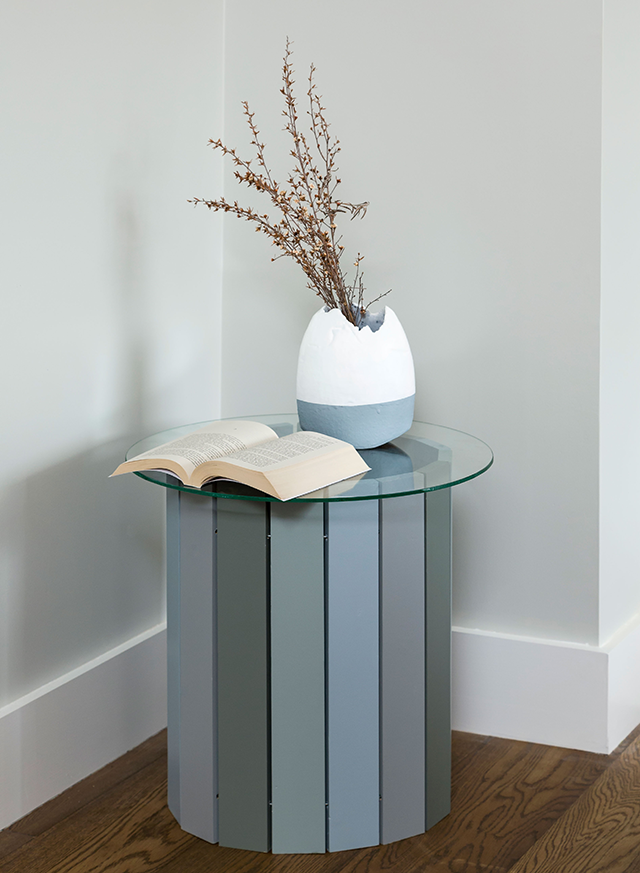
Above: Rustic side table painted (from left) in Resene Half Gunsmoke, Resene Templestone, Resene Inside Back and Resene Dusted Blue. Vase painted in Resene Alabaster and Resene Dusted Blue.
Photography by Bryce Carleton, styling by Leigh Stockton.
This DIY originally appeared in habitat, issue 26. See the full issue here.
Published: 28 Sep 2017

