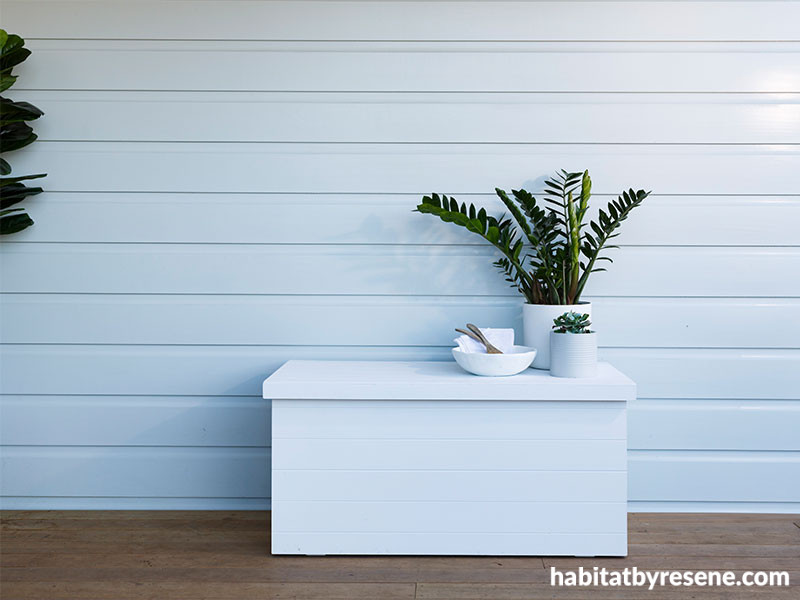
Make an outdoor storage trunk for all those bits and pieces
17 Jan 2019
Paint this handy trunk the same colour as your exterior to blend it in with your cladding or match it to your patio furniture for a stand-out piece of storage.
You will need:
- One sheet of IBS V-Groove 9mm-thick plywood cut into: 2 pieces at 1150mm x 550mm for the front and back, and 1 piece at 1200mm x 600mm for the lid, and 2 x 550mm (h) x 535mm (w) making sure the lines go across the width for the ends.
- Either a second sheet of grooved ply or use plain plywood: 1 piece at 1125mm x 535mm for the base (Note: Using 9mm grooved plywood rather than planks makes the trunk lighter and easily moved)
- Five 2.4m lengths of 45mm x 19mm timber for the frame cut into: 4 x 1150mm for the top and bottom, front and back; 4 x 497mm for verticals at the ends and 4 x 445mm for horizontals at the end.
- Cut 2 x 575mm for the side of the lid, and one at 1200mm long for the front of the lid.
- 1m length of H3 treated 19mm x 90mm: 2 x 500mm for the feet. These are the only pieces that will touch the damp ground.
- 1 litre of Resene Quick Dry primer undercoat
- 1 litre of Resene Lumbersider tinted to your chosen colour. We used Resene Poured Milk.
- 1 paint brush
- Sandpaper
- Drop saw or skill saw
- Screws, power drill, screwdriver
- 2 hinges
- 300mm of chain and two anchor screws

Step 1: Make the frame, starting with the top pieces, laid on a flat surface to make sure all pieces are square and even. Make the base frame, then attached to the top frame with the vertical side pieces.

Step 2: Attach the end pieces of plywood (measuring 550mm x 535mm) first as these sit flush with the frame at the top and side edges. BUT leave a 15mm overhang or lip at the bottom. This is to allow for the base and the feet to be inset. Attach the front and back, lining them up with the ends, with the 15mm overlap at the bottom.

Step 3: Attach feet to the base piece of ply, on the smooth side not the grooved side if you are using grooved ply, then drop the base piece into place. Screw in place.

Step 4: Make the frame for the lid; there’s no back frame, just sides and front. Attached the piece of ply for the lid. Glue the hinges to the lid – unless you use short screws, they will poke through the ply. Fill the screw holes, and sandpaper back when dry. Also check for sharp edges or any rough patches that might need a light sand.

Step 5: Undercoat the trunk using Resene Quick Dry primer undercoat.

Step 6: Apply two topcoats of Resene Lumbersider tinted to your chosen colour. We used Resene Poured Milk. Attach the chain to the lid and inner side of the trunk to stop the lid from flipping back too far when open.

Header Image: Our completed storage box and the bowl on top are painted in Resene Poured Milk, the weatherboards are Resene Half Periglacial Blue, and the deck is stained in Resene Woodsman Driftwood. The plant pots have been painted Resene Slipstream (large) and Resene Grey Seal.
builder Andy Fraser
images Bryce Carleton
Published: 17 Jan 2019


