
latest
habitat tv

Say goodbye to the morning scramble for keys, coats and sunglasses and hello to this… see this and more videos
blog

Brick Bay unveils its poetic new folly for 2026
The winner of the 2026 Brick Bay Folly competition has been unveiled. Within the Wings… more
Make your own picture perfect sideboard
11 Nov 2019
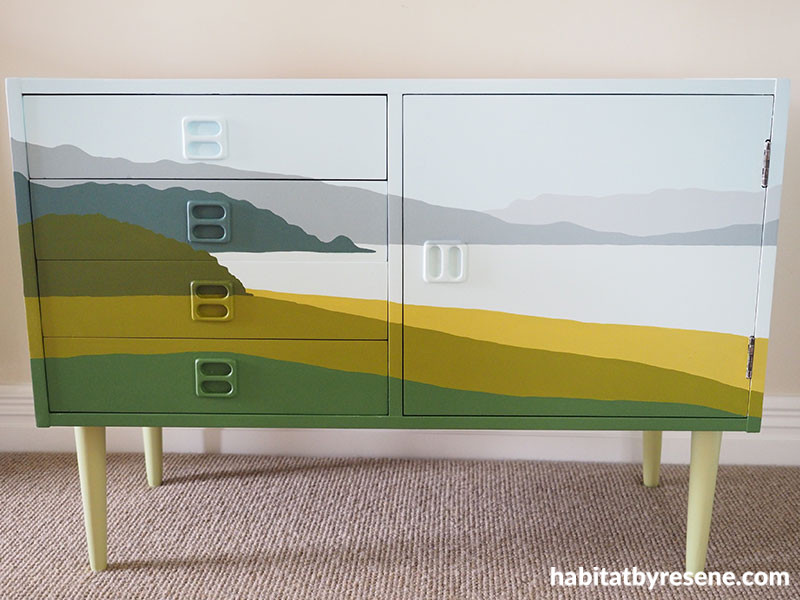
A sideboard needn’t be limited to the ‘functional storage’ category. With a bit of artistic flair and a splash of Resene paint, you can turn your sideboard into a stylish feature to complement any room.
You will need:
- An electric sander
- 120 grit sandpaper
- Resene Quick Dry
- Smooth surface microfibre blend mini roller
- Small paint tray
- Soft sanding block or finishing sandpaper
- Small and medium flat artist’s paintbrushes
- Paintbrush
- Resene Lustacryl tinted to your choice of colours – Fleur used Resene Onahau (sky), Resene Half Eskimo (pale, furthest hills), Resene Destiny (grey hills), Resene Green Meets Blue (hills with rocky headland), Resene Foam (sea), Resene Saratoga (green hill), Resene Karma (sand/beach), Resene Grass Hopper (foreshore), Resene Green House (green paddock) and Resene Iko Iko (legs). Alternatively, you could use Resene testpots for non-working joinery areas.
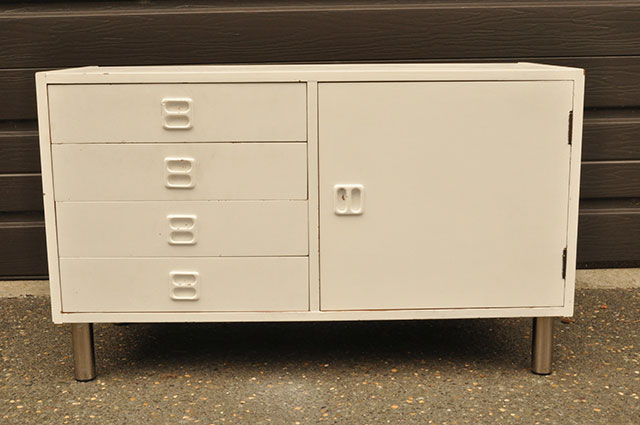
Step 1 Remove the drawers. Using a pencil, number the back of each drawer so that you know which one fits in which space when you put them back in.
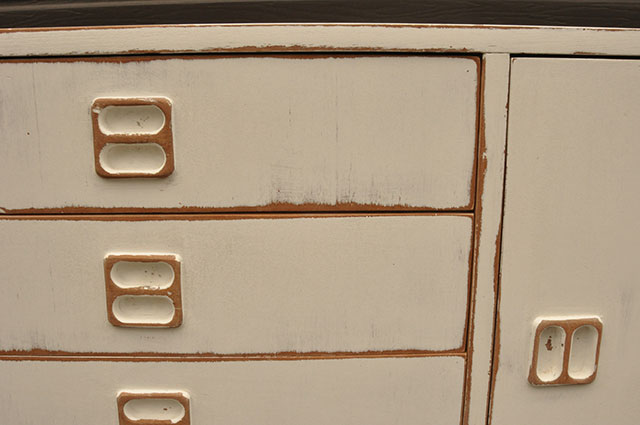
Step 2 Using 120 grit sandpaper, sand the drawer fronts and the body of the drawers. Pay particular attention to the edges and corners where paint may be cracking and flaking. Make sure you remove all loose paint. Wipe down the entire piece with a soft cloth to remove all the dust and put the drawers back in.
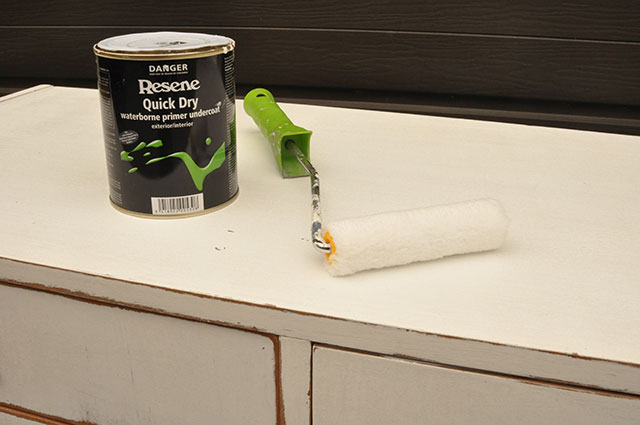
Step 3 Use a small smooth surface microfibre blend roller to paint the drawer fronts and the body of the drawers with Resene Quick Dry, allowing it to dry completely. Then, lightly sand all surfaces with a soft sanding block or very fine finishing sandpaper. Don’t skip this step – it makes all the difference to the smoothness of the final paint finish! Remove dust using a clean, soft cloth.
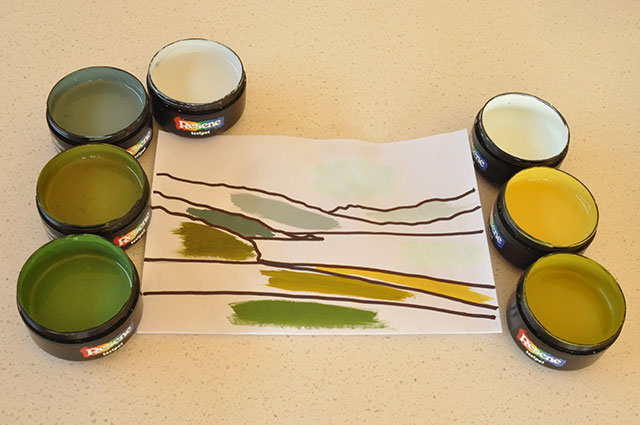
Step 4 On a piece of paper, sketch out your design and work out where each colour will go. Whether you dream of beaches, lush forests, the night sky or sunsets, there is a Resene colour combination that can help bring your imagination to life.
If you find a picture of a landscape you like but aren’t sure what paint colours to use, try uploading the image to the free Resene Colour Palette Generator. Simply select and upload your image and then click the 'Generate' button. The Resene Palette Generator will create a Resene colour palette based on the most common colours that occur in your image.
Step 5 With the microfibre blend roller, use Resene Lustacryl tinted to Resene Onahau to paint the sky, which will also include the top surface of the piece of furniture. Resene Lustacryl semi-gloss is a hardwearing paint and better suited to surfaces that will experience a bit of wear and tear. For a glossier finish, try Resene Enamacryl.
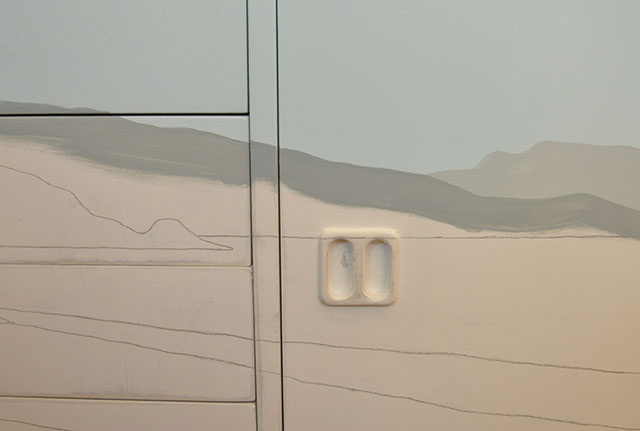
Step 6 Using a flat artist’s paintbrush, proceed to paint in each part of the landscape by starting at the furthest point (the hills which are furthest away) in two coats. Start by painting in the outline with a smaller brush and then you can swap to a bigger paintbrush to fill in the rest.
Step 7 When the paint is dry, continue with the next hill and work your way down the landscape to the bottom of the piece of furniture. Fleur used Resene Onahau for the sky, Resene Half Eskimo for the highest and palest hills, Resene Destiny for the grey hills, Resene Green Meets Blue for the hills with rocky headland, Resene Foam for the sea, Resene Saratoga for the green hill, Resene Karma for the sand/beach, Resene Grass Hopper for the foreshore, Resene Green House for the green paddock and Resene Iko Iko for the legs.
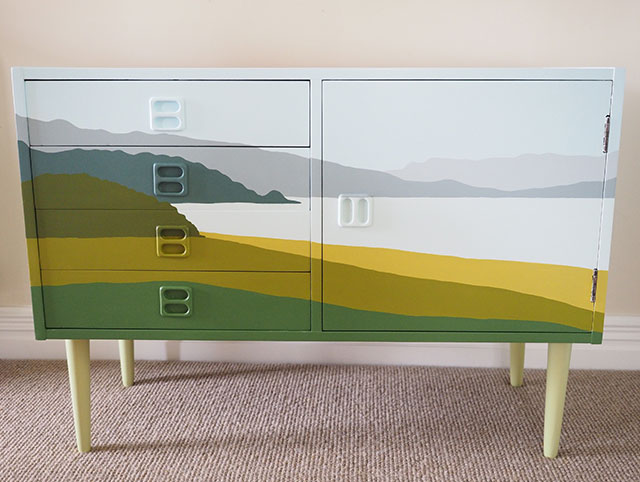
Fleur changed out the legs of her sideboard for ones that were more style-appropriate. Instead of buying new legs, she swapped legs from another second-hand piece of furniture and gave them a fresh coat of Resene Iko Iko. The wall is painted Resene Eighth Canterbury Clay and the skirting board is in Resene Half Rice Cake.
images and project Fleur Thorpe
Published: 11 Nov 2019

