
latest
habitat tv

Say goodbye to the morning scramble for keys, coats and sunglasses and hello to this… see this and more videos
blog

Reader roundup: See what our readers have been up to!
Refurbished vintage furniture, charming exteriors and magnet walls for kids. These projects are sure to… more
Mini makeover: perked up planters
18 Jan 2017
So you've got green fingers but are lacking anything pretty to place your plants and herbs in? Well we've got you covered. Even if you're not a DIY connoisseur, these planter projects will take no time at all. Thanks to Nikki Astwood of Revised Edition for sharing these quick ideas using Resene testpots.
Remember to message us or post your DIY projects using Resene paint on our Facebook page. We love hearing from you.
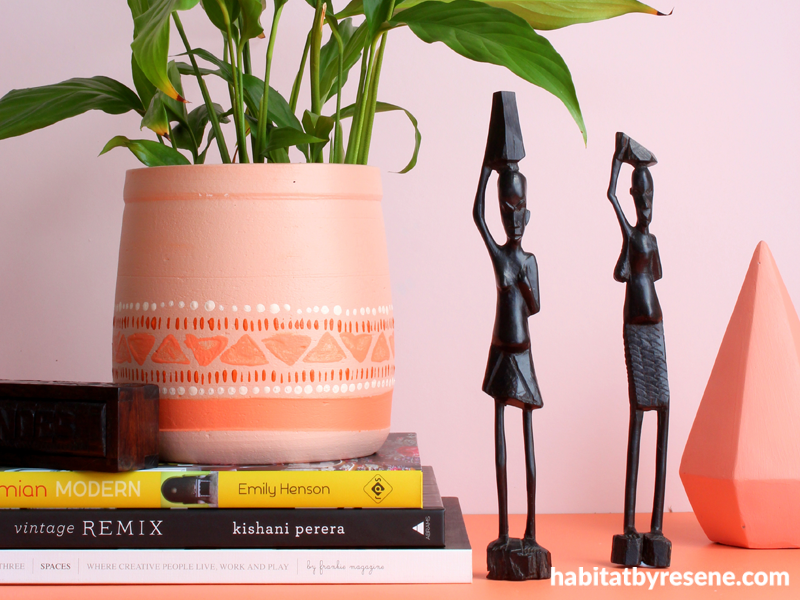
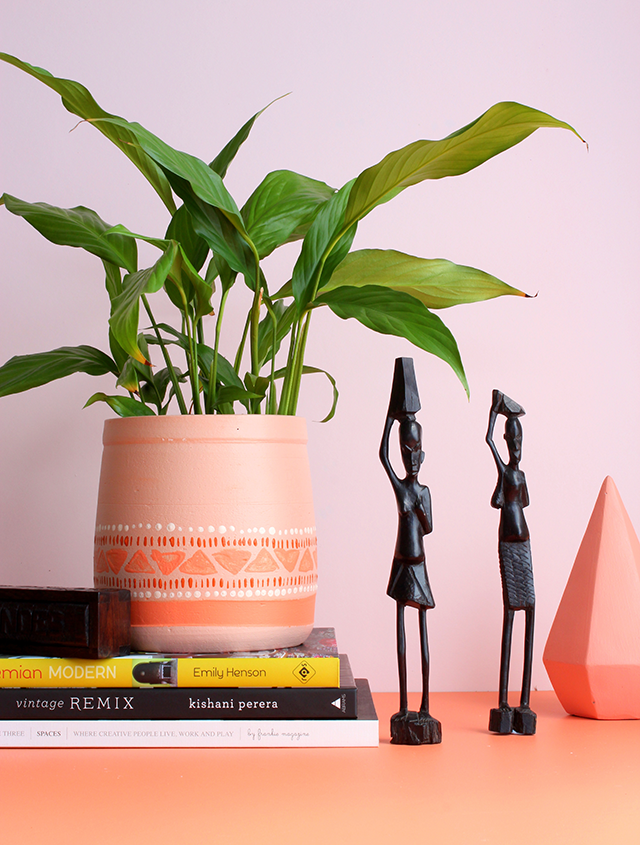
Project 1: Paint a terracotta pot
Terracotta is having a moment. Grab a terracotta pot and decorate it in a pattern that fits in with the personality of your home.
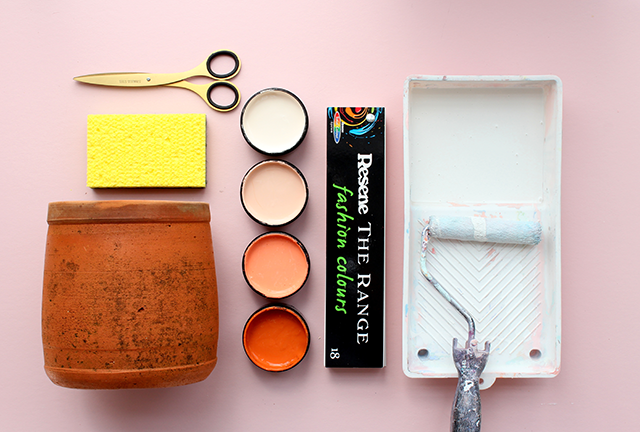
You will need
Terracotta pot, sponge, scissors, Resene roller, flat brush, round brush, Resene Terracotta Sealer, Resene testpots in Resene Dawn Chorus, Resene Sazerac, Resene Ruby Tuesday and Resene Ayers Rock.
- If you’re using a secondhand pot, make sure you give it a good clean first and allow it to dry.
- Paint the inside and outside of your pot using Resene Terracotta Sealer. This will prevent moisture coming through the pot and affecting the paint finish on the other side.
- Paint the pot with Resene Dawn Chorus and leave to dry.
- Once dry, start your pattern. The triangles were created using sponge, cut to shape and dipped into Resene Ruby Tuesday.
- Using the round brush, work your way around the pot for the dots (in Resene Sazerac) and stripes (in Resene Ayers Rock).
- Complete the pattern by using a flat brush with Resene Ruby Tuesday to create a line around the bottom.
Project 2: a display for your herbs
You've perfected the art of growing herbs so don't be shy to show them off.
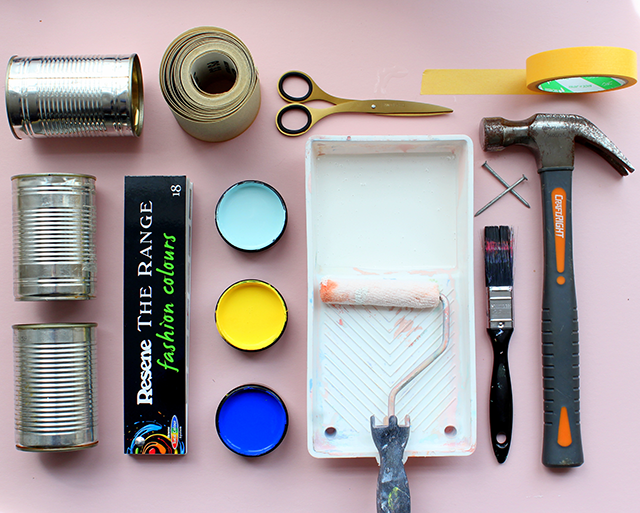
You will need
Scissors, sandpaper, masking tape, empty cleaned up tins, nails, hammer, Resene testpots in Resene Double Resolution Blue, Resene Happy and Resene Morning Glory, paintbrushes, and a tray.
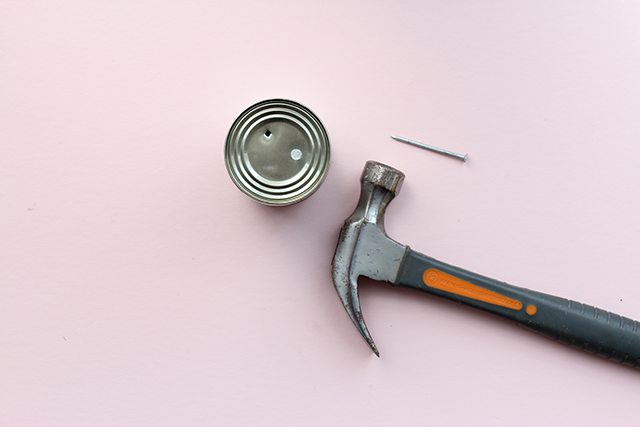
- Start by sanding the tins, giving them grit for the paint to stick to.
- Next, nail two holes into the bottom of each tin.
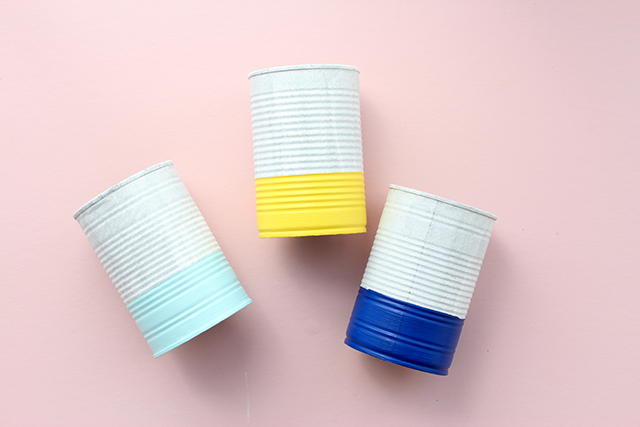
- Optional: use white paint as primer (we used Resene Alabaster) on the tins, and then mask off for the first colour.
- Paint the bottoms of the tins and leave to dry. Repeat with the tops in different colours.
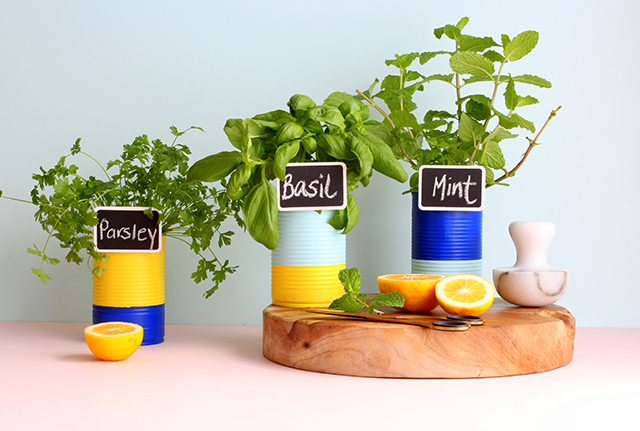
- Fill with soil and herbs and enjoy your bright new display!
- As an extra, paint small pieces of wood with Resene Blackboard Paint and use as labels.
- For a longer lasting option, seal the tins inside and out after you have drilled the holes to protect the cans from moisture and rust.
Published: 18 Jan 2017

