
latest
habitat tv

Say goodbye to the morning scramble for keys, coats and sunglasses and hello to this… see this and more videos
blog

Re-living the 1980s through art
Clint C is an artist whose work instantly sparks recognition and joy. Based in Hamilton,… more
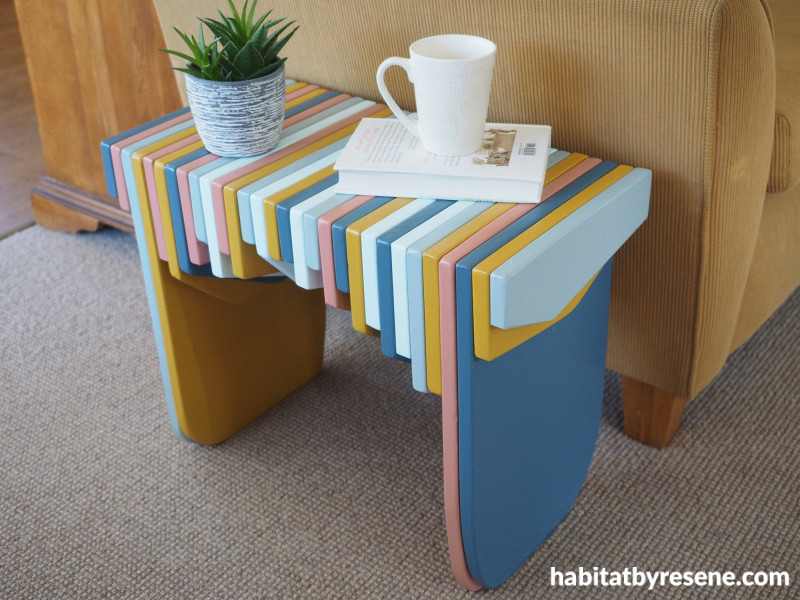
How to create a side table that’s a cut above
15 Sep 2022
This side table is no sideline act. Paint pieces of pine in your favourite Resene colours to create the perfect piece for your home.
You will need:
- 5 untreated pine boards 28cm x 18mm x 1.2m
- Saw
- Jig saw or band saw
- Sandpaper
- Resene Quick Dry
- Small micro fibre roller
- Paints
- Paintbrush
- Wood glue
- Electric drill
- Screws
- Hole filler
- Resene testpots in your favourite Resene colours. Fleur used Resene Onahau, Resene Liberty, Resene Influential, Resene Coral Tree and Resene Destiny
Step 1: Start by cutting four lengths of wood at 44cm long to make the legs. Put these aside and now cut up all the remaining wood into various lengths ranging from 8cm – 22cm.

Step 2: Next use a jig saw or band saw to cut soft triangular shapes each of the boards (excluding the leg boards). Sand these down to form rounded edges. For the leg boards, round off the two bottom corners.

Step 3: Use a small microfibre roller to paint all the boards with one coat of Resene Quick Dry. Once dry, sand lightly with fine grit sandpaper.

Step 4: Paint each of the boards with two coats of Resene testpot paints. Fleur used Resene Onahau, Resene Liberty, Resene Influential, Resene Coral Tree and Resene Destiny. For most pieces, you only need to paint the parts of the wood which will show.

Step 5: Once the paint is dry, start by screwing the boards together. Choose the first two boards, apply some wood glue to the inside face and then screw 3-4 screws to hold them tightly together.

Step 6: After the first two boards, next add the first leg. Apply wood glue and then screw this to the first two boards, followed by the next leg so that you have two legs sandwiched together side by side. Keep repeating the process of glue and screwing until you have screwed all the boards together, one by one. It’s a good idea to do this on a flat surface so that the boards are all flat and aligned nicely. As you are working on it upside down, it’s a good idea to flip it over every so often to check that the colour pattern is looking okay.

Step 7: Once you have screwed on the last board, the screw holes will be visible from the outside. For a nice clean finish, fill these holes with hole filler. Once this has dried, sand it smooth, prime it and paint over it with two coats of Resene paint.

project and images Fleur Thorpe
Published: 15 Sep 2022

