
latest
habitat tv

Say goodbye to the morning scramble for keys, coats and sunglasses and hello to this… see this and more videos
blog

Reader roundup: See what our readers have been up to!
Refurbished vintage furniture, charming exteriors and magnet walls for kids. These projects are sure to… more
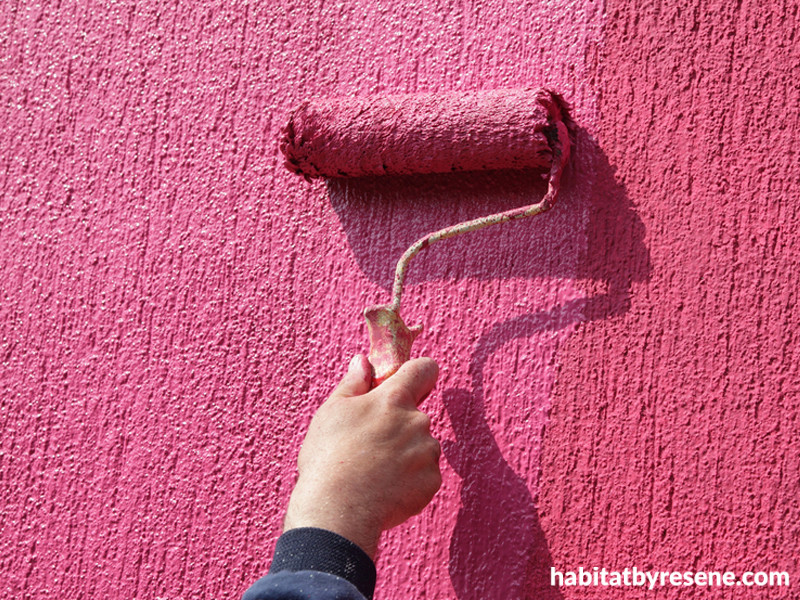
Painting with a roller
07 Apr 2015
Rollers do one thing really well – they cover a large area with paint in a short time and give a lovely smooth finish. That’s why Resene recommends that you use a roller rather than a brush for large surfaces like walls and ceilings.
If you’ve never painted with a roller before, or feel your technique is lacking, here’s a brush up (excuse the pun) on how to do it.
For a start
· Use good-quality, well-cleaned equipment – you’ll need a roller handle, a roller sleeve, an extension pole, a roller tray, a 50mm brush for cutting in around the edges, and of course your choice of Resene paint.
· There are many different types of roller sleeves available, from fluffy to ultra smooth. The one for sale at Resene ColorShops are clearly labelled on their uses but if in doubt, just ask the Resene staff.
· Sleeves also come in different sizes; the larger 230mm one is the most popular and is used for most walls and ceilings. The 150mm sleeve can also be used on walls and ceilings but is mostly used on smaller surfaces, such as interior doors and cupboards, as well as fencing.
Then there is an even smaller 100mm roller which is good for hard-to-reach places but also craft and stencilling projects.
· Be prepared! Have everything you need ready before you start painting. Go at a nice even pace. If you rush, you’ll end up splattering paint on yourself and anything else within range.
· Rinse new rollers in water (for waterborne paints) or turps (for solventborne paints) to remove any loose fibres or dust. If your roller handle has been used before, place a drop of oil on the bearings (i.e. the two plastic end caps).
· With new or pre-used sleeve, lightly dampen them before use (if you’re using waterborne paint).
Now get painting
· You will need to cut in around the edges of the walls and into the corners of the room with a brush first, as a roller can’t reach into these areas with any accuracy. Brush on the paint 40mm to 50mm out from the edges. Cut in one wall at a time – painting all edges, corners and around light switches etc. Begin each brushstroke about 100mm along from the end of the previous section.
· Once you’re ready to roller, tip paint into the tray to the level shown. If you’re painting a wall or ceiling, use an extension pole on the roller handle; it may seem cumbersome at first but will be much easier than climbing up and down a ladder. Roll the roller into the paint to saturate the fabric then use the ribbed section of the tray to squeeze out any excess paint. Do this a few times to make sure the paint evenly covers the roller.
· Lay the roller carefully against the wall and start moving it upwards, then across a section of the wall in a rough W pattern. Work on one metre square sections at a time, painting as evenly as possible. Paint as close as possible to the edges and corners, over the strip of brushed paint.
· Once you have covered about four square metres, go back over the area using a light touch and a partially loaded roller. Start just above the skirting board and roll evenly upwards, then evenly downwards, pulling the roller off the wall down near the skirting board. This is called ‘laying off’ and gives the paint as smooth a finish as possible.
· Once you’ve finished, leave the paint to dry for two hours before you can add a second coat.
Top tips
· If you take a break, stop painting at a natural break in the wall or ceiling, ie a corner. Submerge the roller head and sleeve in the paint in your roller tray, then put a plastic bag (a supermarket bag is good) around the whole thing and seal it to stop the paint from drying. Or clean the tray and wrap cling film around the roller sleeve.
· Rollers are notoriously tricky to clean once you’ve finished painting. Wash the roller and trays straight after you’ve finished. Roll out as much excess paint from the sleeve as possible, or run a straight edge of some sort (a ruler or piece of timber) down the sleeve to squeeze out the paint. Then immerse the roller in a bucket of water working through the pile with your fingers. Keep doing this in fresh buckets of water until its clean, then let the sleeve air-dry standing on its end so that the pile doesn’t flatten. Tip any dirty water into the garden, not the drain.
· Throw out any foam sleeve you have used with solventborne paints as they are too costly and time-consuming to clean.
Published: 07 Apr 2015

