
latest
habitat tv

Say goodbye to the morning scramble for keys, coats and sunglasses and hello to this… see this and more videos
blog

Re-living the 1980s through art
Clint C is an artist whose work instantly sparks recognition and joy. Based in Hamilton,… more
Plant yourself down here: DIY outdoor potted plant bench
22 Jan 2026
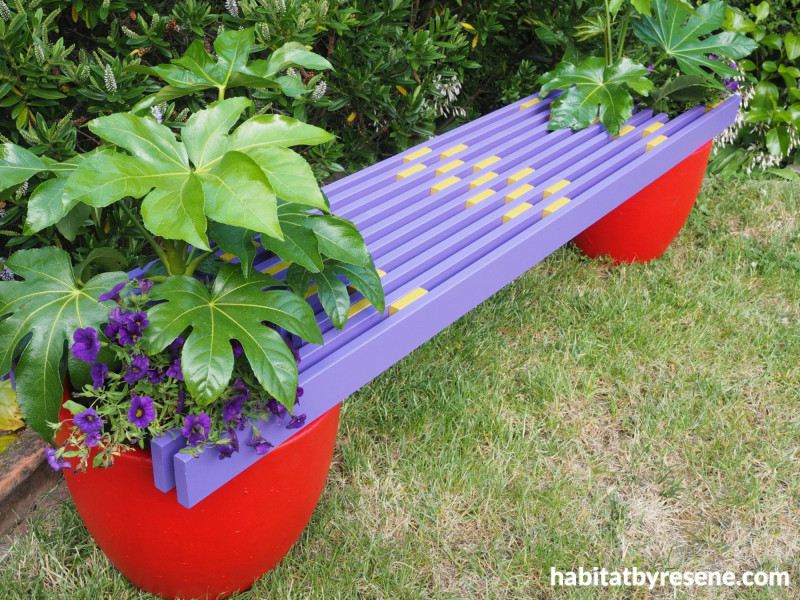
Garden and patio seating doesn’t have to be plain, just look at this bright colourful bench in bold hues like Resene Kingfisher Daisy, Poppy and Lemon Ginger – and it can also hold your favourite plants!
You will need:
• 4x treated pine board, 17mm thick x 70mm wide x 1.8m long
• 6x treated pine board, 17mm thick x 70mm wide x 1.25m long
• 1x treated pine board, 17mm thick x 70mm wide x 2.6m long
• Sandpaper
• Resene Quick Dry
• Paintbrush
• Small micro fibre roller
• Mitre saw
• Exterior wood glue
• Electric drill and galvanised screws
• 2x large terracotta pots
• Resene Aquapel and Terracotta Sealer
• Potting mix
• Plants
• Resene Lumbersider paint in colours of your choice. Fleur used Resene Kingfisher Daisy, Lemon Ginger and Poppy
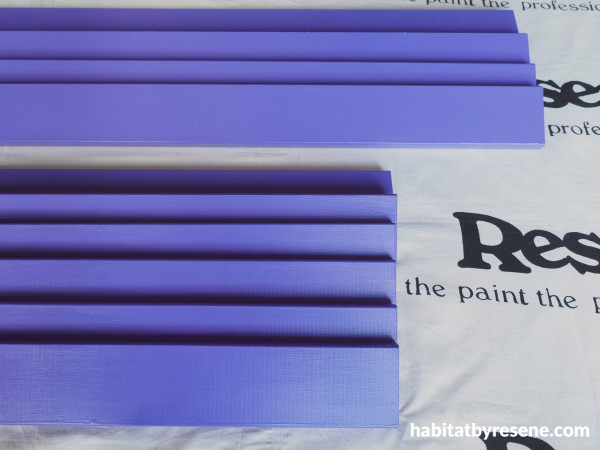
Step 1: Prime the four lengths of the 1.8m boards and the six 1.25m boards with one coat of Resene Quick Dry. Once this is dry, paint on two coats of Resene Kingfisher Daisy. Using a small micro fibre roller makes quick work of this.
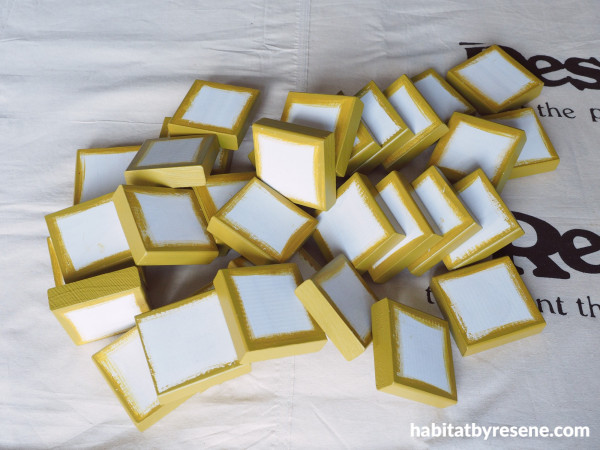
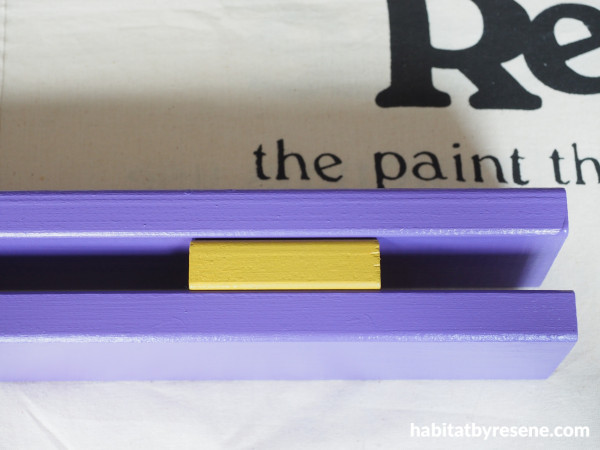
Step 2: Use a mitre saw to cut your 2.6m board into 35 blocks that are 70mm long, making them a 70mm x 70mm square. Sand the cut edges smooth, wipe away any dust, prime with one coat of Resene Quick Dry and then paint the four edges with two coats of Lemon Ginger. (You don’t need to paint the two flat faces as these won’t be seen.)
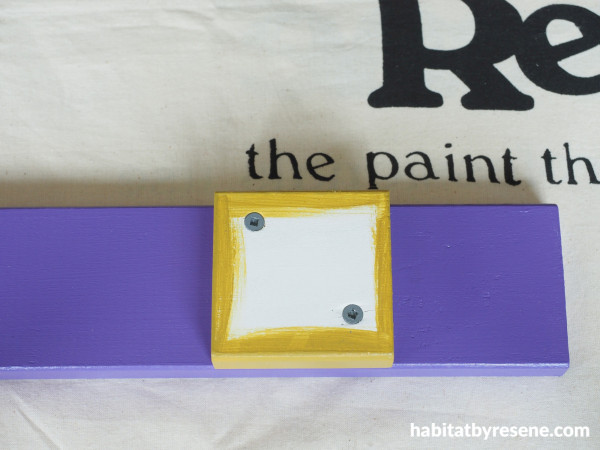
Step 3: Take the first 1.8m long board and use exterior wood glue and galvanised screws to screw a block at each end inset by 70mm, and two more blocks inset at 415mm from the end. Glue and screw another block in the centre of this board.
Step 4: Glue and screw the second 1.8m board to these 5 blocks.
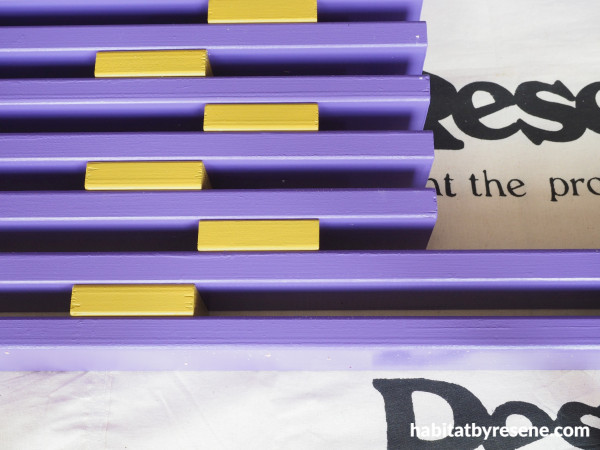
Step 5: Glue and screw the next set of blocks in place – two at each end inset by 345mm from the end and two more blocks that line up to be on either side of the first centre block on the first row. Glue and screw the first 1.25m long board to these blocks. Repeat the process of glue and screwing the blocks in place forming a staggered pattern with each row and alternating with another 1.25m board. Finish by adding the last two 1.8m boards with the same block spacing as was done at the start.
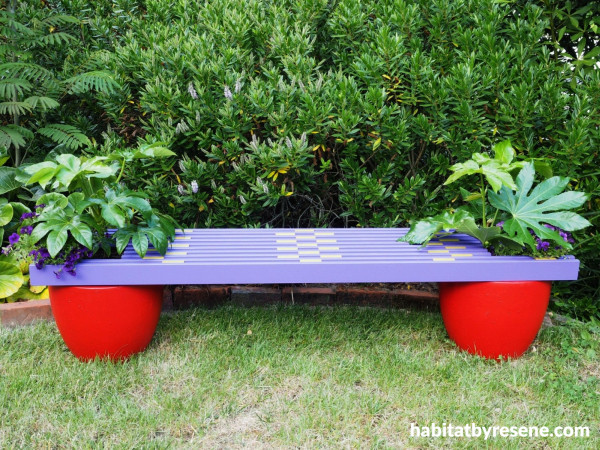
Step 6: Seal two large terracotta pots with one coat of Resene Aquapel and Terracotta Sealer. Once this is dry, paint the pots with two coats of Resene Poppy. Once the paint is dry, fill the pots with good quality potting mix and your favourite plants. Place the pots far enough apart that the wooden slats straddle between the two pots.
project and images Fleur Thorpe
Published: 22 Jan 2026

