
latest
habitat tv

Say goodbye to the morning scramble for keys, coats and sunglasses and hello to this… see this and more videos
blog

Re-living the 1980s through art
Clint C is an artist whose work instantly sparks recognition and joy. Based in Hamilton,… more
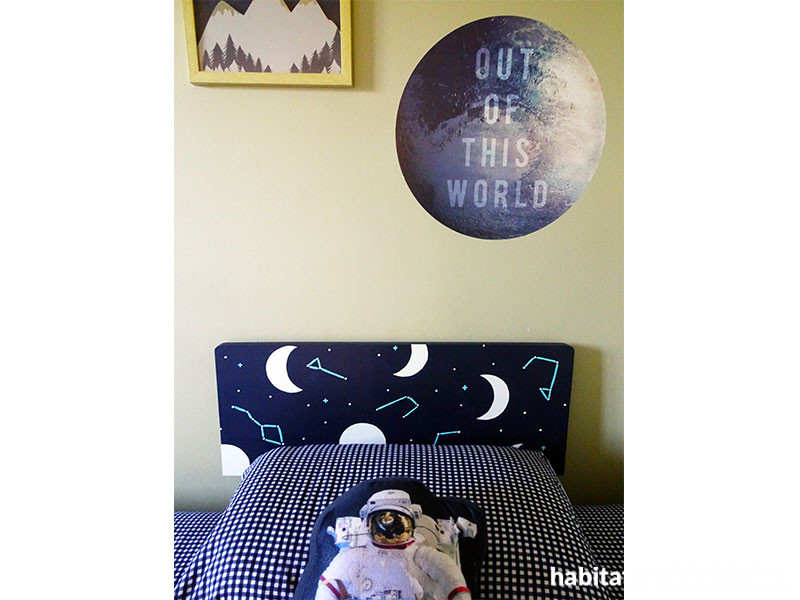
Take your kid’s headboard out of this world
25 Jun 2019
Go to infinity and beyond with a few favourite Resene colours and create this space-themed glow-in-the-dark headboard your little astronaut will love.
You will need:
- Sandpaper and/or an electric sander
- Testpot brushes
- Small artist’s detail brushes
- Painter’s masking tape and scissors
- Resene Quick Dry primer undercoat
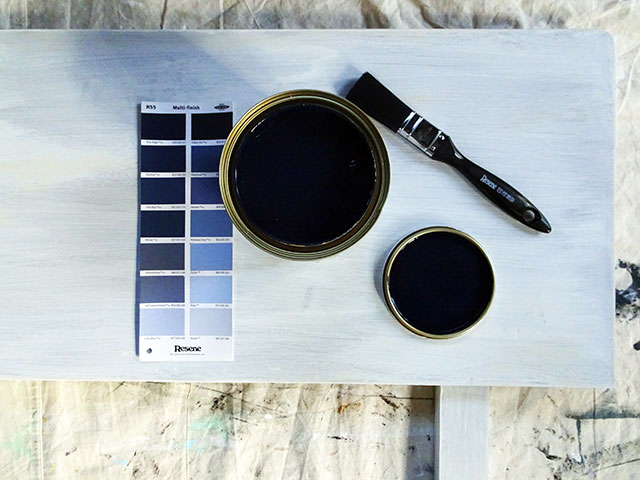
- Resene SpaceCote Low Sheen Interior paint in your choice of colour; Sarah used Resene Indian Ink
- Resene FX Nightlight glow in the dark paint
- Resene testpots in your choice of colours (Sarah used Resene Rice Cake, Resene Onahau and Resene Yes Please)
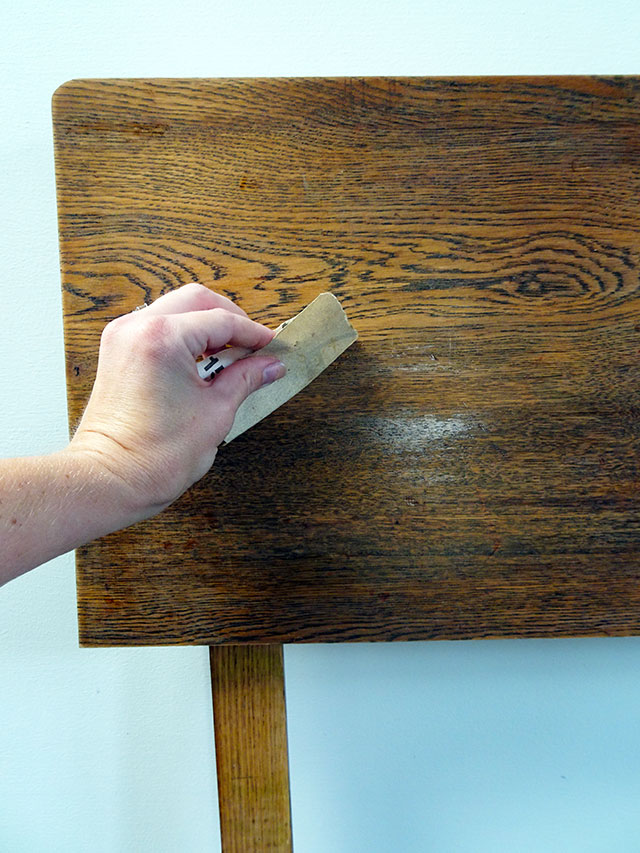
Step 1 The first step with upcycling second hand items is to always clean and check for any damage or parts that need to be repaired. Sand the wooden headboard thoroughly to prepare it for painting and wipe clean.
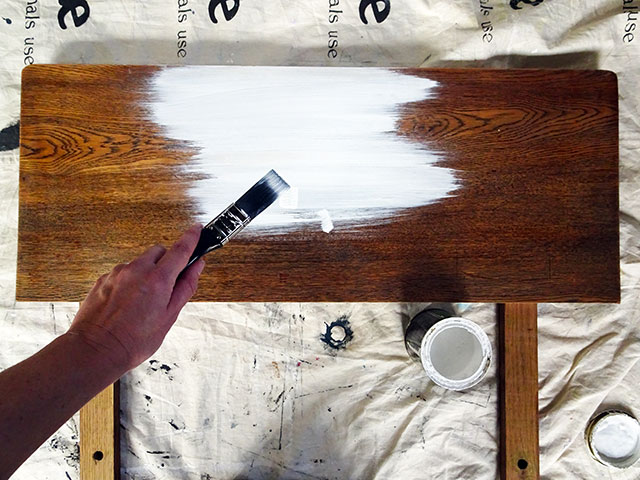
Step 2 Prime the headboard using one coat of Resene Quick Dry primer undercoat using a testpot brush and allow it to dry. You could also use a small paint roller for this step, if you prefer.
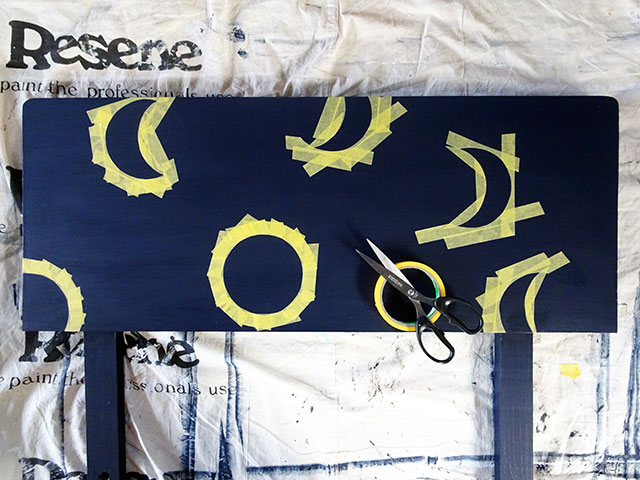
Step 3 Next you’re ready to mask out the full and crescent moon shapes. For this step, Sarah used a Resene paint tin as the stencil and masked the edges carefully with masking tape.
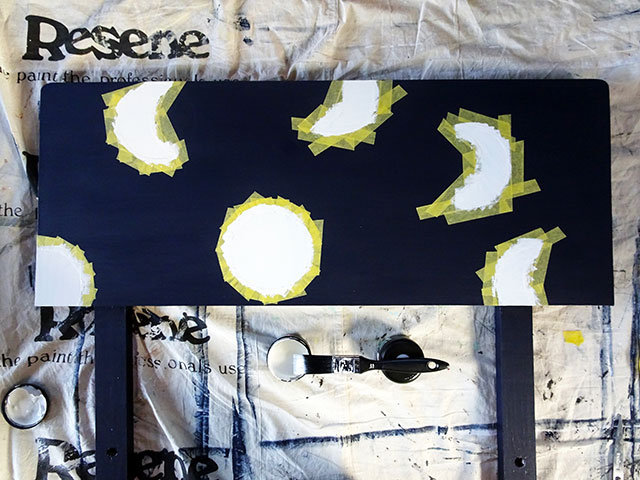
Step 4 Paint the centre of the moon shapes with two coats of your chosen Resene White for a maximum glow effect. For a slightly warmer tone, go for Resene Rice Cake like Sarah did.
Once the white paint is dry, apply three coats of Resene FX Nightlight over top so that the moons will glow in the dark. Make sure that you allow time for each coat to dry before applying the next.
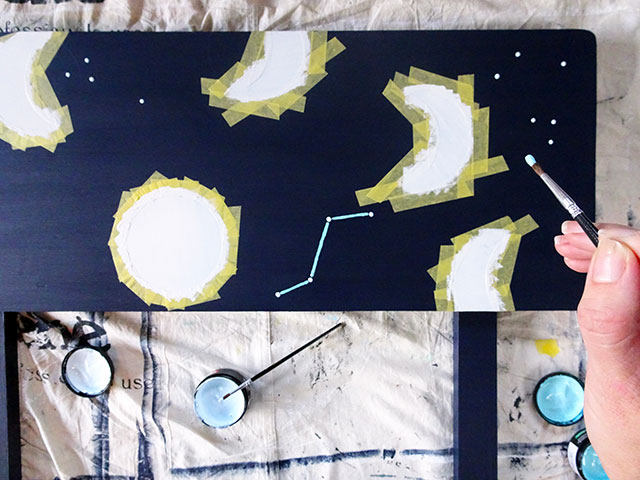
Step 5 In the remaining space, paint freehand stars and constellations using small detail brushes in your choice of Resene colours. Sarah used Resene Onahau and Resene Yes Please. Add in additional stars using Resene Rice Cake and Resene FX Nightlight.
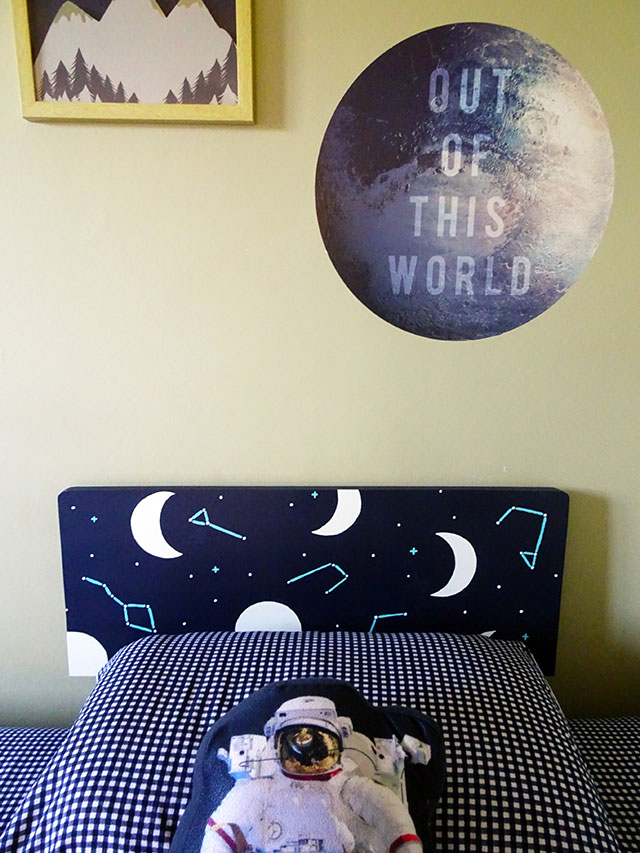
The final effect is a fun intergalactic headboard that will wow day or night, and space-mad kids will love being able to sleep amongst the stars in their own bedroom.
Top tip: Sarah had fun with freehand shapes and placements, but you might prefer to map out a pattern or create your own design. Try adding planets, rockets finished in Resene FX Metallic or other space shapes!
styling and images Sarah Herring
This DIY is brought to you by Upcycling for Good, a collaboration between Resene and The Salvation Army family stores. The project asks keen DIYers to upcycle second-hand items using Resene paint – look out for this regular feature on Habitat by Resene.
Published: 25 Jun 2019

