Build a swingseat
Summer may be over, but that doesn't mean you can't continue to enjoy the outdoors. This swingseat is a great incentive to head into the garden and enjoy the fresh autumn air, and it's a piece of furniture to keep for many years to come. Here's our step-by-step instructions.
You will need
Tools and equipment (all available to hire from Hirepool – visit www.hirepool.co.nz):
· Drop saw
· Skill saw
· Power drill
· Jigsaw
· Post-hole borer
· Wheelbarrow
· Spade
· Chisel
· Clamps
· Mallet
· Airless spray unit and/or 75mm paint brush
· Safety glasses and ear muffs
Materials:
· 11 colonial fence pickets for seat slats (ours are cut to 1290mm long)
· Dressed 100mm x 100mm pine for frame, H5 treated (2200mm for top beam, 2 x 2800mm for side posts, which includes 600mm to concrete into the ground)
· 6m of 75mm x 50mm treated pine for seat frame
· 1m of 125mm x 25mm dressed pine for arm rests
· 10m of 10mm rope
· stainless steel or exterior grade screws
· 4 x 7.3 diameter screw eyes
· 2 eye bolts; 2 coach bolts
· gorilla or exterior grade glue
· 120-grit sandpaper
· Resene Waterborne Woodsman stain in Resene Natural
Step 1
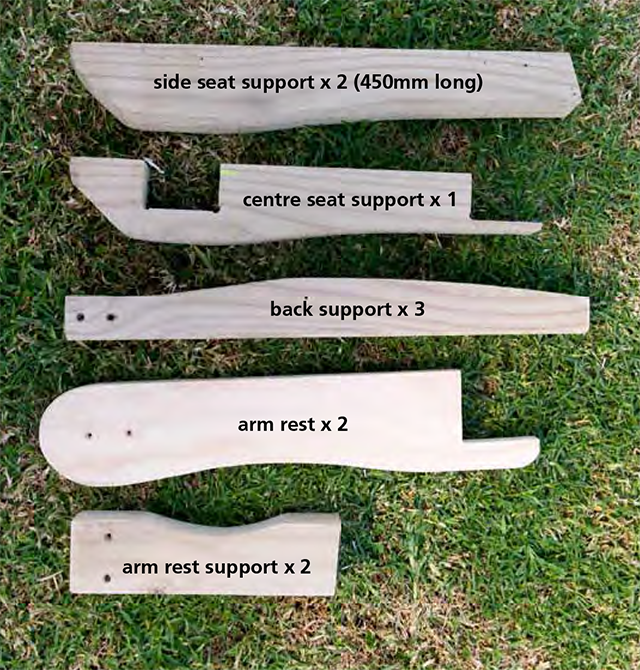
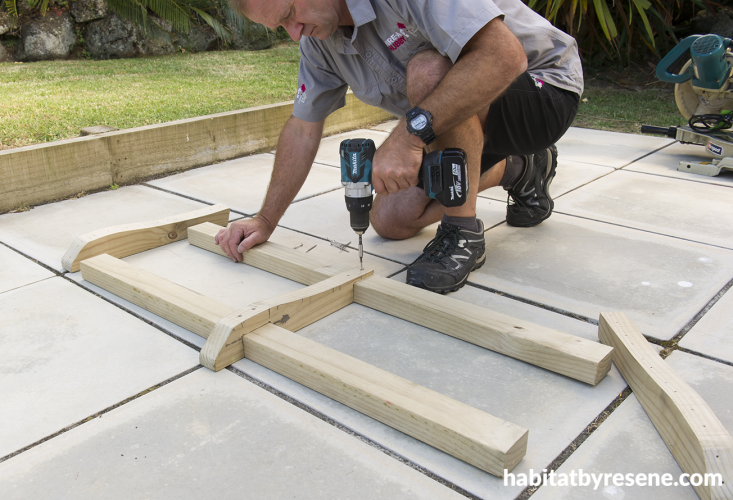
Start with the seat. Make the frame for the seat base, using our photograph as a template (above), or use straight pieces if preferred. Sand any cut edges. Pre-drill the holes so that the screws can counter-sink for a neater and more comfortable finish, and use the glue for extra strength.
Step 2
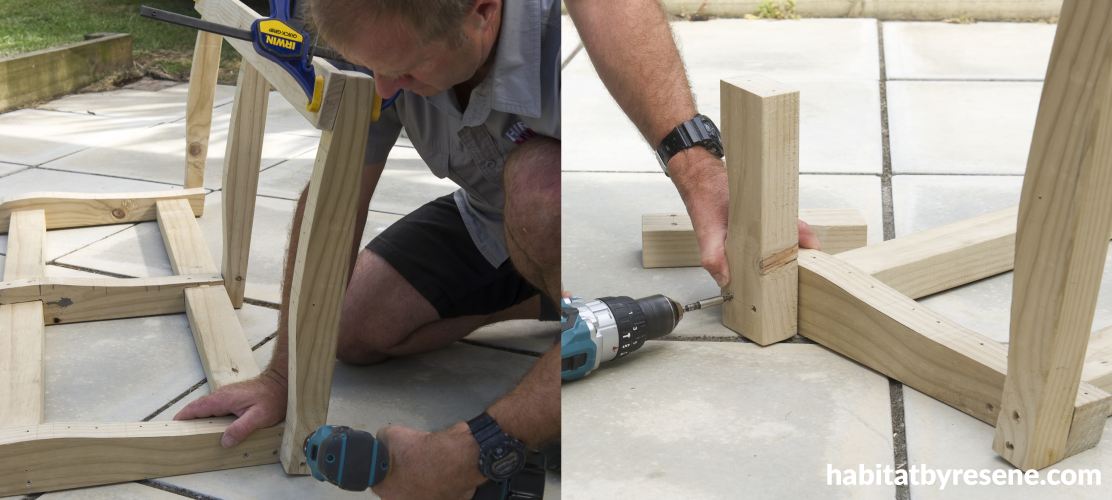
Make and attach the uprights for the back of the seat. Clamp one of the slats across the three uprights to ensure they’re straight. Attach the arm rest supports.
Step 3
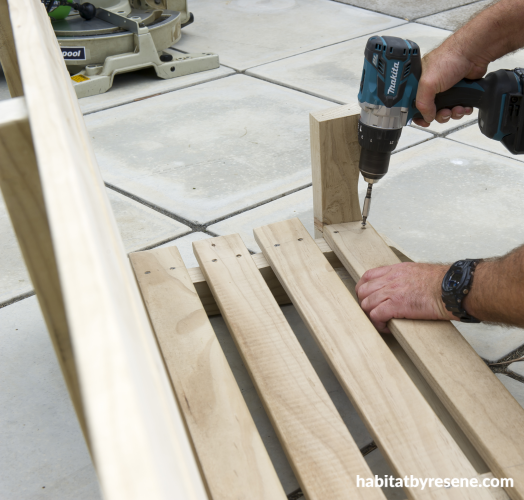
Cut slats to length, and note that two of them are going to be shorter to go inside the uprights and one of those will have a notch jigsawed out of the centre to fit over the back frame. Screw slats into place, using the narrow edge of a slat as a spacer.
Step 4
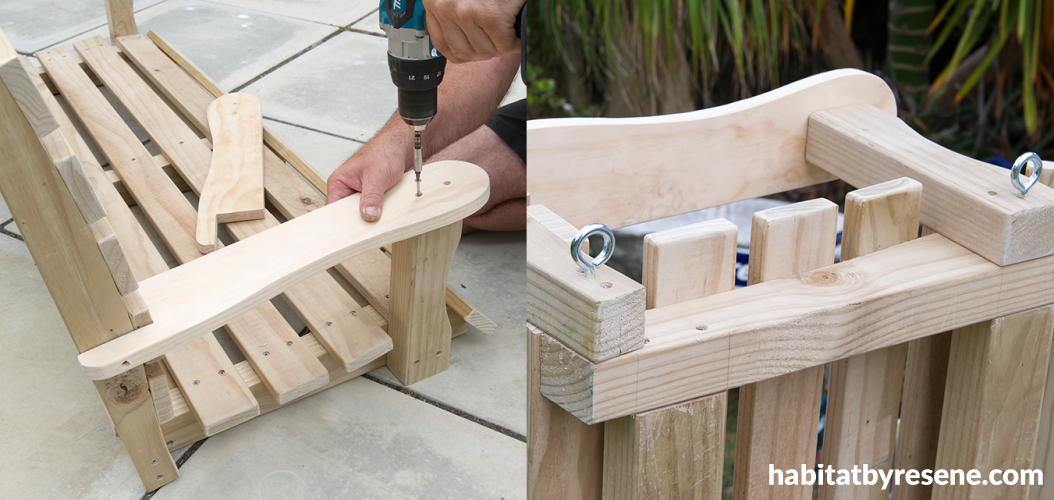
Attach the arm rests and the self tapping screw eyes, as shown in gallery.
Step 5
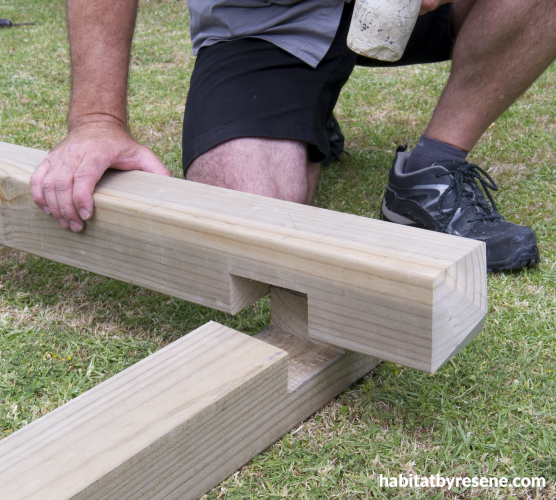
Cut opposing notches into the top beam (130mm from the ends) and posts with a circular saw and chisel. Drill holes for the coach bolts. Slot the beam and posts together, using a mallet. We cut 30 degree bevels on the ends of the top beam which not only looks good but stops water seepage into the timber’s end grain. Or you can leave the beam plain. Add the eye bolts to the underside of the top beam, 40mm in from the posts. They go close to the posts so that the rope stays out past the seat arms.40mm in from the posts. They go close to the posts so that the rope stays out past the seat arms.
Step 6
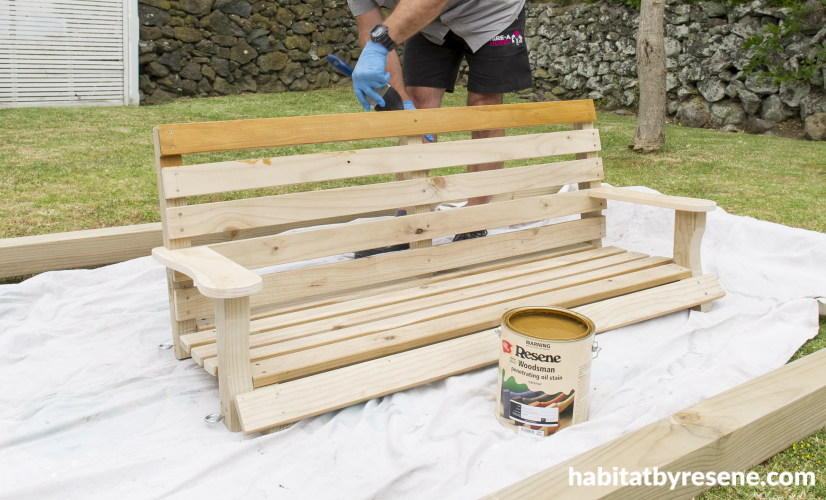
Stain the timber. We used a brush to apply Resene Waterborne Woodsman stain, but if you choose a paint finish, you could use an airless spray gun. Thread the 10mm rope and knot it at the top so the chair doesn’t tip, then thread through the eyelets on the chair, and knot. Adjust the height to around 450mm off the ground then tie off securely. Singe the rope ends so that they don’t fray.
Published: 28 Mar 2016
Do you have a home full of wonderful Resene paint and colour? Send us some snaps by emailing [email protected].
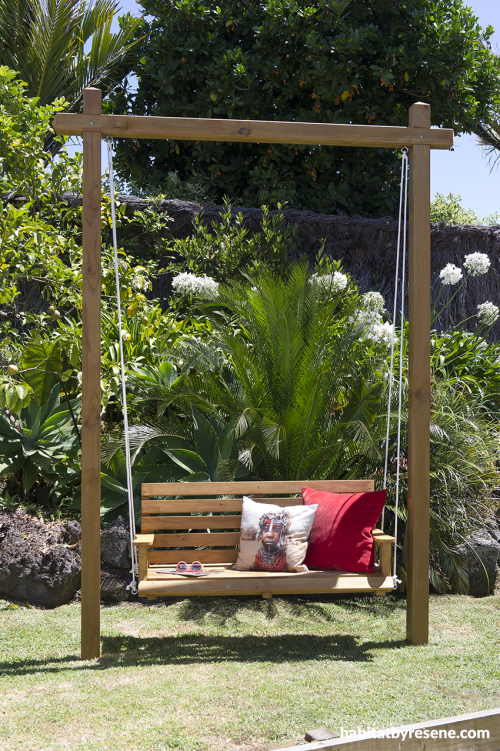
A swingseat in the garden is a great excuse to head outdoors and take in the fresh autumn air.
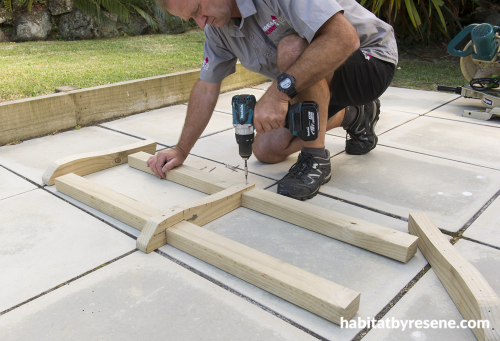
Step 1 – start with the seat. Make the frame for the seat base.
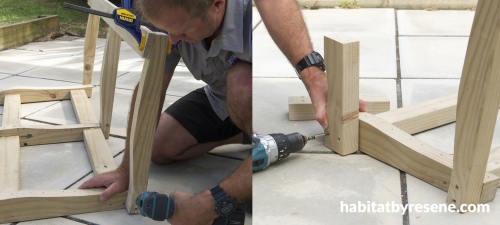
Step 2 – finish the frame of the seat base.
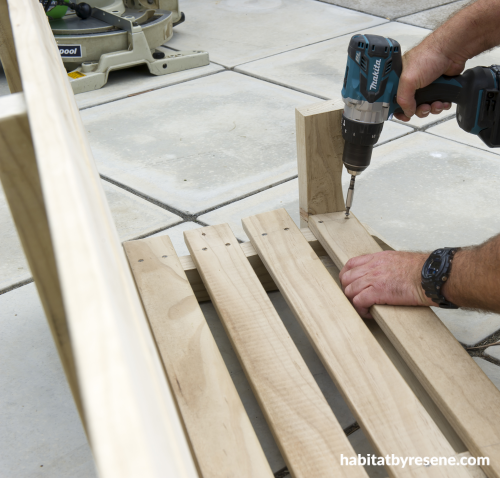
Step 3 – cut slats to fit (note written specifics in step 3) and screw into place.

Step 4 – attach arm rests and screw eyes.
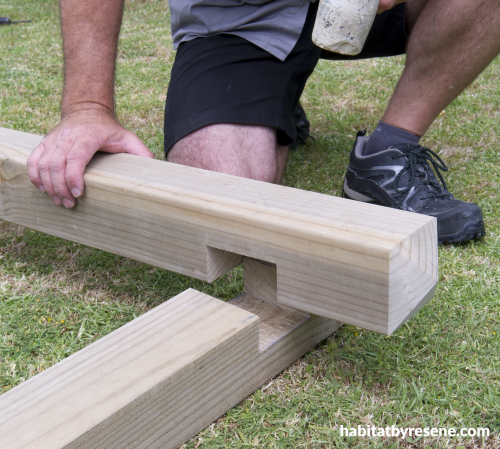
Step 5 – constructing the posts.
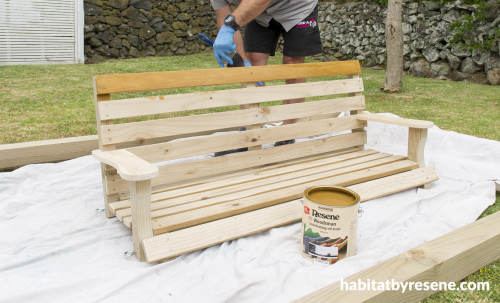
Step 6 – stain the timber. We used Resene Waterborne Woodsman stain in Resene Natural. If you're looking for another colour, the range has a large collection for you to choose from.
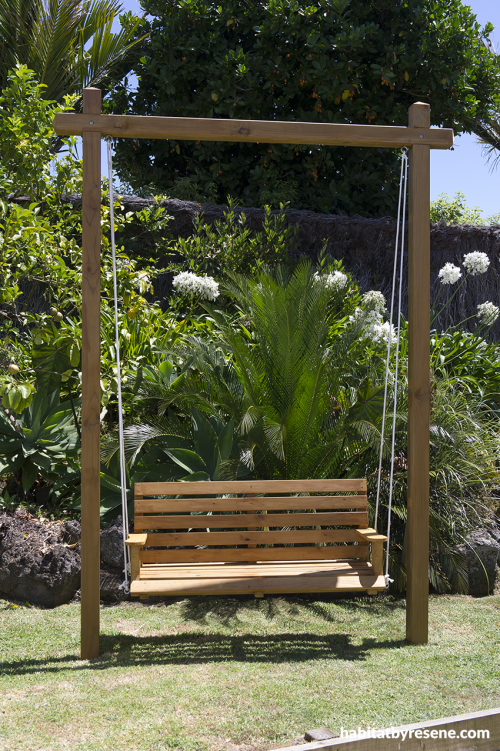
Step 7 – fix the seat into place, and you're done. Grab a book and your comfiest cushions, and settle into your new swingseat – made by you!
the look
If you're stuck on what
colour to use or need colour
advice, try out the Resene
Ask a Colour Expert service.
the look
If you're stuck on what
colour to use or need colour
advice, try out the Resene
Ask a Colour Expert service.


