Christmassy crafts: Last minute festive touches for your home
Embrace the spirit of the season with these delightful last-minute Christmas crafts using Resene paints, bringing festive charm to your home in a uniquely creative way. These simple, cost-effective projects, which the kids can get involved in too, will bring a touch of holiday magic to your home, inviting you to create cherished memories with family and friends. So, set aside an hour or two, pick your favourite Resene testpots, and let the festive crafting begin!
Festive table settings – three ways
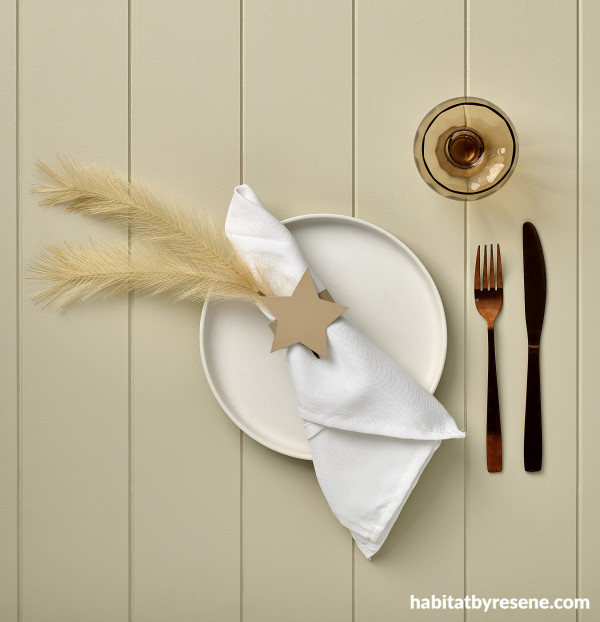
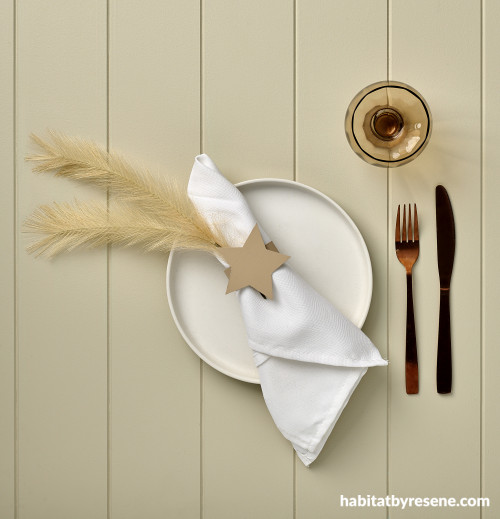
This beautiful beachy table setting is simple and summery. Our table is painted in Resene Tea, with DIY star napkin holder in Resene Rodeo Drive.
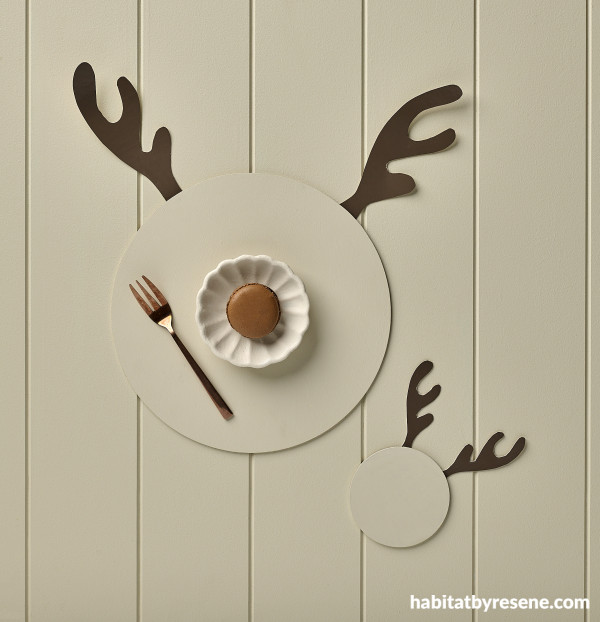
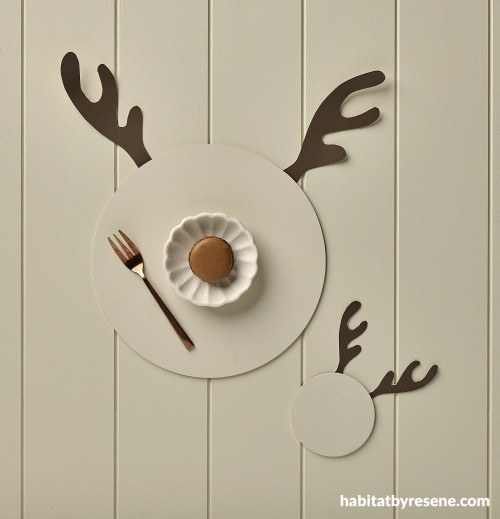
This playful and jolly table setting features a placemat and coaster with reindeer ears. The table is painted in Resene Tea and small dish in Resene Rice Cake with placemat and coasters in Resene Tea and Resene Oilskin ears.
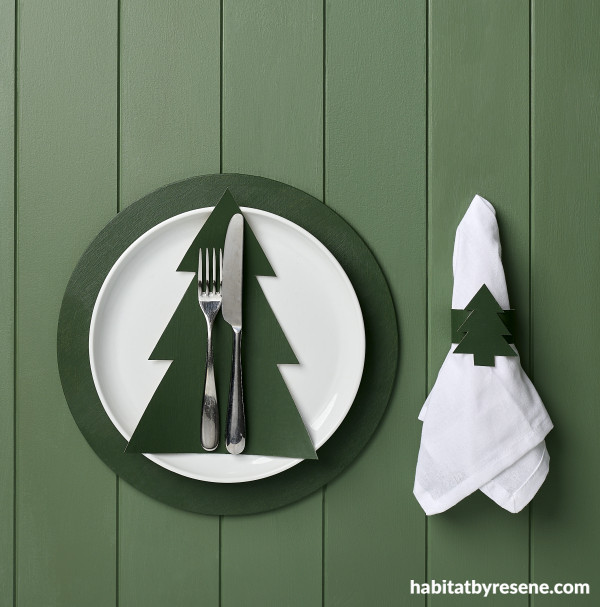
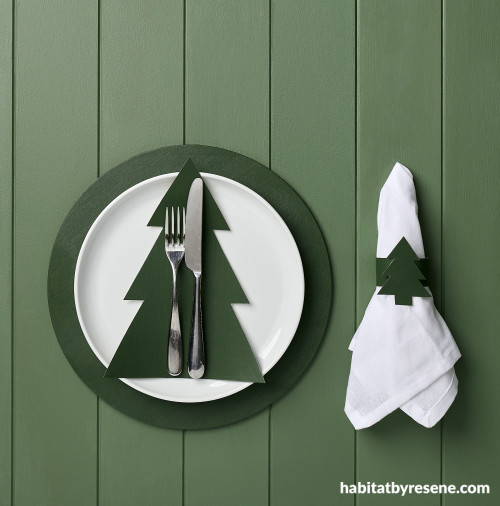
This tonal place setting is created using only one colour for a stunning and effective design. The table, placemats, cutlery tree and napkin holder are all painted in Resene Forest Green.
If you are hosting Christmas this year and find the cost of place settings pricey then why not have a go at making your own? All your need is some cardboard, paint, glue and scissors. These simple projects can be whipped up very quickly and will save you lots of money!
While we have chosen a tree shape, you could try a large star, snowman, or even a large bell. Combine your shape with your own favourite Resene colour, or colours, to create your own unique table setting! Try a different take on a Christmas green by opting for a turquoise like Resene Surfie Green and Resene Blue Lagoon, or a terracotta shade instead of red, such as Resene Apple Blossom and Resene Tuscany.
To make the placemats and napkin holders you will need:
- A4 sheets of cardboard
- Resene testpots in your chosen colours – we used Resene Rodeo Drive for the DIY star napkin holder, Resene Forest Green for the tree setting and Resene Rice Cake, Resene Tea and Resene Oilskin for the reindeer setting
- Resene testpot paintbrush
- Glue
- Scissors
- Pencil or pen
- Templates for the shapes you need to cut out – tree, ears, stars.
Step 1: Paint your pieces of A4 cardboard in your chosen Resene testpot colours.
Step 2: Find some shape images on the internet, print these out and stencil onto your painted card, then cut out your shapes. For the napkin holders, you will also need to cut a small strip of cardboard to make the ring – around 3cm wide and 18cm in length.
Step 3: Using clear craft glue, stick your components together. Glue the reindeer ears onto the underside of the placemat, and the smaller shapes onto the strips for the napkin rings.
Step 4: Once complete, set up your table settings with cutlery, glasses, and whatever else you’d like to add that finishing festive touch.
Have yourself a merry little wreath-mas
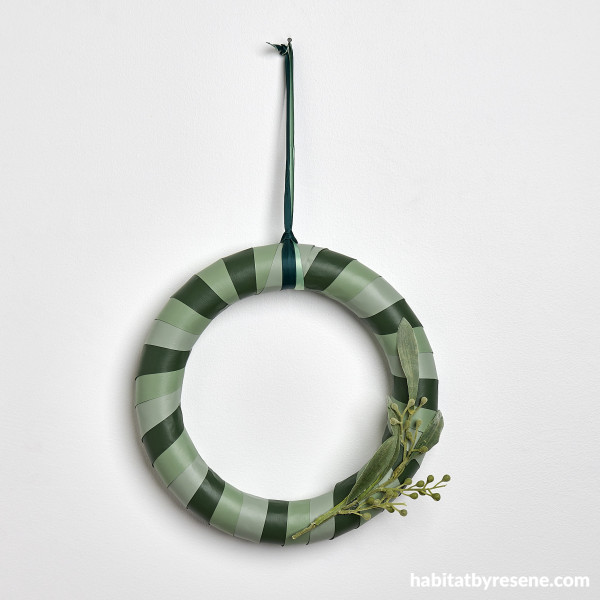
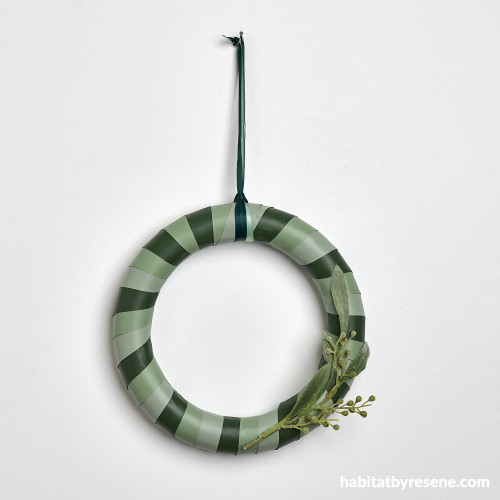
Get creative with cardboard strips and make your own wreath! Ours is painted using Resene Pumice, Resene Forest Green, Resene Spanish Green and Resene Xanadu. Wall painted in Resene Black White.
If you are not a fan of the traditional Christmas wreaths and are looking for a modern but simple wreath to go on your door that ties in with your décor style, then why not give this one a try. Using a 35cm polystyrene ring, some simple cardboard, four different shades of Resene green testpots and faux greenery, you can create your own wreath masterpiece in no time! For a real shiny spin you could even opt for Resene FX Metallic shades like Resene Bullion, Resene Glitterbug and Resene Go Go Go.
To make your own wreath:
Step 1: Using a pencil and ruler, measure out 6cm long strips of cardboard which are 3.5cm wide onto an A3 sheet of cardboard.
Step 2: Use scissors to cut your strips of cardboard – you will need approximately 35 strips depending on the size of your ring.
Step 3: Paint your cardboard strips (only on one side) in your favourite Resene colours. We used Resene Pumice, Resene Forest Green, Resene Spanish Green and Resene Xanadu.
Step 4: Measure your painted cardboard strips to 18cm in length and cut with scissors then glue your strips of cardboard around the ring, overlapping slightly.
Step 5: Once all your strips are on, glue on your greenery and other festive embellishments and add your ribbon to hang.
Mr Treatpot
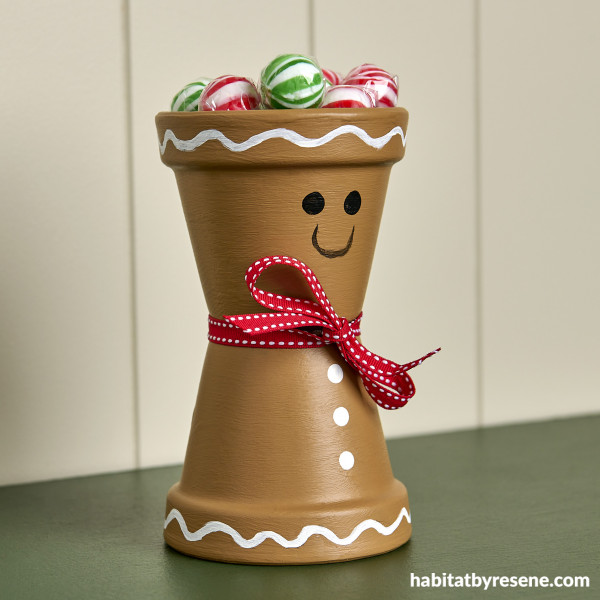
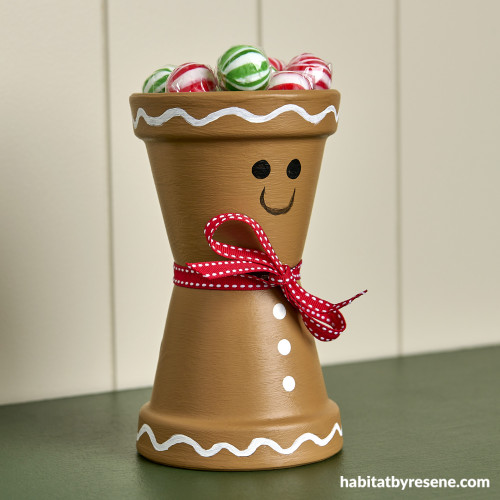
Our gingerbread man treat pot is painted in Resene Brown Sugar, with Resene Half Rice Cake and Resene Black Sand features. The wall is painted in Resene Tea and table in Resene Forest Green.
If you have teacher or coach gifts to give or maybe a present for a neighbour or special family member, these cuties are just the perfect gift, and you might even have some old pots lying around that you can use! Since we made a gingerbread man themed pot, we used a sweet, smooth brown, Resene Brown Sugar. However, depending on what theme you’re going for, you can use any of your favourite Resene testpot colours. For a snowman try a crisp white like Resene Quarter Alabaster, for a reindeer try a brown like Resene Hairy Heath, and for a Santa try red and white like Resene Rudolph and Resene Barely There.
How to make Mr Treatpot:
Step 1: Paint your two pots in your chosen Resene paint colour to match your chosen character.
Step 2: Using a pencil, draw your design of your character, for example Santa’s beard, reindeer nose or snowman buttons, then using a fine paintbrush, paint over your designs in your chosen Resene paint colours.
Step 3: Glue your pots together using clear craft glue and leave to dry.
Step 4: Tie a ribbon or other decorative feature around the neck of the pots and pop some treats in the top.
Deck the tree with bells of terracotta
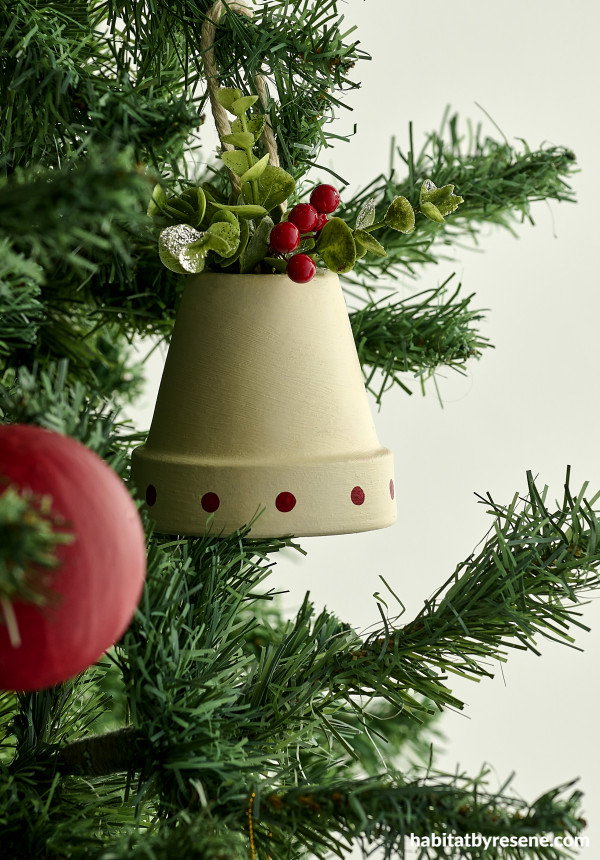
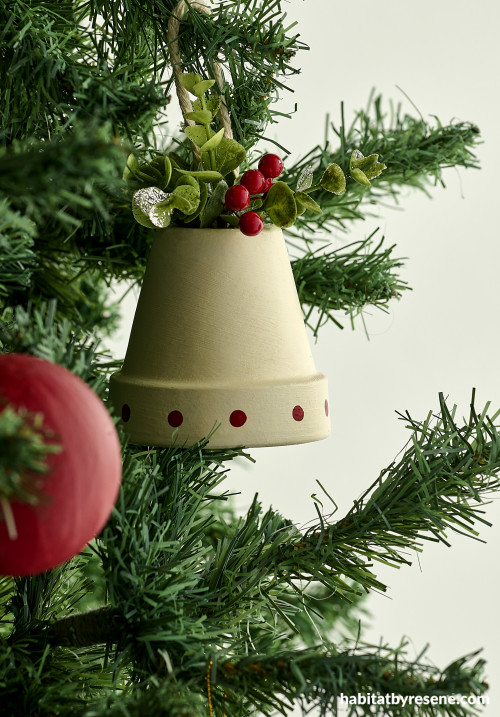
On our festive tree, we added hand-made decorations painted in Resene Double Pearl Lusta and Resene Red Berry. The wall is painted in Resene Black White.
Nothing says Christmas like a bell tree decoration. A few of these DIY beauties mixed in with your other baubles and you’ll have your tree looking fab in no time. This is a great one to get the kids involved with too, they can be involved in the whole process right from choosing the terracotta pots and their favourite Resene testpots, to hanging them on the tree once finished. Making your own decorations is something we all remember doing as a child, and we hold onto these precious memories for years to come! Be as bold and bright as you want – perhaps you want to try a hot pink like Resene Smitten, a fluorescent orange like Resene Outrageous or a bright yellow like Resene Happy.
How to make your own decorations:
Step 1: Paint your terracotta pots both inside and out in your chosen shades. We used Resene Double Pearl Lusta. You might need two coats for best coverage.
Step 2: Once the pots are dry, cut and thread some rope, twine or ribbon through the hole of the pot and secure with a knot in the inside of the pot. This will be what you use to hang your decoration onto the tree.
Step 3: Glue any festive embellishments onto the tops of the pot using clear craft glue and add any extra patterns you like with other Resene paint colours. We added dots in Resene Red Berry.
Hang on the tree with your other decorations or give away as Christmas gifts!
Three wise wooden men
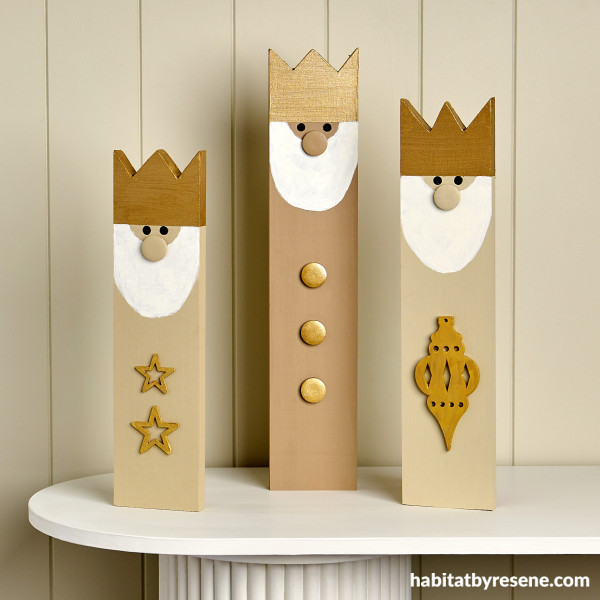
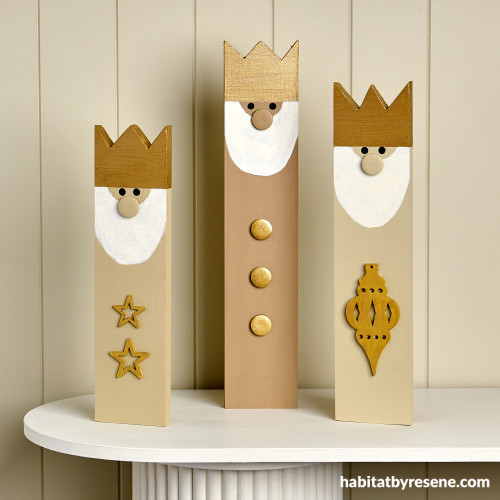
Our three wise men are painted in Resene Sandal, Resene Coral and Resene Navarone, beard in Resene Villa White, eyes in Resene Black Sand and crown and robe details in Resene FX Metallic Gold Dust with Resene Apache as the basecoat. Behind our wise men, the wall is painted in Resene Tea, with the console table in Resene Half Thorndon Cream.
If you have a piece of wood lying around the garage or workshop, then this cute project creating three wise men could be worth a go. These make a great decoration for a centre piece, on an entry table or on a dining buffet! While we have chosen a fairly neutral colour palette with hints of gold, you can paint yours any colour you like, such as bright red and green using Resene Havoc and Resene Crusoe.
How to make these wonderful wooden men:
Step 1: Draw your crown shape onto the top of the wooden pieces in pencil, and using a jig saw, cut out the crown shape. You may need to give the edges a light sand if there are any rough patches.
Step 2: Paint each of the pieces of wood in your desired Resene colours. We used Resene Sandal for the tallest man, Resene Coral for the medium sized man and Resene Navarone for the smallest man.
Step 3: Once dry, use a fine paintbrush to paint on the details. We painted crowns in Resene Apache then Resene FX Gold Dust, eyes in Resene Black Sand, and beards in Resene Villa White.
Step 4: Add any embellishments. Paint old buttons or ribbon you have lying around the house and glue them on for extra decorations if you wish. Be as creative and festive as you want!
If you’ve got an hour to spare, give one, or more, of these last minute touches a go and make your home extra Christmassy this year! Thousands of colours are available in handy Resene testpots so you can choose whichever colour fits your Christmas colour palette and your home.
projects Vanessa Nouwens
images Bryce Carleton
Published: 13 Dec 2023
Do you have a home full of wonderful Resene paint and colour? Send us some snaps by emailing [email protected].


Resene Apple Blossom


Resene Spanish Green


Resene Quarter Alabaster


Resene Double Pearl Lusta


Resene Half Thorndon Cream
the look
If you're stuck on what
colour to use or need colour
advice, try out the Resene
Ask a Colour Expert service.


Resene Apple Blossom


Resene Spanish Green


Resene Quarter Alabaster


Resene Double Pearl Lusta


Resene Half Thorndon Cream
the look
If you're stuck on what
colour to use or need colour
advice, try out the Resene
Ask a Colour Expert service.


