
latest
habitat tv

Say goodbye to the morning scramble for keys, coats and sunglasses and hello to this… see this and more videos
blog

Brick Bay unveils its poetic new folly for 2026
The winner of the 2026 Brick Bay Folly competition has been unveiled. Within the Wings… more
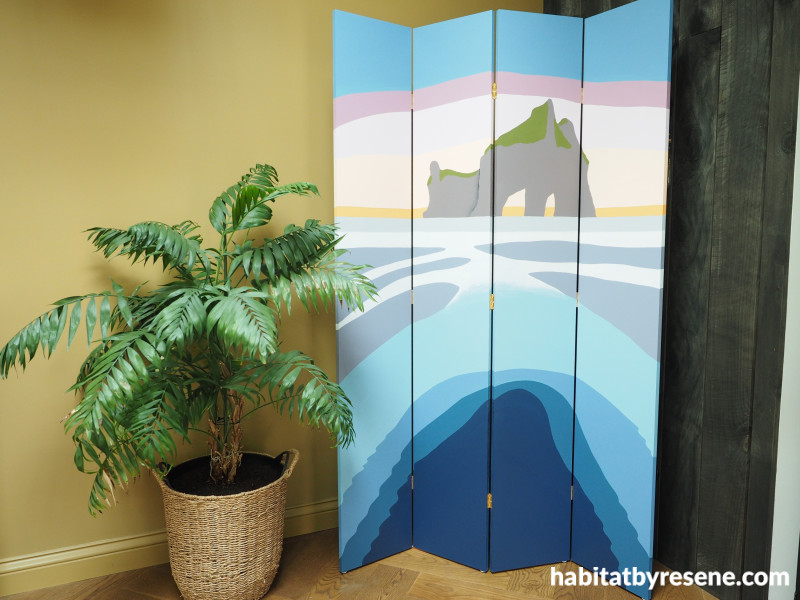
A coastal canvas: How to create your own summer scene screen
01 Apr 2025
Bring a slice of summer into your space with this vibrant DIY project – a coastal-inspired screen that transforms any room into a beachside retreat. With a mix of breezy blues, warm hues and hints of island life, you’ll feel like you're gazing out at the waves, no matter where you are.
You will need:
4 x MDF board panels 300mm wide x 18mm thick x 1.8m long
Saw
Sandpaper
Small microfibre roller
Paintbrush
Resene Quick Dry
Pencil
Electric drill
Hinges and screws
Resene testpot paints in your chosen colours. Fleur used Resene Kashmir Blue, Resene Strikemaster, Resene Alluring, Resene Wax Flower, Resene Roxy, Resene Saratoga, Resene Black, Resene Tenor, Resene Grey Chateau, Resene Quarter Grey Chateau, Resene Waterloo, Resene Blue Moon, Resene Wanaka and Resene Bunting
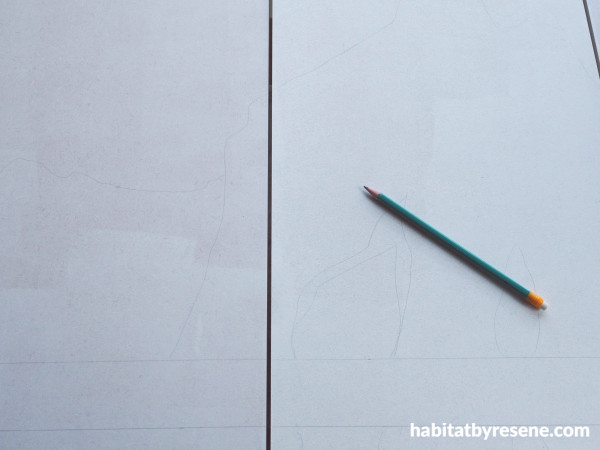
Step 1: Start by cutting the four MDF boards to length (Fleur bought hers at 2.4m long and cut them down to 1.8m). Sand the rough edges smooth and then use a small microfibre roller and Resene Quick Dry to prime the boards. Use a pencil to sketch your scene on to the boards.
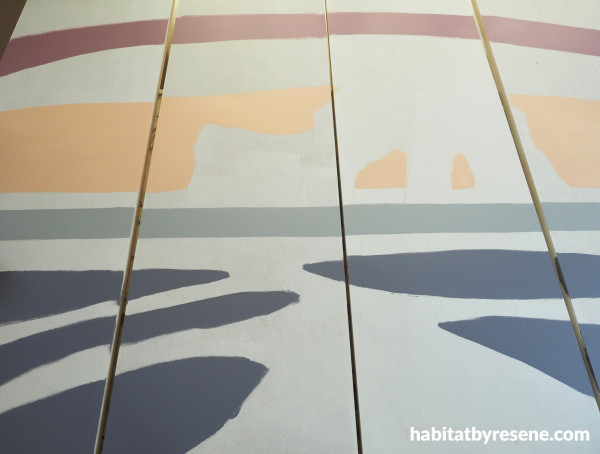
Step 2: Paint on your scene using block colours first, simple shapes and not too much detail.
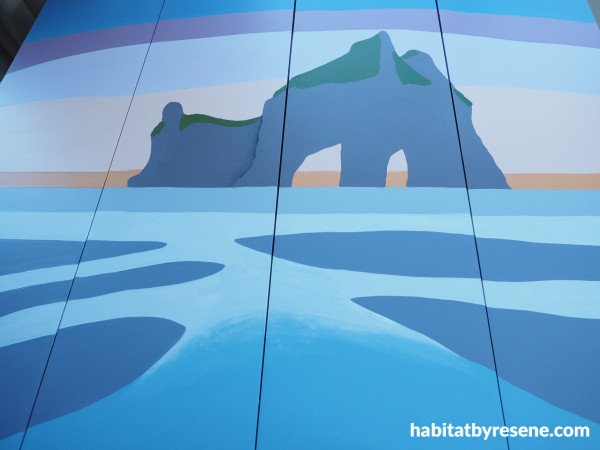
Step 3: Fill in the remaining areas of your painting with your chosen colours. For the sky, Fleur used Resene Kashmir Blue, Resene Strikemaster, Resene Alluring, Resene Wax Flower and Resene Roxy. For the islands, Resene Tenor and Resene Saratoga, with a little bit of Resene Black to separate the two islands. And for the sea, Resene Grey Chateau, Resene Quarter Grey Chateau, Resene Blue Moon, Resene Kashmir Blue, Resene Wanaka and Resene Bunting, and for the sand, Resene Waterloo.
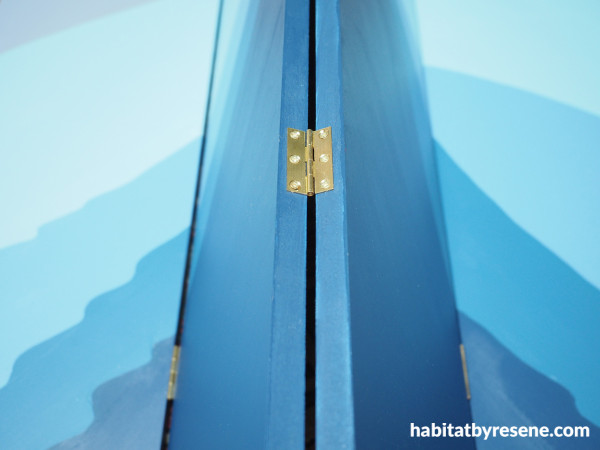
Step 4: Add hinges to join the panels all together so that they concertina / zig-zag in and out.

Step 5: Add small furniture feet to the bottom.
Wall and skirting painted in Resene Bullwhip. Painting of Archway Islands, Wharariki Beach, Golden Bay.
project and images Fleur Thorpe
Published: 01 Apr 2025

