
latest
habitat tv

Say goodbye to the morning scramble for keys, coats and sunglasses and hello to this… see this and more videos
blog

Reader roundup: See what our readers have been up to!
Refurbished vintage furniture, charming exteriors and magnet walls for kids. These projects are sure to… more
A fun and educational DIY for the kids
02 Oct 2024
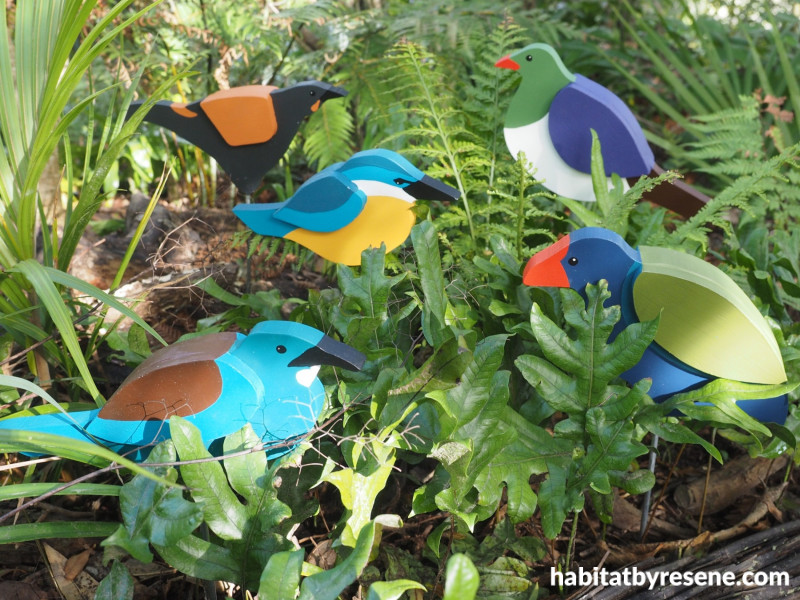
Create some colourful garden art over the holidays and make it an educational experience for the kids at the same time. Discuss our native birds with them and talk about the colours you’re using. Once you’ve finished this project, the kids might have a new found interest in birds, so you could even go on a nature hunt and try to spot them for real!
You will need:
- H3 treated pine wood board, 140mm wide x 18mm thick x 1.8m long
- H3 treated pine wood board, 160mm wide x 12mm thick x 900mm long
- Pencil
- Jig saw or band saw
- Sandpaper
- Galvanised screws
- Electric drill
- Hole filler
- Paintbrush
- Lengths of 6.3mm galvanised rod
- Resene Quick Dry
- Resene testpots in colours of your choice. Fleur used Resene Element, Resene Retro, Resene Fuel Yellow, Resene Rice Cake, Resene Bunting, Resene Alert Tan, Resene Kitsch, Resene Green House, Resene Teal Blue, Resene Brown Pod, Resene Jacarta, Resene Saratoga, Resene Black and Resene Havoc
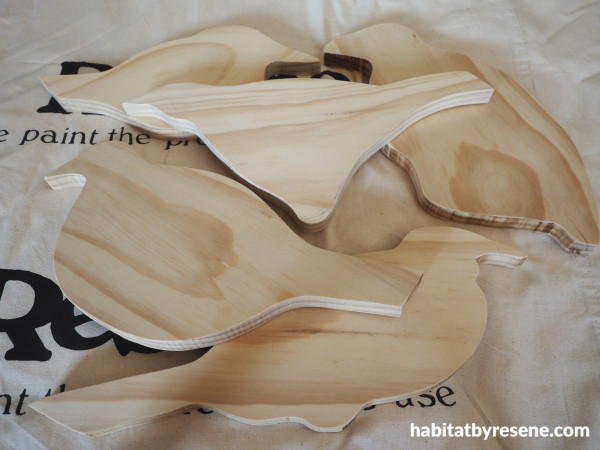
Step 1: Start by cutting out simple bird shapes from your thickest treated pine wood board with a jig saw or band saw. You can either free-hand draw these or print out some shapes found online. Once you’ve cut them out, sand any rough edges smoothand wipe off the sanding dust.
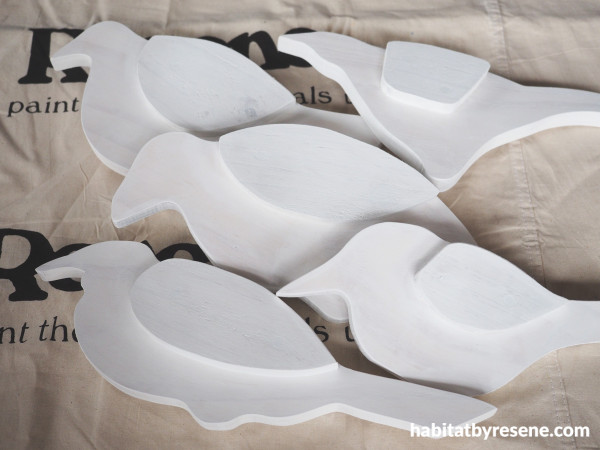
Step 2: From the thinner wood, cut out two wings for each bird and use wood glue and a couple of galvanised screws to attach these to both sides of each bird. Fill the screw holes with hole filler, and once this is dry, sand this smooth, wipe off sanding dust and prime the whole bird with one coat of Resene Quick Dry.
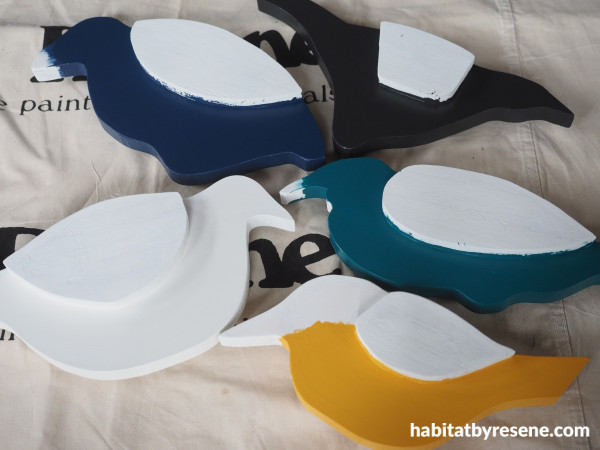
Step 3: To paint the birds, choose your colours and start by painting on the main body colour. Fleur used Resene Element for the Saddleback, Resene Retro for the Tūī, Resene Fuel Yellow for the Kōtare (Kingfisher), Resene Rice Cake for the Kererū and Resene Bunting for the Takahe.
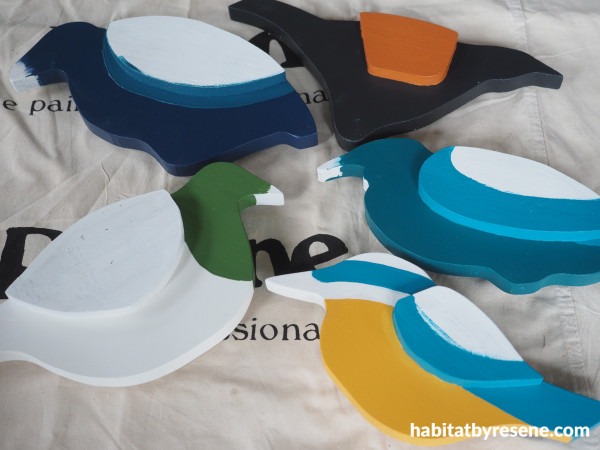
Step 4: Next, paint on your chosen secondary colour. Fleur used Resene Alert Tan for the Saddleback, Resene Kitsch for the Tūī and the Kōtare, Resene Green House for the Kererū and Resene Teal Blue for the Takahe.
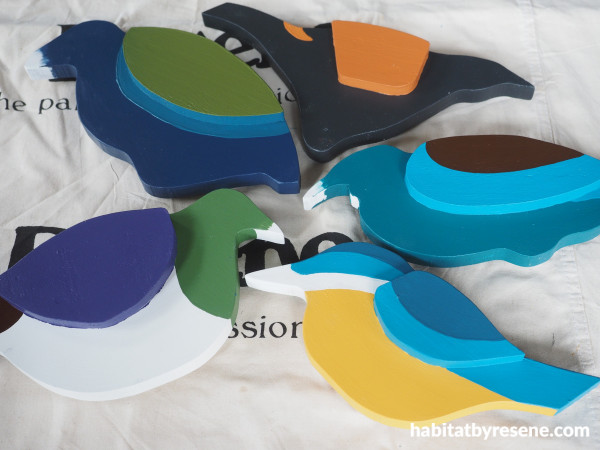
Step 5:Finish the wings with more of your chosen colours. Fleur usedResene Brown Pod for the Tūī, Resene Teal Blue for the Kōtare, ReseneJacarta for the Kererū wings and Resene Brown Pod for the tail, and Resene Saratoga for the Takahe.
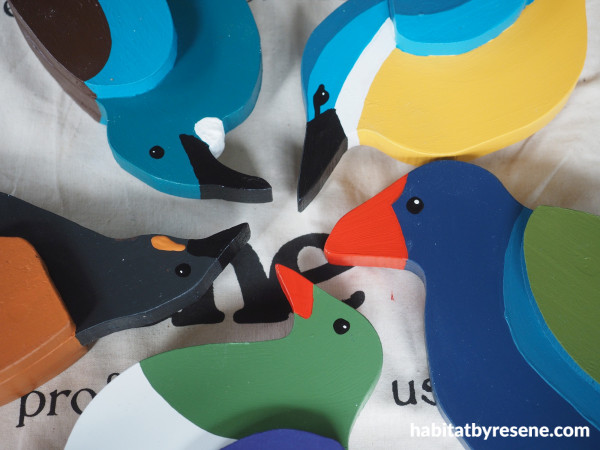
Step 6: Paint on the faces. For this, Fleur used either Resene Black or Resene Havoc for the beaks, and Resene Black and Resene Rice Cake for the eyes. She also used Resene Alert Tan for the Saddleback’s wattle and Resene Rice Cake for the throat tufts (poi) on the Tūī.

Step 7: Use a 6.5mm drill bit to drill a hole into the bottom of each bird and insert a 6.3mm galvanised rod. Head outside to the garden and let the kids choose where to place them. Enjoy!
project and images Fleur Thorpe
Published: 02 Oct 2024

