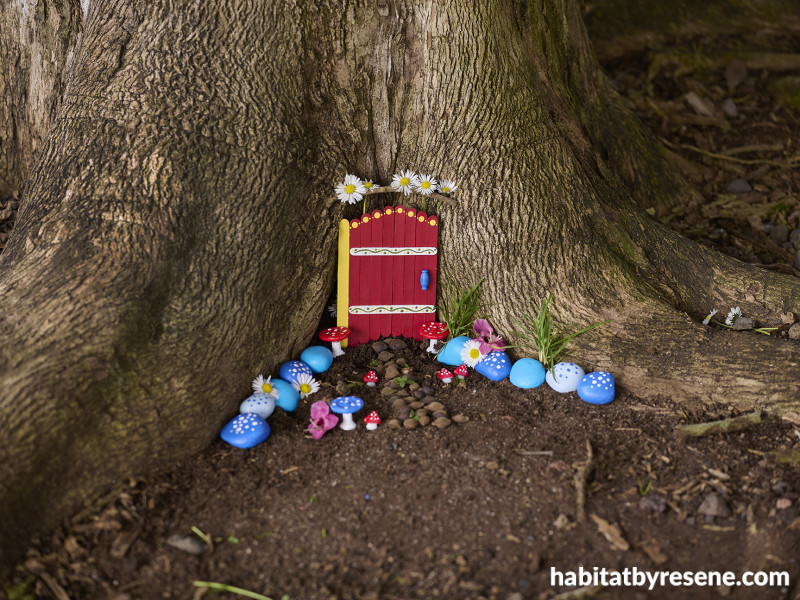
Banish boredom these school holidays: Two tiny fairy doors to try
05 Oct 2022
Let your kids open the door to their imagination and be transported to a fairytale land these school holidays by creating fairy doors. Attach your fairy doors to trees, fences and raised garden beds and head off into the garden on a discovery mission.
You will need:
- 9 x ice block sticks
- 2 x small ice block sticks or matchsticks
- Resene testpots and brushes, Sarah used Resene Pohutukawa, Resene Bright Spark Resene Alabaster, Resene Clover , Resene Half Resolution Blue, Resene Sports Star, Resene Frozen,Resene Half Resolution Blue and Resene Poppy.
- PVA glue
- Buttons, beads and drawer knobs, which you can decorate in your favourite Resene paint colours
Step 1: Select three Resene testpots for your main door colours. Paint eight ice block sticks in one colour, one in another colour and your remaining two smaller ice block sticks/matchsticks in the final shade.
Step 2: To make the door, line up the eight ice block sticks face up on a flat surface, with the ninth different-coloured stick at the end. Create a curved door by moving each ice block stick up slightly more than the previous ice block stick. Or use a mug or cup to shift the ice block sticks into an arch.
Step 3: Apply glue to the two smaller ice block sticks and attach them horizontally as a brace to hold the sticks together. Paint your fairy door in your favourite Resene paint colours. Add decorative rocks and buttons, painting them in your favourite Resene colours before gluing them on.
project by Sarah Kolver
image Bryce Carleton
Take fairy world inside by transforming a household jar into a fairy jar using twigs from the garden and ice block sticks. The twigs are painted in Resene Tutti Frutti, the door is in Resene Get Reddy and the toadstool ‘staircase’ made from cardboard is in Resene Rocket with spots in Resene Soft Whisper. Bedside table in Resene Triple Blanc and wall in Resene Nirvana.
You will need
- Twigs from the garden
- Double-sided tape
- Preserving jar or jam jar
- Ice block sticks
- Thick cardboard
- Resene testpots and brushes, Leigh used Resene Tutti Frutti, Resene Get Reddy, Resene Rocket and Resene Soft Whisper
Step 1: Gather twigs and use double sided tape to apply them around the jar. Paint in your favourite colour, Leigh used Resene Tutti Frutti.
Step 2: Paint the popsicle sticks in a bright contrasting colour. Leigh used Resene Get Reddy.
Step 3: Use double-sided tape to apply the ice block sticks around the top outside of the jam jar, to create the door.
Step 4: Cut the cardboard in a semi-circle and cut/shape the inner of the semi-circle to fit snugly against the twigs. Cut two semi-circles to create the mushroom staircase. Paint in your favourite colours, Leigh used Resene Rocket with Resene Soft Whisper spots.
Step 5: Once dry, attach with super glue or double sided tape to the twigs on either side. Add decorative elements to bring the fairy jar alive.
project by Leigh Stockton
image Bryce Carleton
Published: 05 Oct 2022


