
latest
habitat tv

Say goodbye to the morning scramble for keys, coats and sunglasses and hello to this… see this and more videos
blog

Brick Bay unveils its poetic new folly for 2026
The winner of the 2026 Brick Bay Folly competition has been unveiled. Within the Wings… more
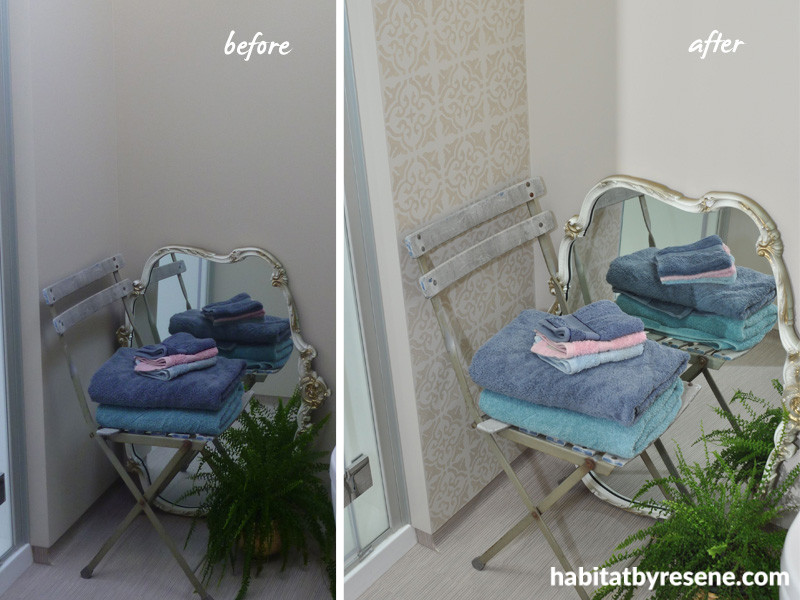
DIY: Brighten a bathroom corner
06 Apr 2017
Is your bathroom too beige and boring? Fleur Thorpe shows us how to add a simple stencil to add some character. Her own bathroom was painted in Resene Triple Blanc so she chose a subtle tone-on-tone scheme using Resene Drought for the stencil pattern so that it wasn't too overbearing for the small room.
You will need:
- Resene Drought testpot
- Stencil
- Measuring tape
- Masking tape
- Small piece of sponge
- Plate or scrap of cardboard for dabbing excess paint off the sponge
Tip: Either buy a stencil from websites such as Cutting Edge Stencils or Royal Design Studio, or make your own. Fleur made her own by choosing a stencil pattern online, enlarging it to fit the dimensions of the area she wanted to stencil, and printing it out on to card. She then taped multiple print-outs together to get the stencil panel, then cut it out using a craft knife. As well as saving money, the advantage of making your own stencil is that you can size it to the dimensions of your area and therefore the number of repeats will fit your space.
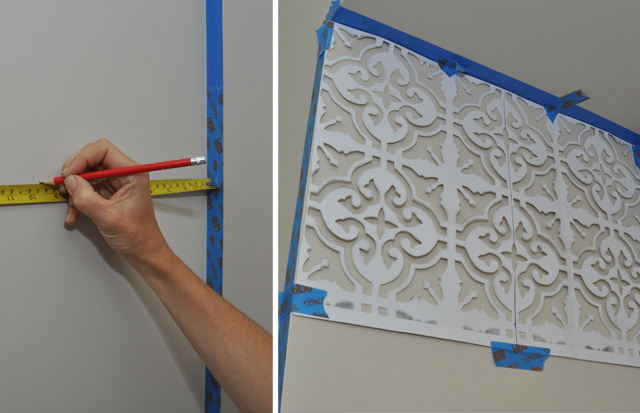
Step 1: Mask off the area to be stencilled. Make light pencil marks in the middle of the wall at regular intervals down its length. This will help keep your stencil straight and aligned.
Step 2: Use masking tape to position your stencil at the top of your wall. It’s best to start a full stencil repeat in an area that you are going to see the most, like at the top of the wall rather than the bottom.
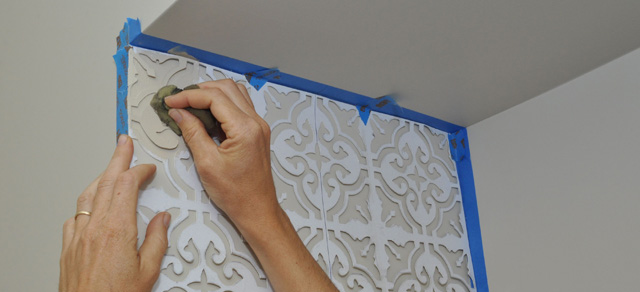
Step 3: Using a small piece of sponge, dip it into the testpot of paint then dab it on to a plate or piece or scrap cardboard to ensure that you get a thin and even coverage of paint on the sponge. Too much paint on the sponge will bleed through to the underside of the stencil.
Step 4: Dab the sponge on to the opening holes of the stencil and move it in a circular motion so that paint gets into all the tight corners. Don’t do this too vigorously as bleed-through can occur. Do this all over the stencil until it is all painted in.
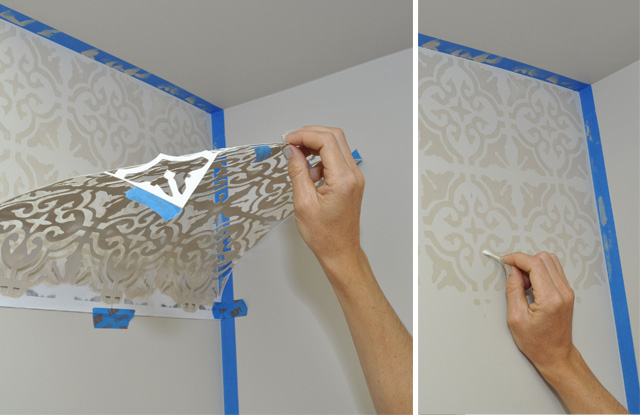
Step 5: Carefully remove the stencil by peeling it off – do not slide it as this will smudge the paint. If you work quickly, any bleed-through can be touched up with a damp cotton bud.
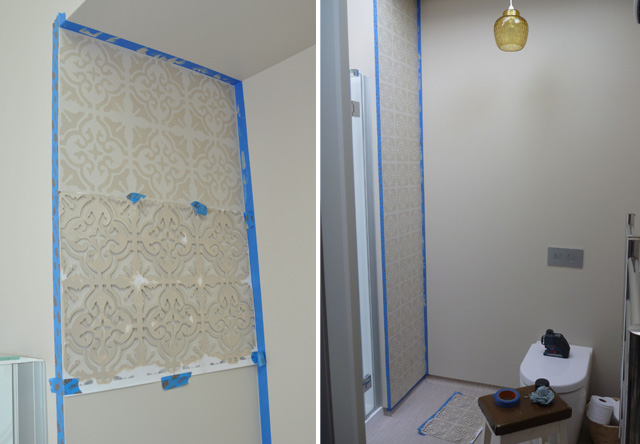
Step 6: The paint will dry quite quickly so you should be able to re-position your stencil straight away for the next repeat. Make sure you align the centre of your stencil with the pencil marks you made earlier. Repeat until the whole wall is complete. Remove the masking tape.
Published: 06 Apr 2017

