
latest
habitat tv

Say goodbye to the morning scramble for keys, coats and sunglasses and hello to this… see this and more videos
blog

Reader roundup: See what our readers have been up to!
Refurbished vintage furniture, charming exteriors and magnet walls for kids. These projects are sure to… more
Colourful, creative ideas for the school holidays
12 Jul 2018
The kids may be on holiday but doesn’t mean they have to stop learning… in exciting, colourful ways, of course! With a splash of Resene paint, winter days at home can go from gloomy to great fun… and these kid-friendly creative projects will also teach them the skill and value of upcycling.
Stylist Sarah Herring has picked up items from one of the Salvation Army family stores and given them new life. Follow Sarah’s lead and take the kids out to find similar pieces and show them how easy it is to make something old into a cool new piece for the home. Plus, they’ll get to play with lots of bright colour – always fun, no matter what your age.
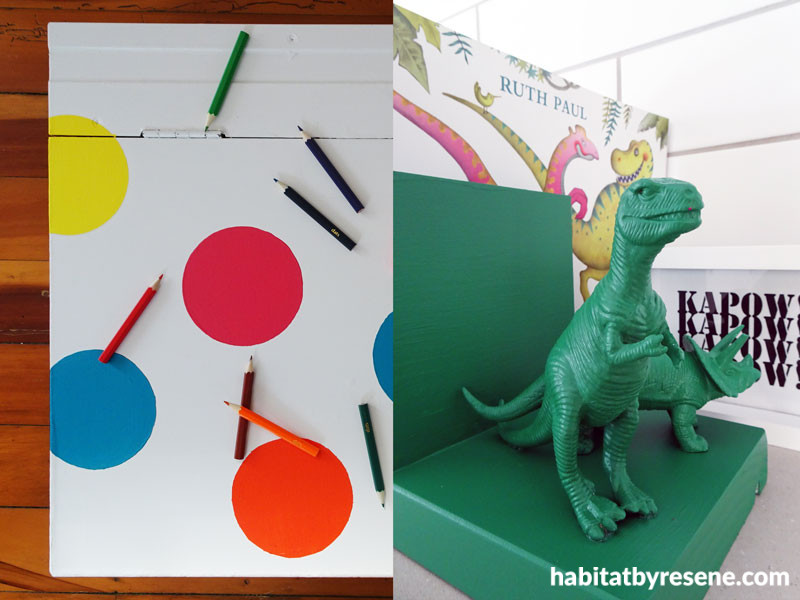
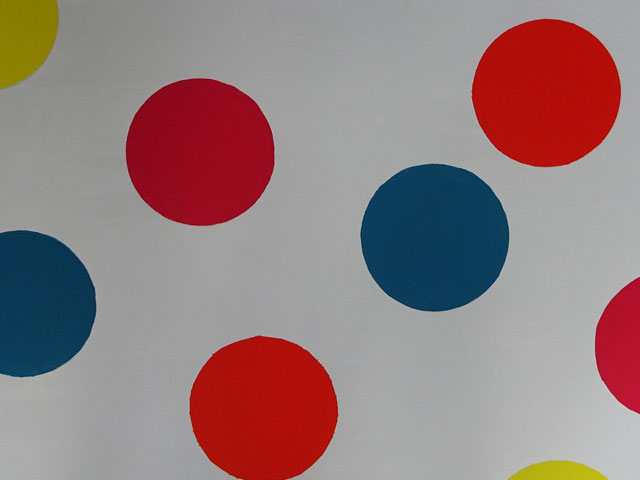
Spot-on writing desk
Make homework fun by transforming an old school desk into a bright and appealing workstation.
You will need:
- Wooden school desk (this one was picked up from a Salvation Army family store)
- Sandpaper
- Resene Quick Dry undercoat
- Pencil
- Painter’s masking tape
- Scissors and pencil
- Something round to use as a circle stencil, such as a plate
- Resene Lustacryl in Resene Black and Resene Black White
- Resene testpots – we used Resene Daredevil, Resene Drop Dead Gorgeous, Resene Happy and Resene She’ll Be Right
- Resene testpot brushes
- Adhesive decorative wrap (from a stationery store)
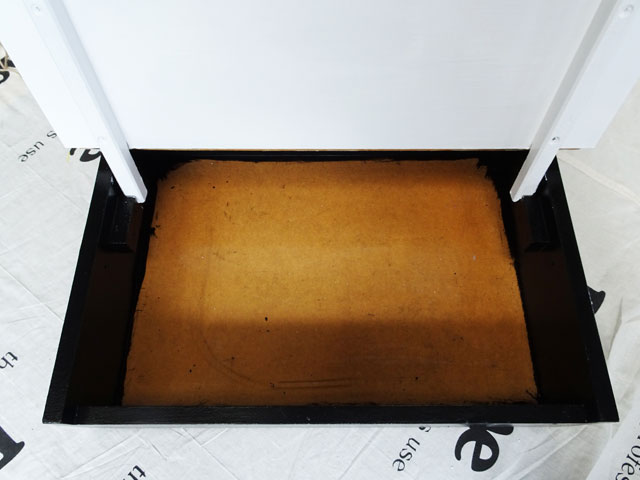
Step one. Give the desk a good clean to remove any dirt and contaminants. Then lightly sand to prepare it for painting. Once it’s clean and sanded, apply one coat of Resene Quick Dry undercoat to all surfaces except the bottom inside surface.
Step two. Once the primer is completely dry, paint the base of the desk with two coats of Resene Lustacryl in Resene Black. Then apply two coats of Resene Lustacryl in Resene Black White to the lid of the desk. Also apply these two colours to the inside surfaces that have already been primed. Leave to dry.
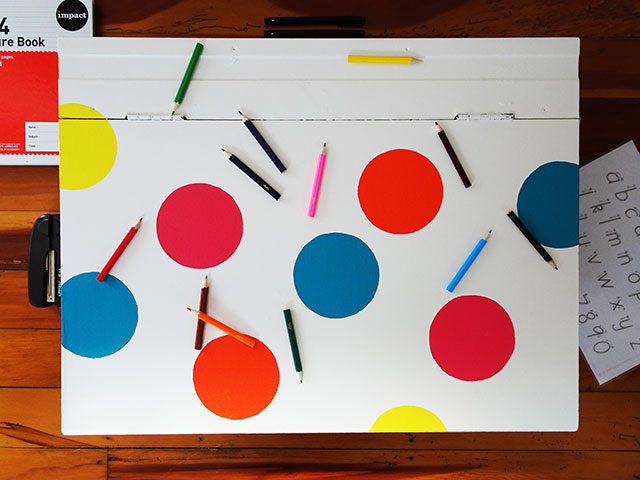
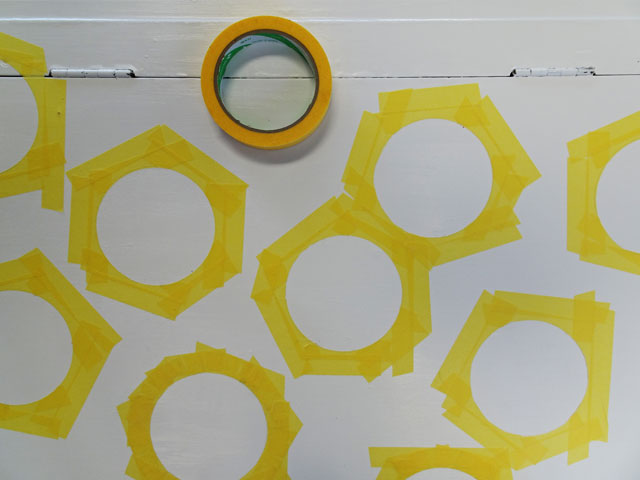
Step three. Use a pencil and the round stencil to draw some circles onto the lid of the desk. Once the circles are drawn, use masking tape to prepare them for painting. It can be really hard to mask out circles, but a good trick is to cut small nicks into your masking tape so that it can bend and then wrap the tape around the curve of the circle. Always make sure you have pressed your masking tape down firmly, so that the paint won’t bleed.
Step four. Apply two to three coats of your chosen Resene testpot colours for the circles, allowing each coat to dry before applying the next. We used four bright and fun colours: Resene Daredevil, Resene Drop Dead Gorgeous, Resene Happy and Resene She’ll Be Right. Carefully remove the masking tape from the edges once all coats have been applied. Leave to dry.
Step five. Apply some complementary adhesive wrap to the inside of the desk where there is no paint. This is easy to find at a stationery store.
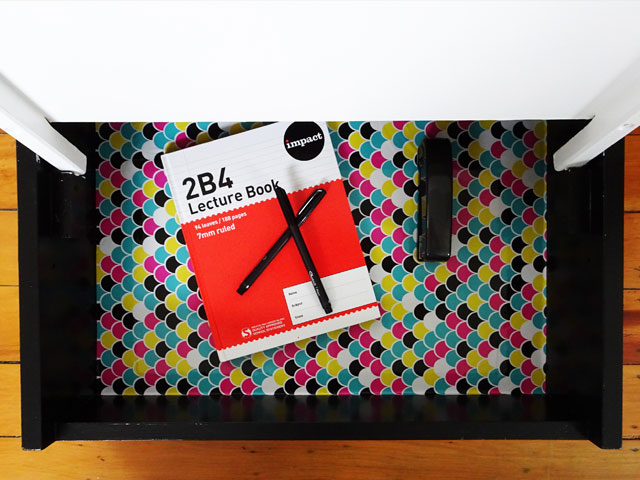
Just like that, an old school desk is transformed into a fun and colourful homework station!
Top tip: Even if your desk is missing pieces, it may still be able to be recycled. This desk was missing its original frame/legs but could still be upcycled and used on an existing table top, bench or floor.

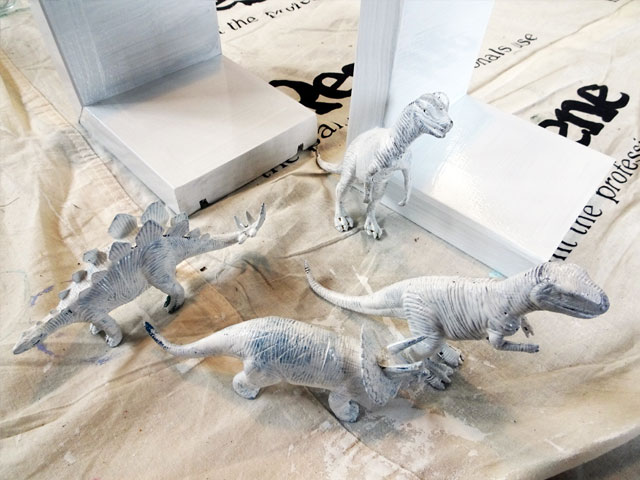
Roar-some bookends
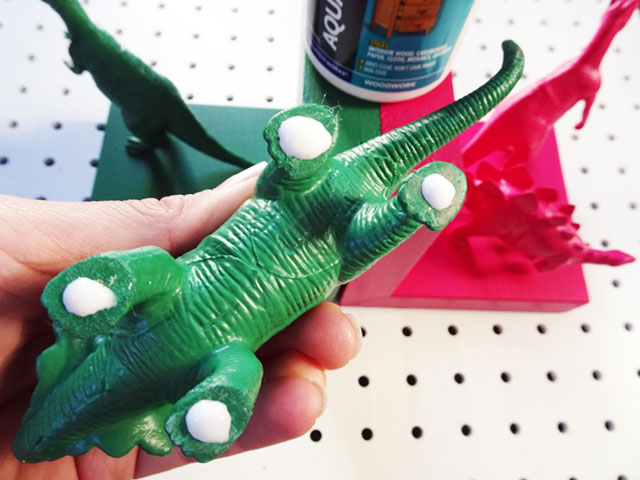
Use discarded plastic dinosaur figurines to make these super cool bookends.
You will need:
- Dinosaur figurines (alternatively use animal figurines)
- 4 short pieces of scrap timber, cut to equal size
- Sandpaper
- Resene Quick Dry undercoat
- PVA glue and super glue
- Resene testpots in Resene Colour Me Pink and Resene Green Pea
- Resene testpot brushes
- Small detail brushes
Step one. Choose four large animal figurines – we chose dinosaurs. Wash and dry the plastic figurines to make sure they are clean and ready for painting.
Step two. Sand the timber pieces and assemble into the two ‘L’ shapes you need for bookends. Use strong clear drying PVA glue to hold the pieces together. Wait until the glue has dried completely.
Step three. Apply a coat of Resene Quick Dry undercoat to both the timber bookends and the figurines.
Step four. Paint your first bookend and two figurines in the colour of your choice. We used Resene Colour Me Pink. Apply two coats of colour. Repeat with your second bookend and remaining two figurines. We used Resene Green Pea. Leave to dry.
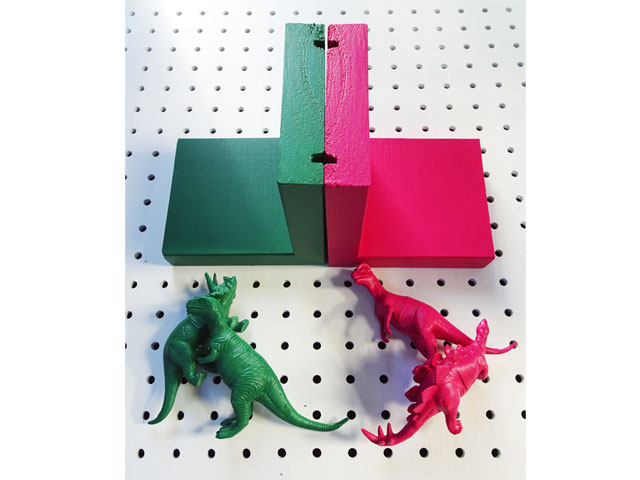
Step five. Carefully apply super glue to the feet/tails of the dinosaur figurines and glue them onto the bookends. Leave to dry completely. Once the glue is dry you can touch up any missed areas of paint with a detail brush.
Pop them into your kid’s bedroom (or home office!) to add a pop of fun, bright colour to the bookshelf.
Top tip: for extra bling use Resene FX Metallic for the bookends. Or try combining multiple colours for a more colourful effect.
Projects by Sarah Herring.
These DIYs are brought to you by Upcycling for Good, a collaboration between Resene and The Salvation Army family stores. The project asks keen DIYers to upcycle second-hand items using Resene paint – look out for this regular feature on Habitat by Resene.
Published: 12 Jul 2018

