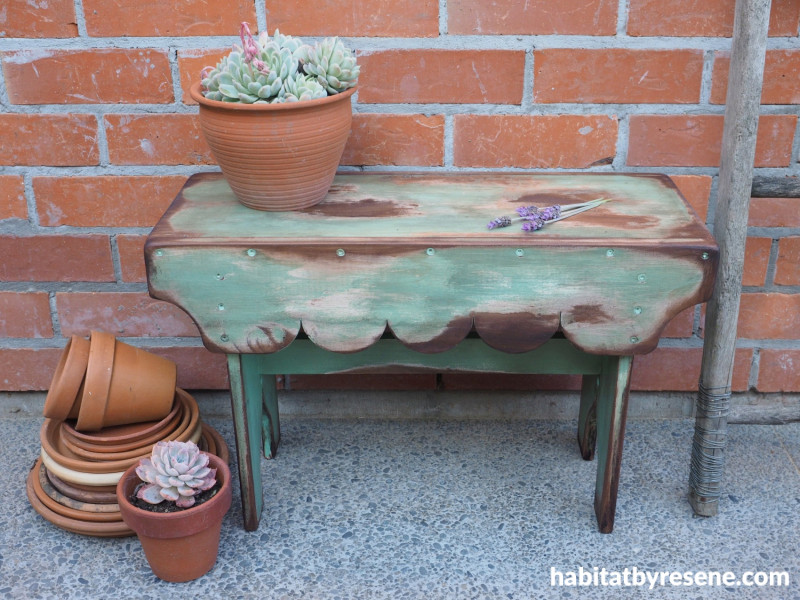
Try this DIY outdoor bench for a charming rustic feel
07 Nov 2024
If you’re looking for a way to spruce up your outdoor area, or add rustic charm to your garden, this DIY bench might be it! With its old, weathered look, it will look at home anywhere, and you can create it using any of your favourite Resene colours. It’s also a great way to reuse leftover wood!
You will need:
- Treated pine board, 230mm wide x 18mm thick x 1800mm long
- 1 treated fence paling, 140mm wide x 19mm thick x 1800mm long
- Saw
- Jig saw or band saw
- Electric drill
- Galvanised screws
- Paintbrush
- Sandpaper
- Rag or cloth
- Resene testpots in your chosen colours. Fleur used Resene Dutch White and Resene Laurel
- Resene Waterborne Woodsman testpot in the colours Resene Dark Oak and Resene Pitch Black
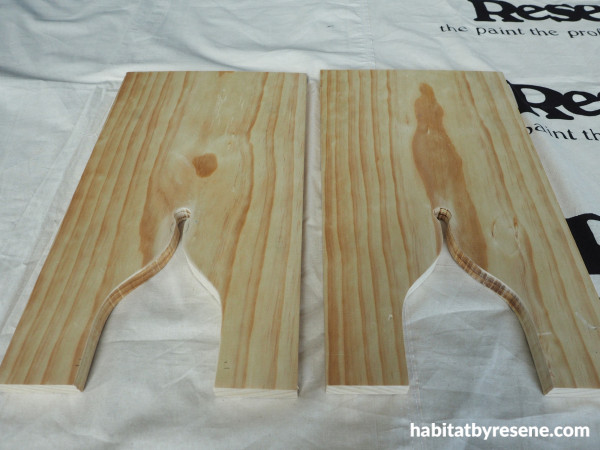
Step 1: Start by cutting the legs for the stool to length. Using the 230mm wide treated pine board, cut off two lengths at 400mm long for the legs. Use a jig saw or band saw to cut out a decorative arch. Fleur made her arch by folding a piece of paper in half, drawing on half an arch, cutting this out, opening the paper up and tracing it on to the wood.
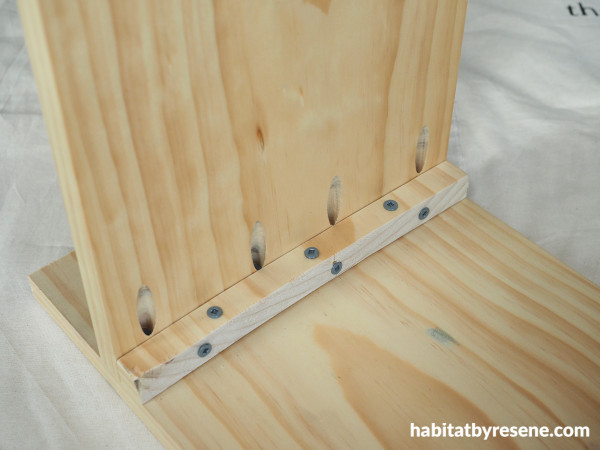
Step 2: Cut the top of the stool to length from the remaining piece of pine board to 650mm long. Attach the legs to the underside of the top, positioning the legs so that they are inset from the end by 75mm. Use a pocket hole jig and screws to attach the legs, but if you don’t have a pocket hole jig, you can drive your screws through the legs at an angle into the top of the stool. Fleur also added a piece of blocking wood and drove screws through that vertically into the top of the stool and then horizontally into the legs.
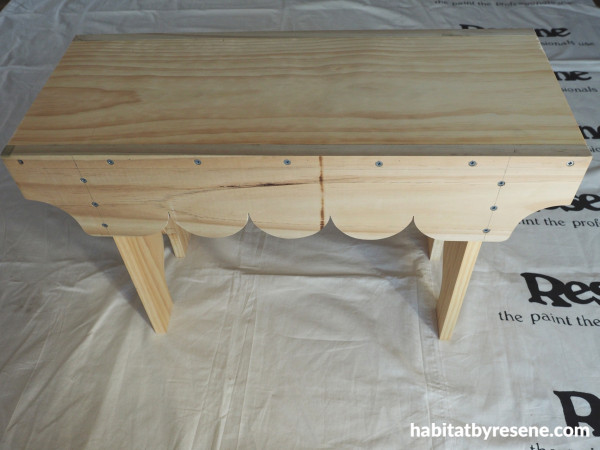
Step 3: From the fence paling, cut the two side boards to length (the same length as the top, 650mm) and use a jig saw or band saw to make this as decorative as you want. Attach this to the side of the stool and make sure you add some screws that go into the legs.
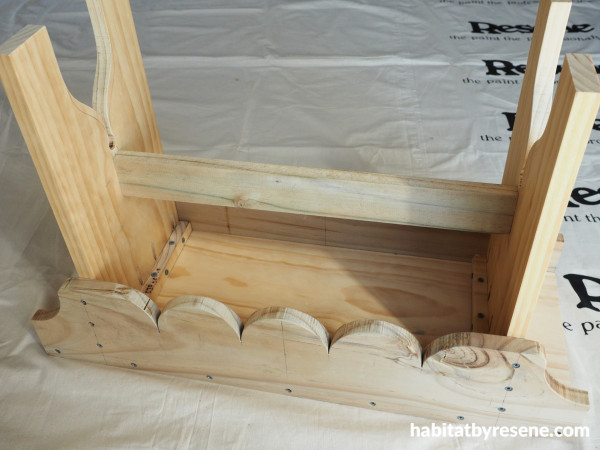
Step 4: Finish the construction of the stool by cutting a support board from the leftover fence paling and screw this between the two legs.
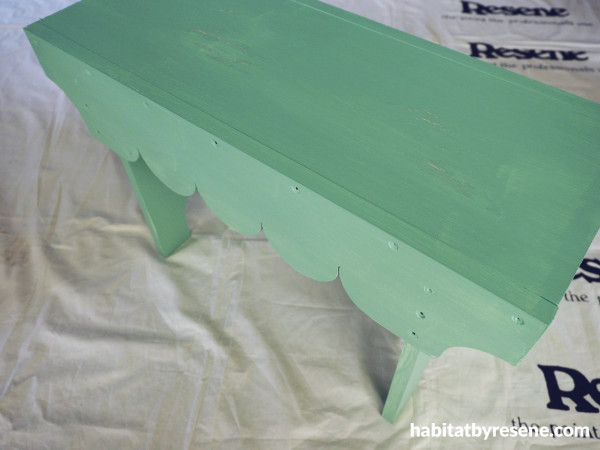
Step 5: Paint the stool with one coat of your chosen base colour and allow to dry. Then paint a coat of another chosen colour and allow to dry. Fleur used Resene Dutch White followed by a coat of Resene Laurel. Note: The paint job doesn’t need to be great as you’re about to sand some of it off.
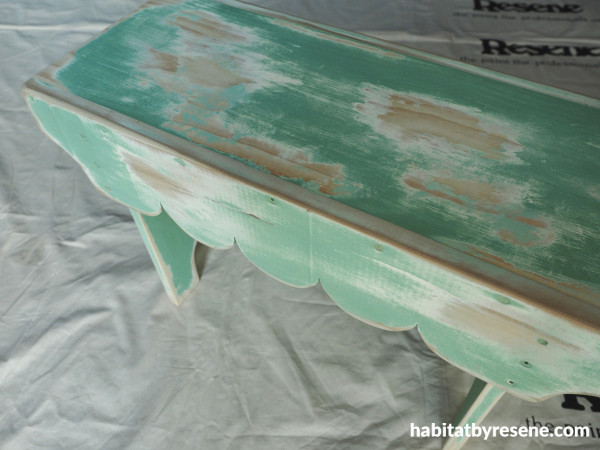
Step 6: Use a coarse grit sandpaper to sand the edges of the wood until they are nicely rounded, and look worn down with age. Sand the paint off where natural wear and tear would occur on edges and corners.
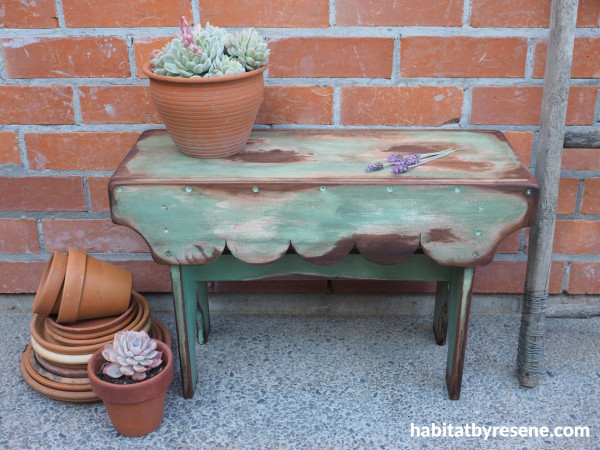
Step 7: Finish by rubbing your chosen stain onto the exposed areas with a rag or cloth. Fleur used Resene Waterborne Woodsman Dark Oak for this part. This will make it look like the stool is made out of a hard wood and not pine. Use a damp clean cloth to wipe any stain off the paint and to remove any excess stain. Note: You can darken the brown up further with a light coat of a darker stain – Fleur used Resene Woodsman Pitch Black for this. Place your table outside in the garden or near the front door – wherever you like.
project and images by Fleur Thorpe
Published: 07 Nov 2024


