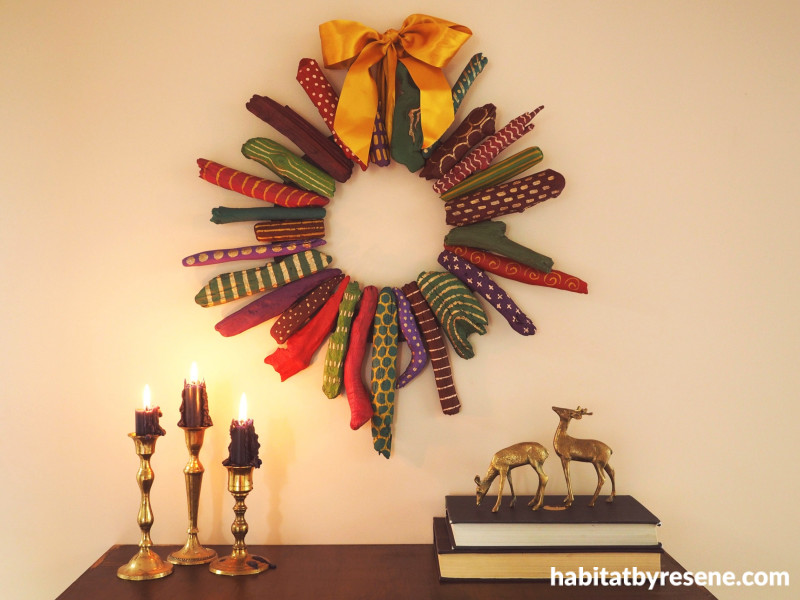
Two easy and extra festive Christmas DIYs
17 Dec 2024
Christmas is right around the corner butthere’s still time to add some festive touches to your home. These two easy DIYs will spruce up your home ready for family, friends and Christmas gatherings.
The north post
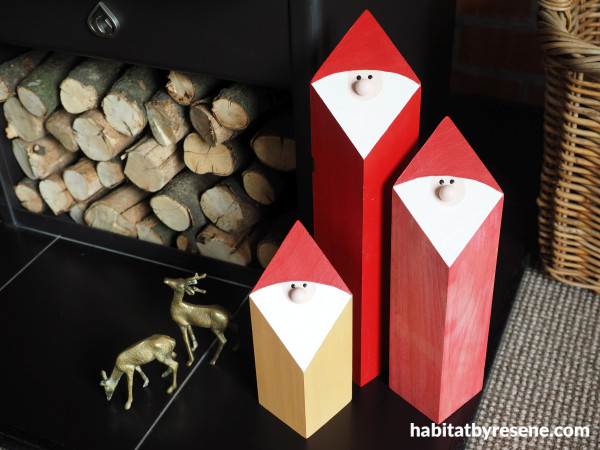
You will need:
- Untreated pine post, 70mm x 70mm square x 1200mm long
- Mitre saw
- Sandpaper
- Paintbrush
- Rag or paper towel
- Small wooden balls
- Wood glue
- Resene Colorwood Natural
- Resene testpots in your chosen shades. Fleur used Resene Sakura, Resene Red Berry, Resene Rice Cake and Resene Black
- Resene FX Paint Effects Medium
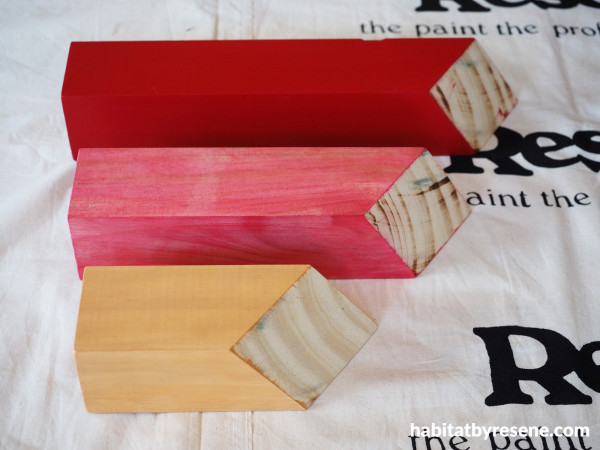
Step 1: Start by cutting the posts to length. Fleur’s are 20cm, 30cm and 38cm long. Cut each end at 45 degrees so that you get a diamond shape at the end (the post needs to sit at 45 degrees against the mitre saw fence, as well as having the saw blade set to cut at 45 degrees). Sand any rough edges smooth.
Choose your colours for each post. For the shortest post, Fleur used Resene Colorwood Natural, for the medium post, Resene Red Berry mixed with a little Resene FX Paint Effects Medium to make a paint wash and for the tallest post, Resene Red Berry.
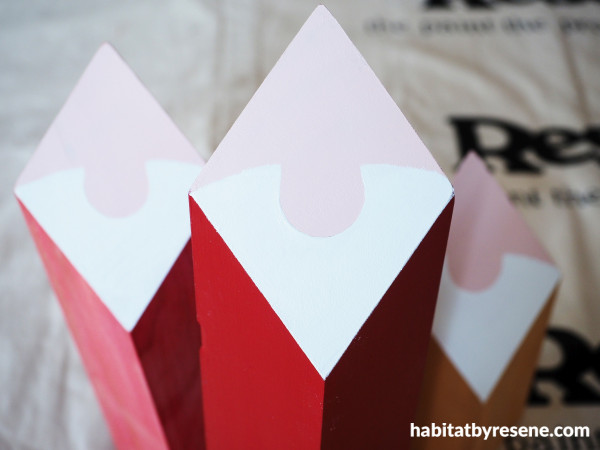
Step 2: For the face, Fleur painted the top two-thirds in Resene Sakura and then the bottom half with Resene Rice Cake, leaving a circle in the middle for the face.
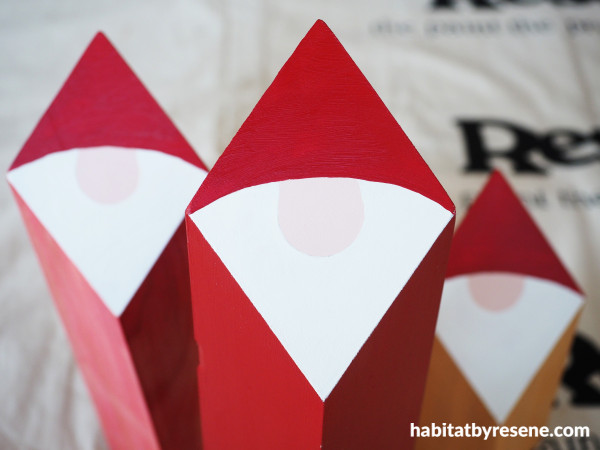
Step 3: Paint the top half in your chosen colour for the hat. Fleur used Resene Red Berry.

Step 4: Finish by painting a small wooden ball in another chosen shade for the nose. Fleur used Resene Sakura. Use wood glue to glue this to the face. Add eyes by dipping the end of a small paintbrush into some Resene Black and use this to dot the eyes on.
Drift into Christmas
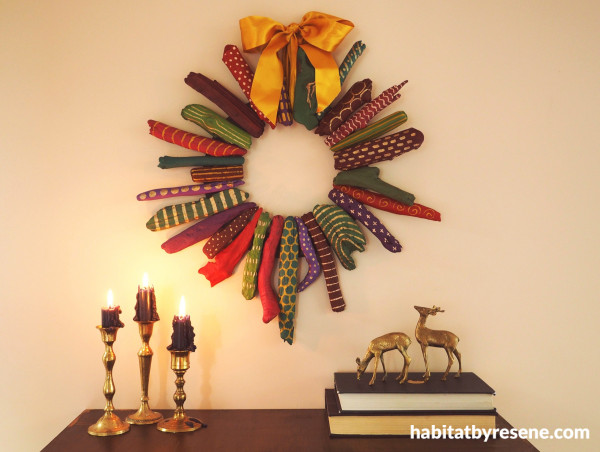
You will need:
- Pieces of driftwood
- Paintbrush
- Cardboard
- Craft knife
- PVA glue
- Hot glue gun
- Ribbon
- Resene testpots in your favourite hues. Fleur used Resene Red Berry, Resene Kingfisher Daisy, Resene Lonestar, Resene Persian Red, Resene Aquamarine, Resene Quarter Pohutukawa, Resene Green Leaf, Resene Clover, Resene Parsley, Resene Awaken, Resene Hot Toddy, Resene Bullion and Resene Black
Note: Collect some driftwood from the beach. Leave it to dry and then brush the sand off it – an old toothbrush works well.
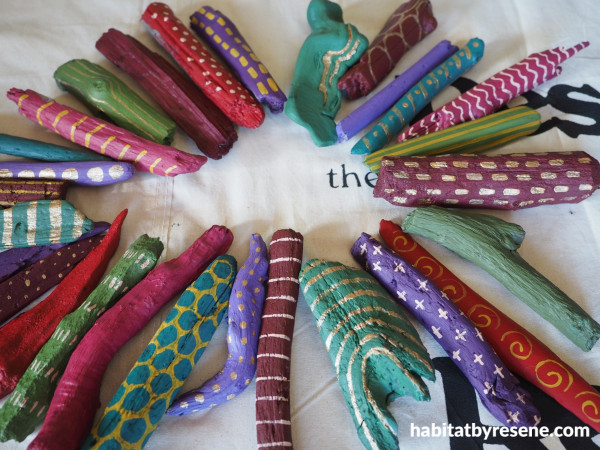
Step 1: Paint the driftwood in your chosen colours. Fleur used Resene Red Berry, Resene Kingfisher Daisy, Resene Lonestar, Resene Persian Red, Resene Aquamarine, Resene Quarter Pohutukawa, Resene Green Leaf, Resene Clover and Resene Parsleyas her base colours. Embellish with patterns in colours of your choice – Fleur used Resene Awaken, Resene Hot Toddy and ReseneBullion metallic paint for this.
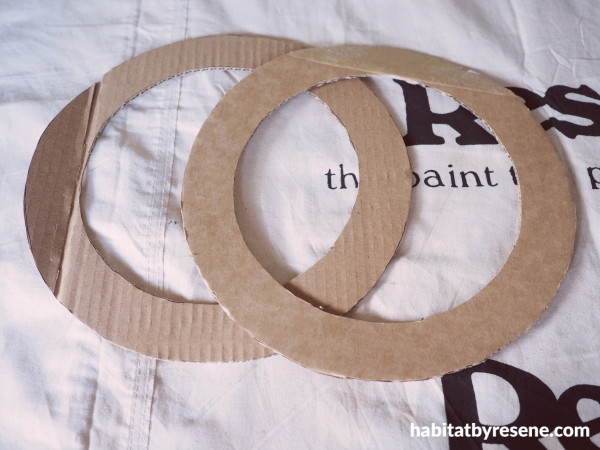
Step 2: To make the wreath base, use a craft knife to cut two circular rings from a cardboard box. Tip: Trace around a dinner plate for the outer circle and a side plate for the inner circle.
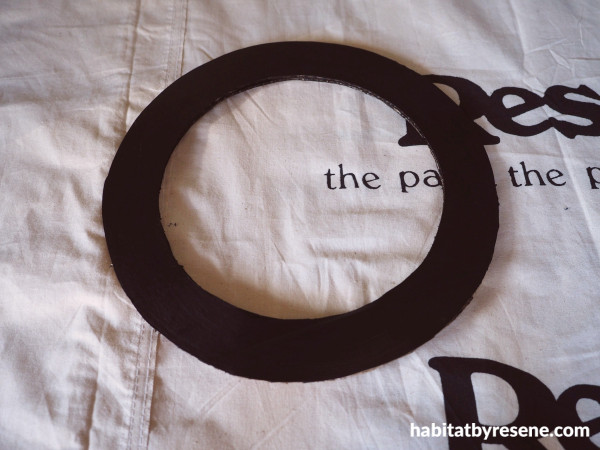
Step 3: Use PVA glue to glue the two rings together. Make sure that the corrugations of both rings are perpendicular to each other (one ring’s corrugations go up and down and the other ring’s corrugations go left to right). This will make the wreath base more rigid. Paint the wreath base with Resene Black.

Step 4: Once the paint is dry, use a hot glue gun to glue the driftwood to the wreath base. Hang with a festive bow.
Wall painted in Resene Just Right.
project and images Fleur Thorpe
Published: 17 Dec 2024


